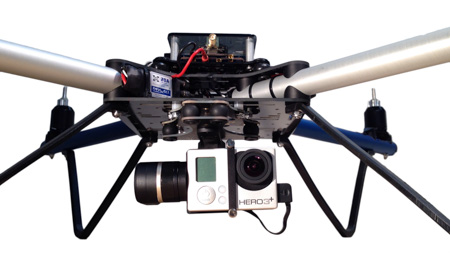
Want to capture some sweet aerial photos or videos with your ELEV-8 v3? This tutorial will show you how to install a two-axis brushless camera gimbal. This intermediate tutorial will require individual components from 3rd party vendors and may require fabrication of a mounting plate and soldering. We've provided instructions for two different gimbals, so you will first need to decide which will best suit your needs.
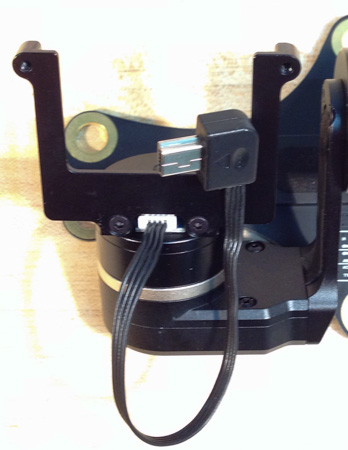
This slick gimbal simply bolts to the underside of your ELEV-8 v3, so it can be easily removed, though you may have to intially remove the bottom chassis plate to orient it correctly. It can supply power to GoPro cameras and relay back a video feed. It comes ready-to-use out of the box, so no calibration is necessary. The FeiyuTech offers moderate vibration isolation.

The ELEV-8 v3 Bottom Chassis Plate has been designed to integrate with the Tarot T-2D Gimbal to provide a compact video and image stabilization solution. Though it is slightly more complex to mount, configure, and remove than the FeiyuTech Gimbal, it provides better vibration isolation. It also requires firmware configuration with software currently only available for Microsoft Windows XP and 7, and you will need to be able to fabricate an adapter plate yourself in order to mount it.

The gimbal is available from the manufacturer and many online retailers, including B&H Photo & Video [3]. In addition to the FeiyuTech MiNi 2D Gimbal itself, you’ll need some other parts to mount it to your ELEV-8 v3 Quadcopter.
It is designed for a GoPro Hero 3, 3+, or 4 [4] camera. Much less expensive cameras with similar form-factors are available, including the SJCAM SJ4000 Action Camera [5].
To install the gimbal, you will need some additional hardware, and connectors. You will need hardware for one of the three options for the "Replacing the Power Connector" step - see that step for details.
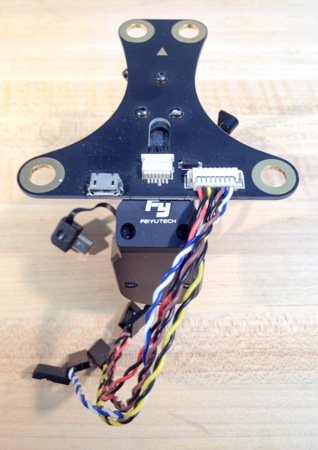
The male JST RCY power connector on the cable assembly that comes with the gimbal isn't compatible with the 0.1"-pitch male right-angle header on the ELEV-8 Power Distribution Board. There are a few different options to make the connection. If you have a pin crimping tool, option one should be easiest for you. If you don't have that specialty tool but do have soldering equipment, we recommend option 2. Only if you don't have the means for options 1 or 2 should you use option 3.
For this method, you need one JR-type female "servo" connector housing and pins (such as Pololu #1924; JR Connector 3-Pack, Female [14]) and a specialty tool for crimping the pin connectors (such as the IWISS SN-28B [10] or Pololu #1928 [11]). If you have the right equipment, this is the easiest and fastest method, but option 2 will work just as well for those that don't.
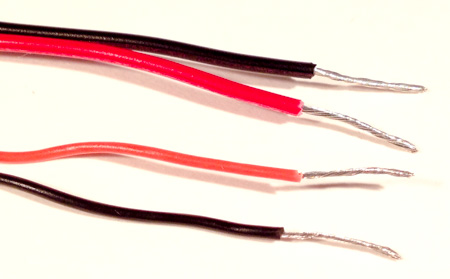
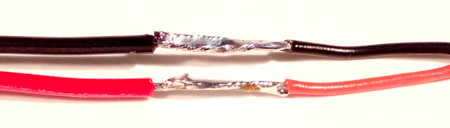
For this method, you'll need a soldering iron, solder, a 3-wire servo extension cable (such as any of the cables in Parallax #751-00010 [17]), 1" of some 1/16" or 1/8" diameter heat-shrink tubing, and a heat gun if you have one. By removing the old connector on the gimbal cable assembly and soldering on a cable that already has a 3-pin female servo connector on the end, you can avoid having to crimp your own connector, but still end up with a reliable connection.


If you don't have a pin crimping tool or soldering equipment, your best option is probably to buy some cable adapters. We've not been able to find anyone who makes a female JST RCY to female JR adapter cable (otherwise we would recommend that), so the best we can to is suggest two adapter cables to use in series. We recommend using a female JST RCY to male JR cable (such as Electronic Model Systems #0151 [7]) and a female to female JR cable (Parallax #800-00043 [8]). Note that many retailers incorrectly identify the connector genders, so pay close attention to the product photos. When using adapter cables, we strongly recommend taping around the connections to reduce the likelihood of them coming loose.
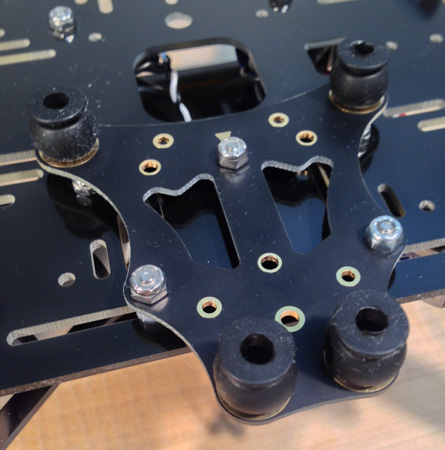
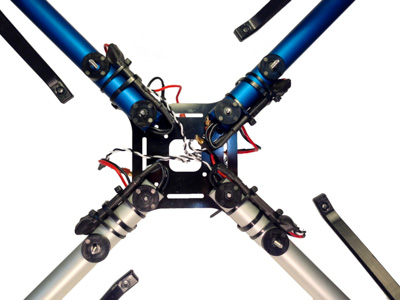
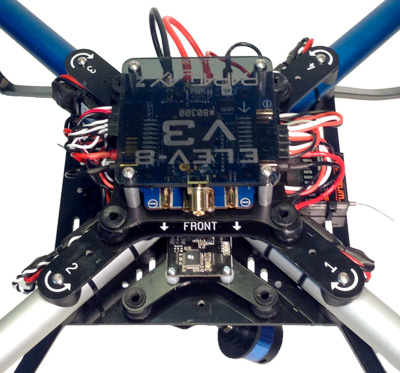
The advantage of the FeiyuTech MiNi 2D Gimbal design is that it just bolts to the underside of the ELEV-8 v3 Bottom Chassis Plate, so it can be quickly attached and removed. The biggest challenge is that the gimbal can only mount on two of the four sides. This means that you may have to rotate your chassis plate, which will require partially disassembling your ELEV-8 unit.
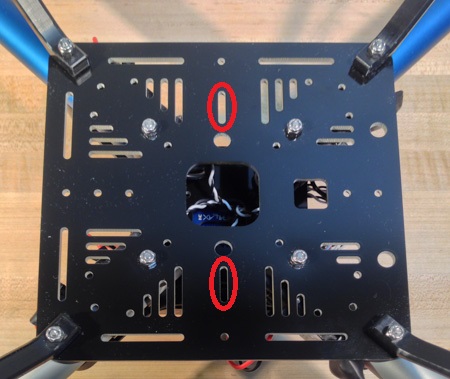
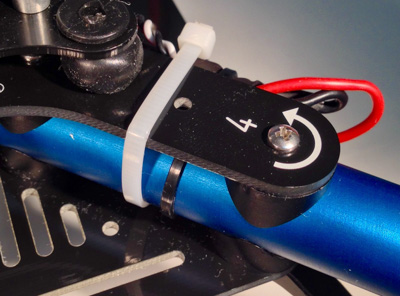
IF you need to rotate your bottom chassis plate, first remove the isolation assembly, and then zip-tie (or tape) each boom to the top chassis plate - this will help hold the top half of the chassis assembly together. Then, carefully remove the eight locknuts from below the bottom chassis plate, being careful NOT to remove the screws. You will then be able to rotate the bottom chassis plate, re-assemble everything, and remove the zip-ties.


That's it!
Every time you power-up the gimbal, it goes through a calibration procedure that takes about 15 seconds. During this time, it is critical that you do not move or bump the gimbal or quadcopter, that there are no obstructions restricting the gimbal's movments, and that there is a camera in the gimbal.
In addition to the Tarot T-2D Gimbal itself, you’ll need some other parts to mount it to your ELEV-8 v3 Quadcopter.
The gimbal is available from the manufacturer and many online retailers, including RobotShop [20] and HobbyKing [21].
It is designed for a GoPro Hero 3, 3+, or 4 [4] camera. Much less expensive cameras with similar form-factors are available, including the SJCAM SJ4000 Action Camera [5].
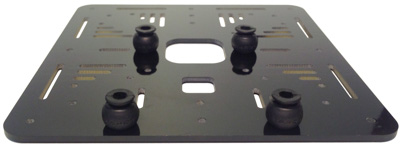
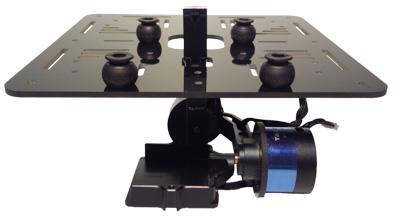
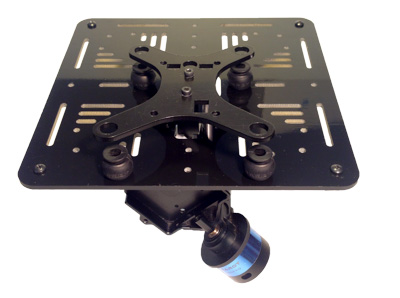
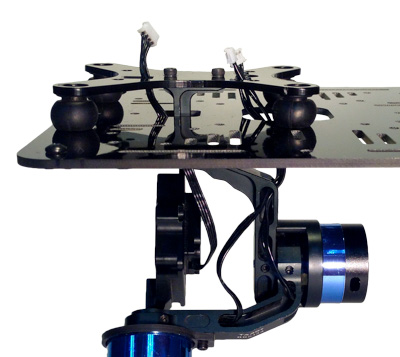
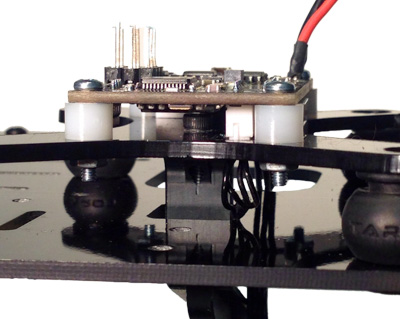
The ELEV-8 v3 Bottom Chassis Plate has been designed to integrate with the Tarot T-2D Gimbal to provide a compact video and image stabilization solution. Though it requires more work to implement, this configuration uses the vibration dampers in compression, providing better isolation than when used in tension, as with the FeiyuTech MiNi 2D Gimbal. To take full advantage of this feature, you will need to fabricate an adapter plate to mount the gimbal to the chassis. We made our adapter plates out of 0.093" Delrin with a laser cutter, but you could also make it out of aluminum, and with a milling machine or by hand. Click here to download the design files for the adapter plates [22].
To install this gimbal, you will need some additional hardware. You will also need hardware for one of the two options for the "Adding a Power Connector" step - see that step for details.
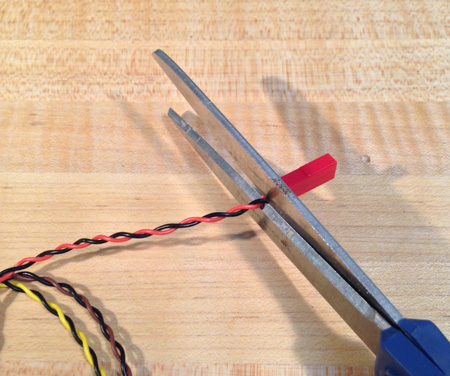
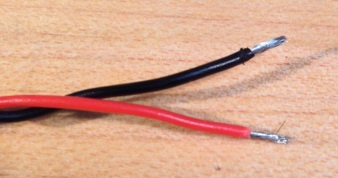
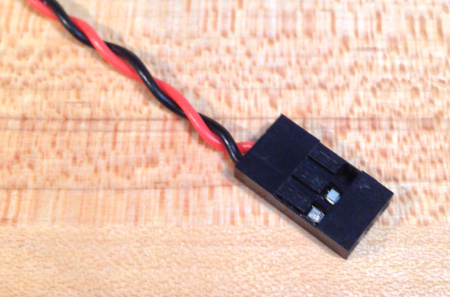
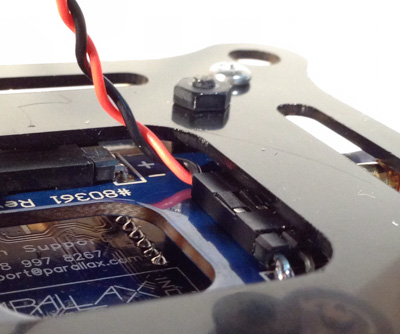
The the black and red power cable soldered to the Tarot T-2D Gimbal Control Circuit doesn't come with any connectors, so you'll have to add one that is compatible with the 0.1"-pitch male right-angle header on the ELEV-8 Power Distribution Board. There are a few different options to make the connection. If you have a pin crimping tool, option one should be easiest for you. If you don't have that specialty tool but do have soldering equipment, we recommend option 2.
For this method, you need one JR-type female "servo" connector housing and pins (such as Pololu #1924; JR Connector 3-Pack, Female [14]) and a specialty tool for crimping the pin connectors (such as the IWISS SN-28B [10] or Pololu #1928 [11]). If you have the right equipment, this is the easiest and fastest method, but option 2 will work just as well for those that don't.
For this method, you'll need a soldering iron, solder, a 3-wire servo extension cable (such as any of the cables in Parallax #751-00010 [17]), 1" of some 1/16" or 1/8" diameter heat-shrink tubing, and a heat gun if you have one. By removing the old connector on the gimbal cable assembly and soldering on a cable that already has a 3-pin female servo connector on the end, you can avoid having to crimp your own connector, but still end up with a reliable connection.
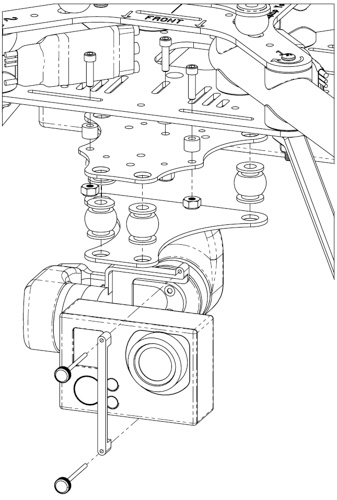
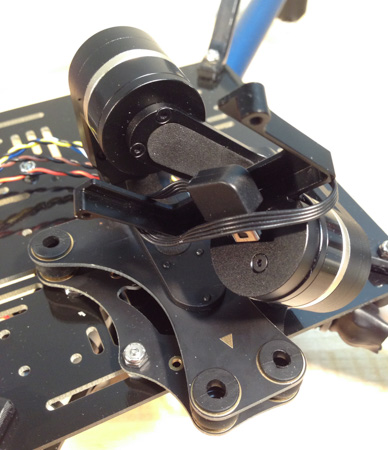
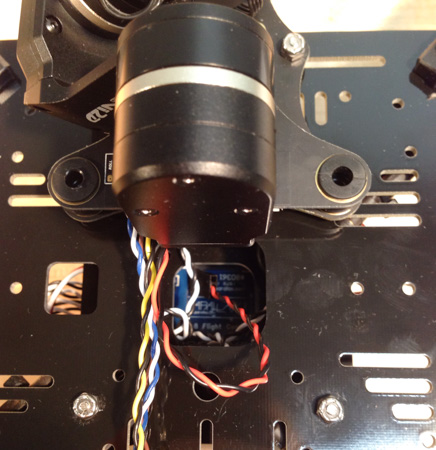
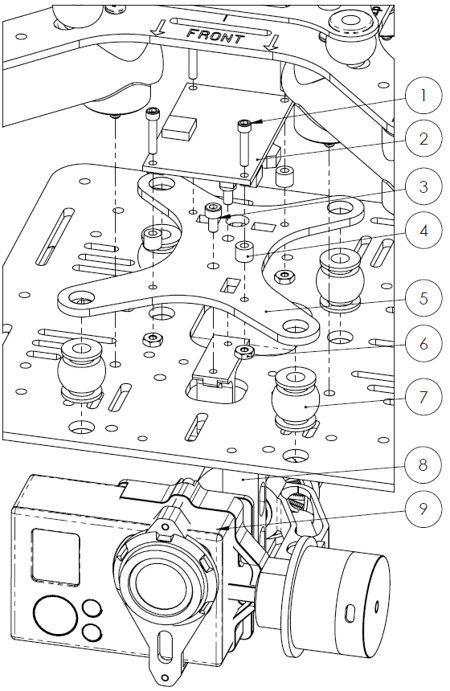
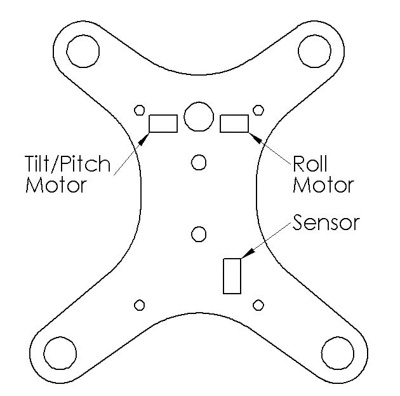
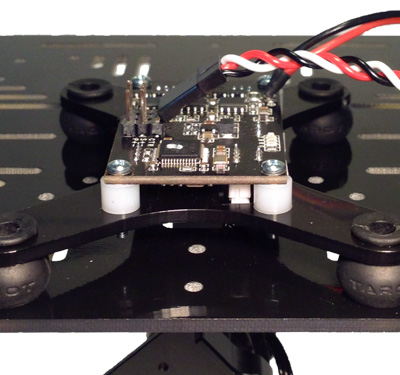
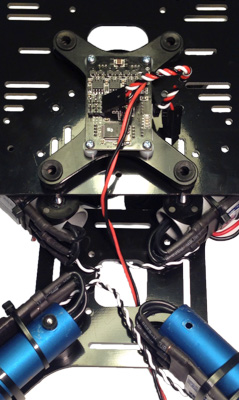
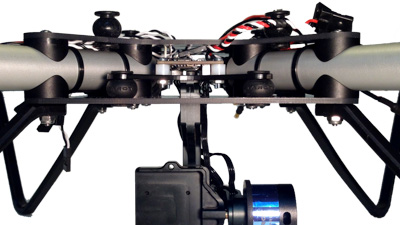
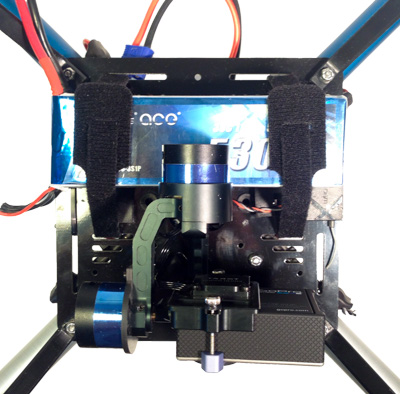
With the power connector added, you can now mount the gimbal to your ELEV-8 v3. The following drawings shows how the gimbal will mount into the chassis.

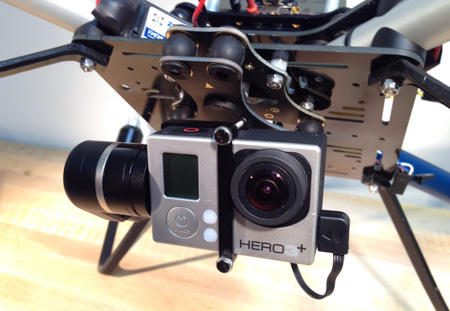
Congratulations! With your gimbal mounted, all that's left is configuring the firmware and then you'll be ready to fly!
With the gimbal mounted, you now need to configure it's firmware. These instructions will reference the Tarot T-2D Assembly Manual v1.1 [26], as revised by John C. Lin (3rd Party).
Make sure to start with the gimbal OFF (battery is unplugged), and your camera mounted in the gimbal.
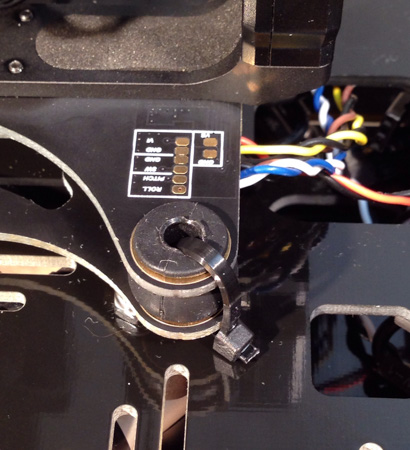
Every time you power-up the gimbal, it goes through a calibration procedure that takes about 15 seconds. During this time, it is critical that you do not move or bump the gimbal or quadcopter, that there are no obstructions restricting the gimbal's movments, and that there is a camera in the gimbal. Check out the "LED Indicators" section of the Assembly Manual for an explanation of the status indicator lights.
For additional information on RC control of the gimbal, please see the Assembly Manual.

Links
[1] http://learn.parallax.com/camera-gimbal-your-elev-8-v3/feiyutech-mini-2d-gimbal
[2] http://learn.parallax.com/camera-gimbal-your-elev-8-v3/tarot-t-2d-gimbal
[3] http://www.bhphotovideo.com/c/product/1163612-REG/feiyu_gm_2da_fy_mini_2d_2_axis_aircraft.html
[4] https://gopro.com/
[5] http://www.bhphotovideo.com/c/product/1072775-REG/sj4000_sj4000_action_camera.html
[6] https://www.parallax.com/product/800-00060
[7] https://www.google.com/shopping/product/9746616272488734333?q=EMO0151
[8] https://www.parallax.com/product/800-00043
[9] http://learn.parallax.com/sites/default/files/content/ELEV-8/Tools/tool_strippers.jpg
[10] http://www.amazon.com/Professional-Compression-Ratcheting-0-1-1-0mm2-Wire-electrode/dp/B00OMM4YUY/
[11] https://www.pololu.com/product/1928/
[12] http://learn.parallax.com/sites/default/files/content/ELEV-8/Tools/tool_screwdriver.jpg
[13] http://learn.parallax.com/sites/default/files/content/ELEV-8/Tools/tool_wrench1.jpg
[14] https://www.pololu.com/product/1924
[15] https://www.youtube.com/watch?v=EJNEG-lqjuA
[16] http://www.jst.com/pdf/JST_CrinpChart%20(English).pdf
[17] https://www.parallax.com/product/751-00010
[18] http://learn.parallax.com/step-2-soldering-motor-bullet-connectors
[19] http://learn.parallax.com/step-7-apply-heat-shrink-tubing-all-connectors
[20] http://www.robotshop.com/en/tarot-gopro-2-axis-stabilized-brushless-gimbal.html?gclid=CLKmrtjUscsCFZNhfgodWPEL6Q
[21] http://www.hobbyking.com/hobbyking/store/__61579__Tarot_T_2D_V2_GoPRO_3_Brushless_Camera_Gimbal_and_ZYX22_Controller_US_Warehouse_.html
[22] https://learn.parallax.com/sites/default/files/content/ELEV-8/v3-Gimbal-Mounting/ELEV-8_v3_Tarot_T-2D_Gimbal_Mount-v1.0.zip
[23] http://www.mcmaster.com/#92185a081/=11db9uw
[24] http://www.mcmaster.com/#94639a469/=11d9pzu
[25] http://www.mcmaster.com/#91841a003/=11dbbba
[26] http://www.caution.se/media/Tarot_2-Axis_Brushless_Gimbal_User_Manual_V1_1_Revised_by_JCLin.pdf
[27] http://image.helipal.com/helipal-tarot-t-2d-software-v15.rar
[28] http://learn.parallax.com/sites/default/files/content/ELEV-8/Gimbal-Mount/Gimbal-Mount-02
[29] http://learn.parallax.com/sites/default/files/content/ELEV-8/Gimbal-Mount/Gimbal-Mount-03