This Spooky Doll was developed during a single-day internal hackathon at Parallax. A one-day project is often the reality for a Halloween animation. Spooky Doll demonstrates the Propeller Multicore Microcontroller nicely by combining WAV file audio playback, fading of two Adafruit NeoPixel rings and control of two servo motors - concurrently! A passive infrared PIR Sensor activates the doll to start when trick or treaters approach the area. The code was easily written in BlocklyProp and provides a simple example for far more complex animations.
The Spooky Doll project required about six hours to build and one to two for programming.
This tutorial provides a quick look at how this project was assembled and programmed. The applications for the WAV file playback and NeoPixel fading are useful for Christmas animations, user feedback, robotics and commercial products.
This project used the following electronic components:
(1) Propeller Activity Board WX (#32912)
(1) SD Card (#32328)
A speaker option:
(1) Portable Mini Hamburger Speaker (#900-00018) which plugs into the Activity Board's jack and provides high volume - OR -
(1) Speaker (#900-00026). If you uuse this speaker you will need to drive it through a transistor such as a NPN SW HS 200MA 3904 For this schematic connection refer to the other example programs (the Art Mobile and Synthesizer projects).
(2) Standard Servo (#900-00005)
(1) PIR Sensor (#555-28027)
(1) Pack of wires (#800-00016)
(1) 200 mm Jumper Wires, MM 40-pc (#800-00066)
(1) 200 mm Jumper Wires, FF 40-pc (800-00062)
(2) NeoPixel Ring - 12 x 5050 RGB LED from Adafruit
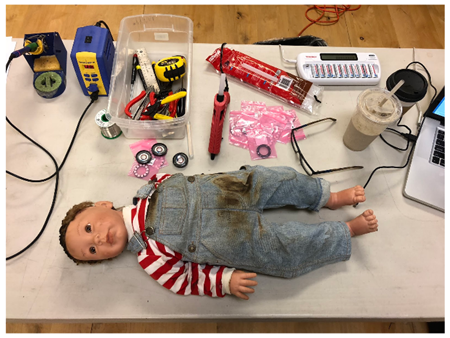
Spooky Doll of your choice!
This particular doll has actually been around Parallax for quite some time, serving as a drone parachutist where it lost the left arm and as a star of the Lets Robot series [1] where guests drove flame-throwing robots over the internet, burning the doll’s pants. These two events were unfortunate, but they added necessary character to the doll for this most recent modification.
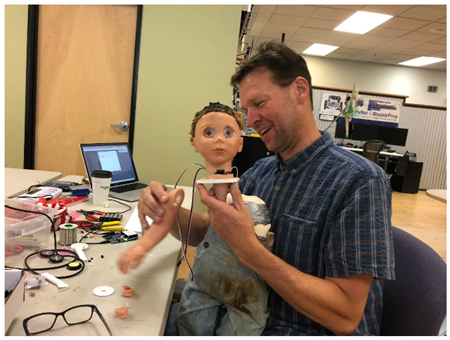
Choose a doll that provides some ease of hacking. Larger dolls have more space for mounting servos, placing NeoPixel rings and running wires to connect the Propeller Activity Board. This particular doll has a soft, plush body with plastic arms and head. Mounting anything in a rigid way is difficult with a soft system, so the body was strengthened with foam core board and hot glue. Some of the steps I took are shown below.
Lay out your parts and try to envision how you’re going to attach motors, install lights, and what you might need to do to mount it upright. Don’t bother making drawings - just get to work and make it a fun project!
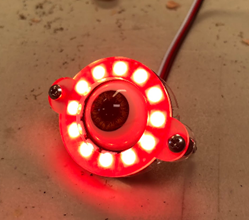
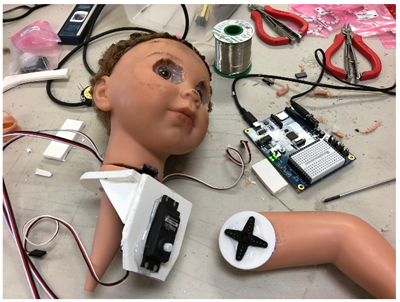
I removed the eyes with the intent of illuminating them with the two NeoPixel LED rings.

I attached the NeoPixels to the eyeballs and tested them with BlocklyProp. While I used a laser cutter to create the acrylic mounts, it would have been just as effective to simply hot glue the NeoPixels to the eyes and glue the assembly back into the doll’s head.
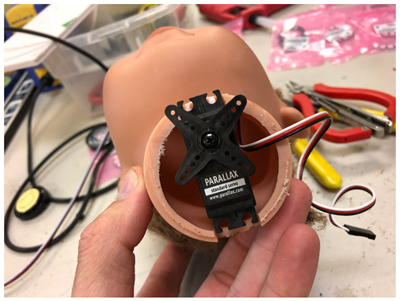
I mounted a standard servo to the neck by cutting a notch, hot gluing it in place, and gluing the servo horn to the neck base.
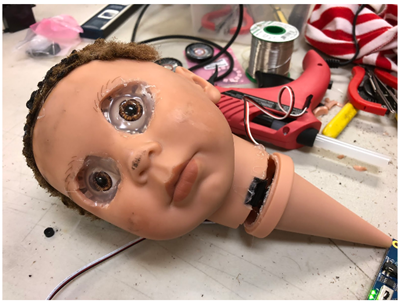
Glued the eyes in place and ran the wires down the neck. This is the fully assembled doll head, ready for attachment back to the body.
The challenge I didn’t plan for was mounting the parts back to the soft body.
I created a mount which would hold the head and arm together and could be glued into the body. Foamcore board is a very effective tool for these quick builds. Simply lay out your parts, cut the board with a box knife, and glue it together.
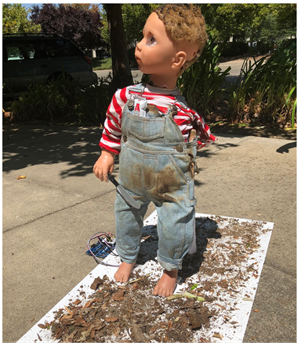
I mounted the assembled doll to a foam core board. Though not visible in this picture, there’s an angle brace behind the doll to hold him securely upright. The base was covered with white acrylic glue and covered with dirt.
The wiring diagram works like this:
P22, 23, 24, 25 are pre-wired to the SD card socket
P12 to the Head Servo
P13 to the Arm Servo
P17 to the PIR Sensor
P0 and P1 to the eye NeoPixel rings
P17 to the Speaker
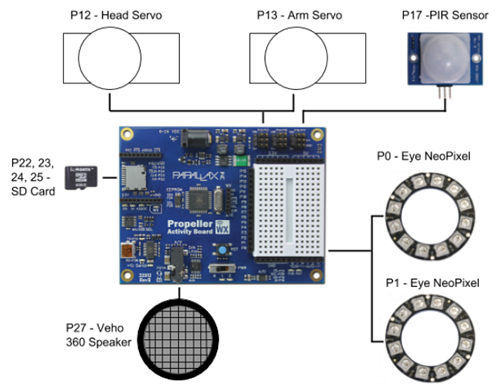
A Parallax 7.5V 1.5A Power Supply (#750-00009) is plugged into the power jack. The P12 and P12 servo header jumpers are at Vin (7.5V). The P17 servo header jumper is at Vdd (5V). The two NeoPixel were soldered to three wires each for data, power and ground.
Parallax has produced tutorials on this subject. Using Audacity, you can record and modify your own sound effects, or import your own music or files. The instructions for creating the correct format are available in our Sound Library reference section [2].
The Spooky Doll Animation has two key features which run in additional Propeller Multicore processors: the NeoPixels in the eyes and the WAV file playback. This is necessary because the eyes fade even red to blue (and back) even if the animation has not been activated by the PIR Sensor. The concept is that curious onlookers will be drawn towards the doll’s eyes before it activates. The WAV files also play concurrently with the eye fading and servo control.
You can download the entire BlocklyProp code below, then use BlocklyProp Solo [3] to load it into your Propeller board.
Project50835-Spooky-Doll-Test.svg [4]
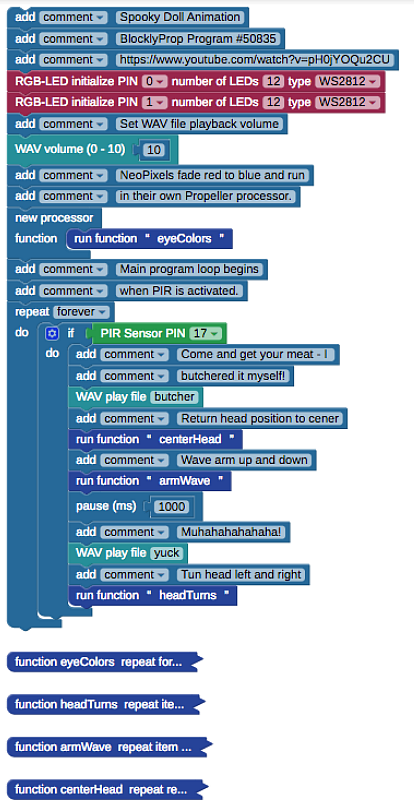
The pseudocode for this project works like this:
Start LED eye fading from red to blue, and back
If motion is detected (human, pets, etc), the PIR Sensor is triggered and the following sequence begins:
“butcher.wav” sound file is activated and plays “Come and get your meat!. . .”
Head servo centers
Arm servo goes up and down
“Yuck.wav” sound file is activated and plays a maniacal laugh “muhahahaha!”
Process repeats if PIR Sensor is triggered again
The entire code is shown below, with servo control blocks in the collapsed state.

Links
[1] http://www.letsrobot.tv
[2] http://learn.parallax.com/reference/create-audio-files-wav-players
[3] https://solo.parallax.com/
[4] https://learn.parallax.com/sites/default/files/content/AB-Blockly/Projects/Spooky-Doll/Project50835-Spooky-Doll-Test.svg