The next script tests the whiskers to make sure they are functioning properly, by using the micro:bit module’s LED matrix display. This gives a visual representation of the binary values (LED off = 1 and LED on = 0) returned by bot(7).read_digital() and bot(9).read_digital(). This way, you can press each whisker against its 3-pin header on the breadboard, and see if the Propeller I/O pin is sensing the electrical contact.
When neither whisker is pressed against its 3-pin header, you can expect your micro:bit module’s display to have no LEDs light up. If you press only the right whisker, the display should have one LED on the right side light up. If you press only the left whisker, one LED on the left side will light up. Finally, if you press both whiskers simultaneously, an LED on both sides will light up.
No Whiskers Touching: no lights on
Left Whisker Touching: LED lights up on left side of the cyber:bot
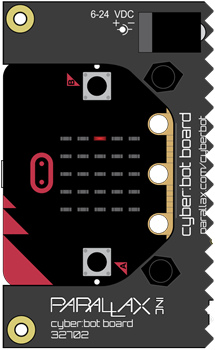
Right Whisker Touching: LED lights up on right side of the cyber:bot

Both Whiskers Touching: LED lights up on both sides

# whiskers_detect_test

from cyberbot import *

while True:
    whisker_left = bot(7).read_digital()
    whisker_right = bot(9).read_digital()

    if whisker_left == 0:
        display.set_pixel(4, 2, 9) #left side LED on if left whisker is pressed
    else:
        display.set_pixel(4, 2, 0)
    if whisker_right == 0:
        display.set_pixel(0, 2, 9) #right side LED on if right whisker is pressed
    else:
        display.set_pixel(0, 2, 0)
A lot of times, problems that occur when dealing with whiskers do not come from the script, but rather the physical connections of the whiskers. Try the following things to improve the physical connections of the whiskers.
These steps are important!
Seriously, you’ve got to make sure your circuit and code pass these tests before continuing. The rest of the examples in this chapter rely on the whiskers working correctly. If you haven’t tested and corrected any errors, the rest of the examples won’t work right.
The main part of the program is contained within the while True: loop, this is so the program continuously checks whether or not the whiskers are being touched and therefore it knows whether the LEDs should be on or off.
while True:
The first thing that the script does once it enters the loop is checks the whisker states using the read_digital function and stores them as a boolean 0 (whisker pressed) or 1 (whisker not pressed) to the variables whisker_left for the P7 state, and whisker_right for the P9 state.
whisker_left = bot(7).read_digital()
whisker_right = bot(9).read_digital()
The script then enters into the first if statement. It checks to see if the value of whisker_left is 0, if it is 0, then the micro:bit module uses the display.set_pixel command to light up the LED located at (4,2) using the maximum brightness of 9. Any other value, with the only other boolean option being 1, falls under the else statement. The else statement turns off the pixel located at (4,2) with a brightness of 0.
if whisker_left == 0:
    display.set_pixel(4, 2, 9)
else:
    display.set_pixel(4, 2, 0)
The second if statement does the same process for the other whisker. It checks to see if the value of whisker_right is 0, and if so, then the micro:bit module lights up the LED located at (0,2) with the maximum brightness of 9 using the display.set_pixel command. Any other value, with the only other boolean option being 1, falls under the else statement which turns off the pixel at (0,2) with a brightness of 0.
if whisker_right == 0:
    display.set_pixel(0, 2, 9)
else:
    display.set_pixel(0, 2, 0)
After it runs through the two if statements, the while True: loop resets and starts over by checking the whisker states again.
