Now that your ELEV-8 Flight Controller has been updated with modified firmware for your LEDs, and you've tested them to make sure they work, you are ready to install the Running Light PCBs onto the booms underneath the motors. You will match each numbered PCB with the boom of the same number.
- First, hold a saddle washer against the Running Light PCB as a reference and bend the pins slightly away from center as shown:
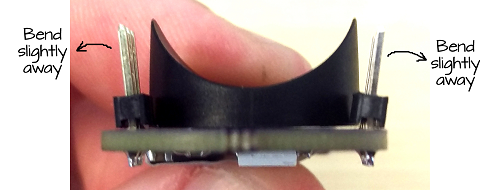
- Repeat this for each PCB.
- Start with the #1 boom on your ELEV-8 v3. Unscrew and remove the locknuts and screws that are holding the motor mount to the boom.
- Turn the landing gear away from the boom.
- Hold the motor and mounting assembly against the boom to keep the Nylon spacers from falling out.
- Look carefully at the diagram below. You will need screws and Nylon spacers found in the ELEV-8 v3 hardware kit. Replace the screws for the motor mount with the ones shown in the picture below:

- Install the saddle washers and Nylon spacers.
- Install the #1 Running Light PCB.
Make sure the Running Light that you numbered in a previous step matches the boom it is being installed on! Failure to do so may permanently damage your Running Lights or Flight Controller!
- Install the landing gear:

- Install the Nylon locknuts and tighten them down.
- Repeat this process for each of the remaining booms.