Finding Block Information
Some blocks are relatively straightforward to use. Others might need a bit of explanation to figure out what they are for, and how to use them.
Try finding the Help information for the blocks in your program.
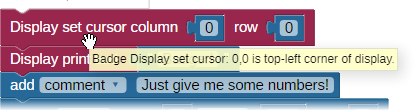
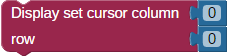
- In your code, hover your cursor over the Display set cursor block for a moment. A tooltip will appear. Each tooltip includes the block name and a brief phrase about its function.
- Now, right-click on the block, and choose Help from the bottom of the drop-down menu.
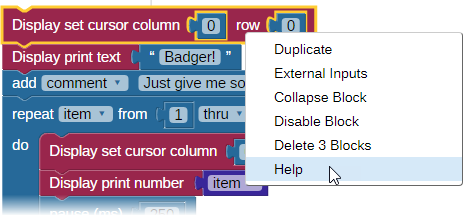
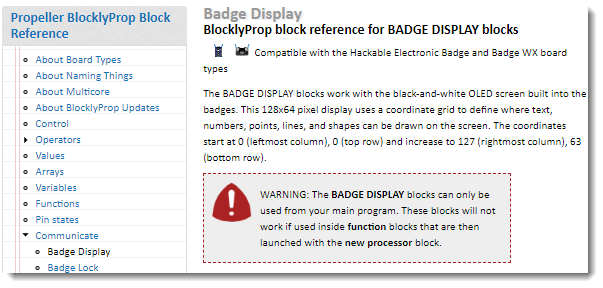
The Help option will take you directly to the page inside the Block Reference which provides details for that specific block, including an explanation for each of the block's fields. Pay attention to any Info or Warning boxes you come across - it will save you trouble later! (Note: You can also navigate here under Support > Reference.)
Additional Right-Click Options
Let's explore the additional block options available from the right-click drop-down menu.
- Click Duplicate. It makes a copy of the block your cursor is on, and any other blocks inside of it.
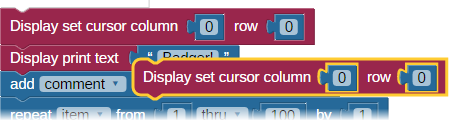
- Click External Inputs. It changes the visual layout of the block. The number value blocks are inputs to the Badge Display set cursor block and appear inside it in the default internal layout. In the external view, all inputs connect to the right edge of their enclosing blocks. Right-click it again and choose Inline Inputs to change it back to the original layout.
- Click Collapse Block. This option visually condenses a block or group of nested blocks, so only the outer enclosing block is visible. Collapsing blocks can be useful for long programs, as you can expand one section to work on at a time but still see the overall code structure. Right click again and click Expand Block.

- Click Disable Block. This option makes the block or block group inactive and “grays” it out to let you know it has been disabled. You can leave it in place, but the program will no longer execute this block until it is re-enabled, which is very handy for testing ideas and code-bug hunting.

- Click Delete Block(s). That threw the blocks in the trash. Don't worry! Just right-click the trash can at the bottom of the workspace, and choose Undo. (CTRL+Z or Command+Z keyboard shortcuts work as well.) You can also drag blocks into the trash can icon if you prefer.

When you right-click in the workspace, there is a Delete ... Blocks option in the drop-down menu that comes up. This selection will delete ALL the blocks in the workspace! A pop-up menu asks you to confirm this is what you want before the delete. If necessary, right-click in the workspace a second time to select Undo
More About Project Files
If you have been following this tutorial from the beginning, you should have two Blockly programs, the second one made with the Save Project As option from the toolbar's drop-down menu. Let's look at some other options in this same menu. Most of them cause you to navigate away from your workspace. You will see a pop-up asking if you want to do that, reminding you to click Stay and save your changes first.
Basics
- Edit Project details let you go back and edit your project's name and description. You cannot change board type, however.
- Save project as lets you make a copy of your project and give it a new name.
- New project starts a new project and lets you create the name and description, as well as choose a board type.
- My projects takes you to a list of the username you have created yourself, Shared or Private. The convenient table view displays the title, board type, and also the description if you added one.
- Community projects lists your personal projects, plus all of the projects other users have chosen to make public.
- Help & Reference takes you to a page with links to resources on the Parallax Learn site, like this one.
Seeing the C Code
- Download SimpleIDE files saves the C code that gets generated by your blocks. It is the C code that gets compiled and downloaded to the Propeller microcontroller. You can view the C code for your program by clicking the Code button next to the Save button. If you download this C file, you can open it again in SimpleIDE, a text-based programming tool that does not require Internet access to use once it is installed.
![]()
Local Files, for the Adventurous
- Download blocks file lets you save your Blockly project on your local computer as an SVG file.
- Upload blocks file lets you re-upload a blocks file you downloaded previously. You will have the option to replace the project you are in with the uploaded blocks or append those blocks to the current project.
- Here is the .svg file for Hello World, opened in Chrome:
![]()
The SVG file stamps your project with your username, the project's title, its Project ID (also used in the SVG file name) and the Propeller board that is the project's target. From the SVG file, you won't be able to edit the project or program your Propeller with it. But it does have two useful purposes for advanced users:
User libraries: BlocklyProp has a define function block that creates a named wrapper around a custom set of blocks that you would like to re-use frequently. You might create a group of related functions in a custom "library" project and download the SVG file. Then, you can later upload and append this "library" to your future projects to access your favorite functions. Kind of like making your own BlocklyProp Bookmobile, if you will.
Lessons plans and handouts: If you are a teacher, the SVG files give you an option for organizing and archiving your lesson plans and assigning template projects to your students without making them community projects.
Demo if you dare: If you want to participate in the ongoing development of the open-source community project that is BlocklyProp, you may find yourself at demo.blockly.parallax.com. This site is where new blocks for various Parallax devices and new features are tested and tried before being promoted to blockly.parallax.com. Note, however, that if you create a project on the demo site, it stays there in the demo universe. If you save your demo projects as SVG files, then you may be able to upload them to the production site if/when their blocks go "live."