The advantage of the FeiyuTech MiNi 2D Gimbal design is that it just bolts to the underside of the ELEV-8 v3 Bottom Chassis Plate, so it can be quickly attached and removed. The biggest challenge is that the gimbal can only mount on two of the four sides. This means that you may have to rotate your chassis plate, which will require partially disassembling your ELEV-8 unit.
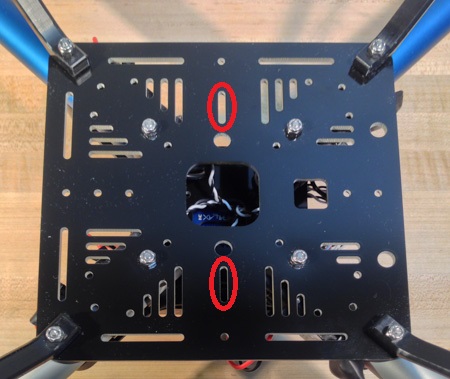
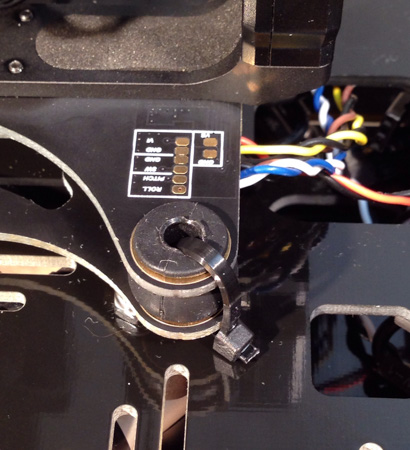
- The MiNi 2D Gimbal can only mount to the "sides" of the bottom chassis plate that have a slot along their centerline (encircled in red in the photo below). In that photo, the plate has been rotated so that one of these sides is towards the front (silver booms) of the ELEV-8. Make sure your bottom chassis plate is oriented so that one of these sides faces the front (assuming you want your gimbal to be forward-facing).
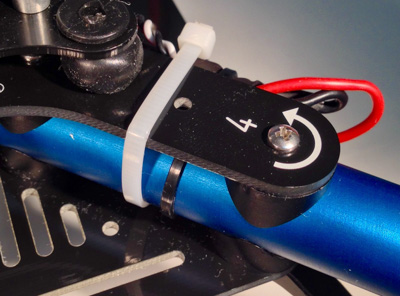
IF you need to rotate your bottom chassis plate, first remove the isolation assembly, and then zip-tie (or tape) each boom to the top chassis plate - this will help hold the top half of the chassis assembly together. Then, carefully remove the eight locknuts from below the bottom chassis plate, being careful NOT to remove the screws. You will then be able to rotate the bottom chassis plate, re-assemble everything, and remove the zip-ties.
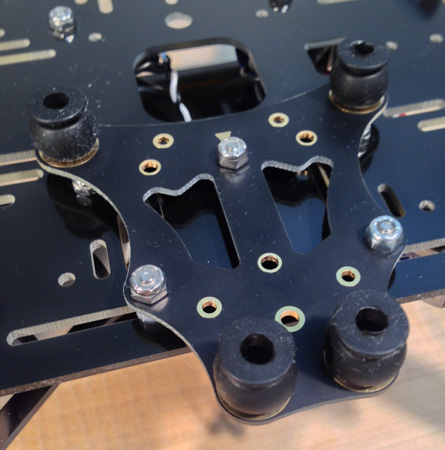
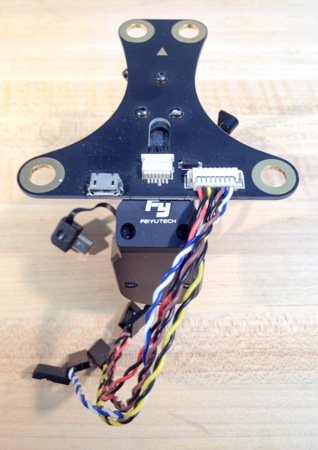
- Before mounting the gimbal's top adapter plate, four vibration dampers need to be installed on it as shown in the photo below.

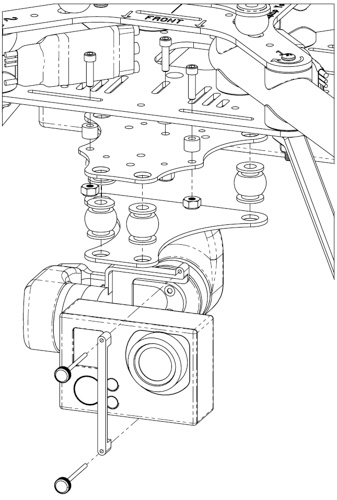
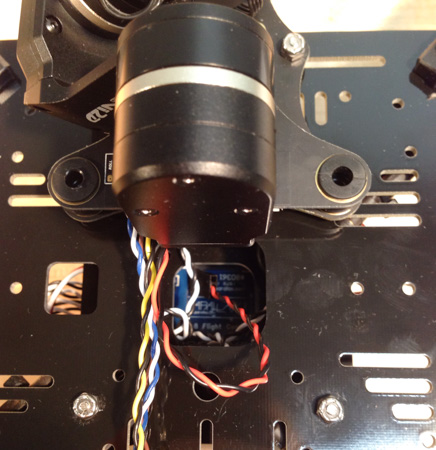
- With your ELEV-8 upside-down, line up the adapter plate with the slots in the bottom chassis plate as shown in the images below. Feed the three machine screws through to the bottom of the chassis plate in the locations shown, slide on a spacer, then the adapter plate, and finally the locknut. Use the screwdriver and wrench to tighten everything.
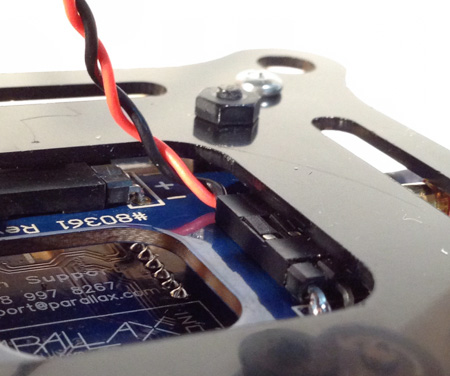
- Plug the gimbal cable assembly into the socket on the top-back of the bottom gimbal adapter plate, as shown below.
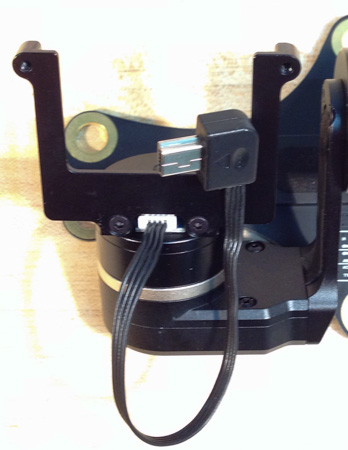
- If you are using a GoPro, plug in the cable supplied with the gimbal to the back of the camera mounting plate. You may have to remove a small picece of adhesive-backed felt to reveal the socket.
- With your ELEV-8 v3 upside-down, lay the gimbal over the top mounting plate and feed the vibration dampers through the bottom adapter plate, thereby attaching the gimbal to your ELEV-8.
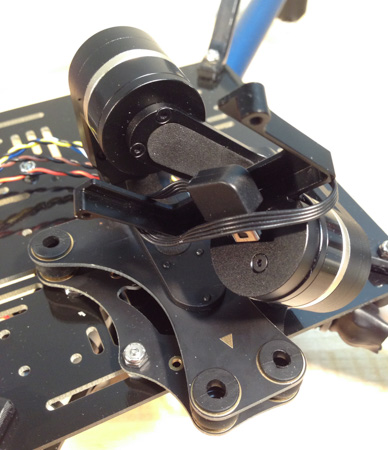
- Take the zip tie and feed it through one of the vibration dampers (and the top and bottom adapter plates). Tighten the zip tie just enough that it's not loose, but not so much that it starts to compress the damper. The zip tie is there as a backup in case the vibration dampers fail.
- Connect the gimbal power cable to the ELEV-8 Power Distribution Board (PDB). Feed the cable up through the center of the chassis and then plug it in to one of the unused headers on the bottom side of the PDB. It will be easiest if you remove the isolation assembly to make the connection. Be sure you have the polarity correct!
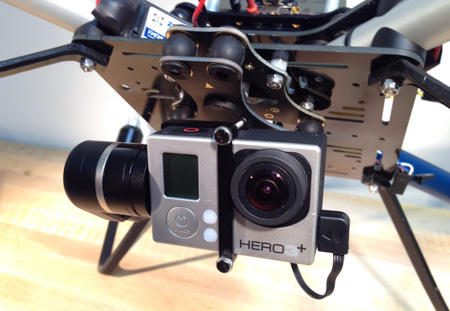
- Finally, use the hardware included with the gimbal to secure your camera to the gimbal.
That's it!
Every time you power-up the gimbal, it goes through a calibration procedure that takes about 15 seconds. During this time, it is critical that you do not move or bump the gimbal or quadcopter, that there are no obstructions restricting the gimbal's movments, and that there is a camera in the gimbal.