Breadboard Basics
Breadboard Basics
One of the most important items in your prototyping toolbox is the breadboard. We use it all the time in our tutorials as a place to wire circuits. The true beauty of the breadboard is that it provides a “blank canvas” for you to deconstruct and reconstruct all sorts of projects and inventions!
If you’ve never used one before, or just want to know why it’s called a ’breadboard,’ check out our introductory video on the basics of breadboarding.
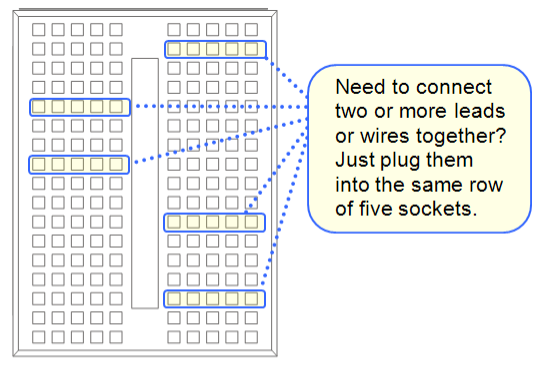
If you can’t watch the video right now, the key thing you need to know is that each horizontal group of breadboard sockets is electrically connected. Underneath the plastic casing are sets of metal clips which provide the electrical connection for wires plugged into the same horizontal row. Notice that these connections don’t bridge the gap running down the middle of the board, so the horizontal rows on the left side are not connected to those on the right. Be sure to keep this in mind when building your circuits, as it’s an easy “oops” to make!