In this tutorial, Parallax friend and guest author Jon McPhalen introduces the concept of precision timing with the Propeller multicore microcontroller, using the Blockly programming tool. You will learn about the Propeller’s clock frequency, and how to make use of it to control timing in a wide range of applications. This activity is compatible with parts found in the Propeller FLiP Try-it Kit (#32023), the ActivityBot Robot Kit (#32500), and BlocklyProp Starter Kit (#32520).
Before you Start
- Use the Other board type when making the projects in this tutorial, even if you have an Activity Board or FLiP module. These projects use blocks from the System category of the block menu, which is only available to the Other board type.
- This tutorial assumes you are familiar with BlocklyProp programming up through Functions & Multicore and up through Check Pushbuttons from Circuit Practice with BlocklyProp.
Parts List:
You need a Propeller board & cable:
or
- (1) Propeller FLiP Module (#32123)
- (1) Breadboard for Propeller FLiP Try-it Kit (#700-32023)
- (1) USB A to Micro B programming cable (#805-00016)
Plus the following components:
- (1) 220 ohm resistor (red-red-brown)
- (1) 10 k-ohm resistor (red-brown-orange)
- (1) tact switch (pushbutton)
- misc jumper wires
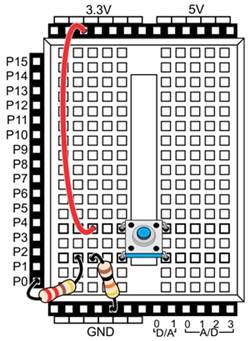
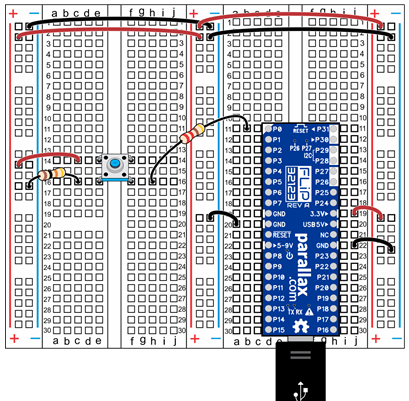
Wiring
Activity Board WX and FLiP wiring is provided below.