Input Messages
You might have been wondering if there’s a way to type messages into the terminal and send them to the micro:bit. Well, there is — with the help of the input function.
- Enter, name, and save enter_a_message.
- Click the Send to micro:bit button.
# enter_a_message.py

from microbit import *

sleep(1000)

message = input("Enter some text: ")

print("message = ", message)
- Check the results in the serial monitor.
(Click the Open Serial button if needed.) - If the prompt doesn’t immediately display, press/release the micro:bit module’s reset button.
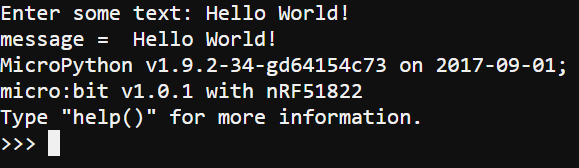
Also, make sure you are using serial monitor near the bottom of the browser, not the one in the simulator panel on the right. - Click to the right of the “Enter some text: “ prompt, and type “Hello World!” followed by the Enter key.
- Verify that the next line in the terminal displays: message = Hello World!
- Click the Close Serial button to return to the editor pane.
How it Works
The input function can send a prompt, like “Enter some text: “, receive the characters you type, and return them as a string. That string normally gets stored in a variable with a statement like message = input(“Enter some text: “). The text you type (up to when you press Enter) will get stored in the message variable, and MicroPython will automatically set that variable’s type to string. For more on data types, see the Remember and Use Values page.
Try This: Input Your Name
Customize the example script to ask for and store your name.
- Change project’s name from enter_a_message to enter_a_message_try_this.
- change “Enter some text: “ to “What is your name? “.
- Save the modified script.
- Click the Send to micro:bit button.
Your Turn: Expand the Script
- Now that you have a script that asks for your name, expand it to ask for, remember, and report your favorite color.
- Use a loop to make the script repeatedly ask for and display your name and favorite color indefinitely.
- Modify the loop so that it only runs three times.
Did you use your real name? Don’t worry, the micro:bit is not collecting your personal information! But do keep in mind that there are social aspects to cybersecurity, not just technical!
Input a Value
Let’s say you’re working on a project where you have to enter the cyber:bot robot’s left and right wheel speeds into the terminal. It might seem like all you’d have to do would be to type in numbers like 50 and 100. The problem is that those numbers are received as strings of characters “50” and “100” then stored in string variables. Before your script can use those values to set robot wheel speeds, it needs to convert them from string to int values with the int() function.
- Enter, name, and save enter_a_value.
- Click the Send to micro:bit button.
# enter_a_value.py

from microbit import *

sleep(1000)

text = input("Enter a value: ")
value = int(text)
print("value = ", value)
- If the serial monitor isn’t already open, click Show serial.
- Click the serial monitor to the right of the Enter a value: prompt.
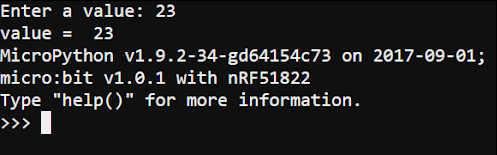
- After it says Enter a value:, type “23” and press Enter.
- Verify that it displays value = 23.
- Click Close Serial.
How It Works
If you typed 23 in response to the prompt, the text = input(“Enter a value: “) statement stored “23” in the text variable. This is a string of characters, not a usable number. The next line, value = int(text), converts the “23” string to the integer 23 and stores it in the value variable.
Think about this as two steps. First, the int(text) function call takes the text variable, which stores the “23” string, and returns the int value 23. That result gets copied to the int variable named value. Keep in mind that MicroPython automatically sets the variable type to int since that’s the kind of object the int() function returns.
Next, print(“value = “, value) prints “Value = . Then, the print function has to convert the int value 23 stored by value into the character string “23” before sending it to the terminal.
The most important point in this exercise is that you entered characters that the script was able to convert to values it can use to make calculations, control repetitions, and more.