cyber:bot Board Rev C – Connect to micro:bit
In this activity, you will:
- Connect micro:bit and battery supply to a cyber:bot board Rev C.
- Use a script to test if the micro:bit is properly connected to the cyber:bot board.
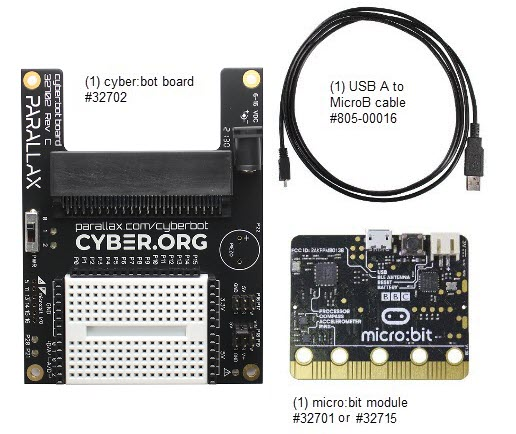
Parts

Assembly
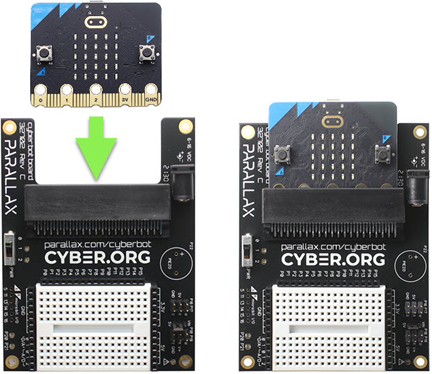
- Orient the micro:bit module and cyber:bot board as shown in the image below. If on a table, both the cyber:bot board’s white breadboard and micro:bit modules 5×5 LED matrix display should be facing upward.
- Hold the micro:bit by its edges, and slide the gold edge of the micro:bit module into the cyber:bot board’s edge connector.
- Use the image on the right to make sure the micro:bit is firmly seated in the edge connector. It’s okay to press with some force to get the micro:bit to sink into the socket all the way. The five circular holes in the micro:bit should be more than half covered by the edge connector.

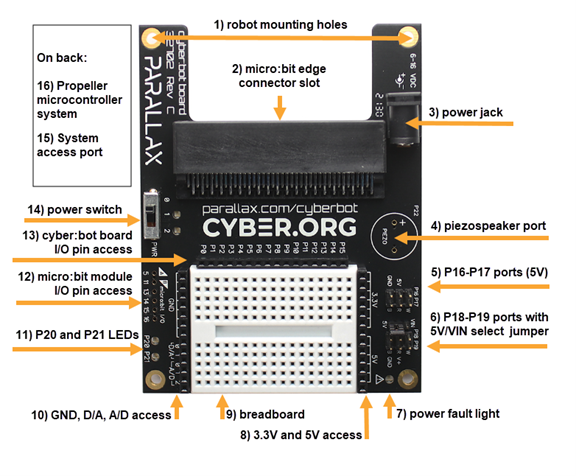
Meet the cyber:bot Board Rev C
- Take a look at your cyber:bot board’s features.

What’s Next?
Skip to Test the cyber:bot Board.
