Skip to content
Parallax Learn

Parallax Learn

  • Welcome
  • Tutorials
        • Tutorial Series head tag

          Tutorial Series
        • Tutorial Series

          The special, classroom-ready series pages are organized collections of tutorials for our most popular hardware and/or languages. The tutorials for each topic are conveniently accessible from a single page, shown in the order it is recommended that they be completed.
        • Robotics Series Head tag

          Robotics Series
        • Robotics Series

          • Artificial Intelligence
          • Cybersecurity: Radio Data tutorialCybersecurity
          • cyber:bot + Python
          • cyber:bot + MakeCode
          • Boe-Bot Tutorial SeriesBoe-Bot
          • Arduino Shield-Bot
          • ActivityBot with C TutorialsActivityBot + C
          • ActivityBot with BlocklyProp Tutorial SeriesActivityBot + BlocklyProp
          • Scribbler 3 Tutorial SeriesScribbler 3
        • Electronics & Programming Series Head tag

          Electronics & Programming Series
          • BS2 Board of Education Tutorial SeriesBS2 Board of Education
          • Propeller C-Language BasicsPropeller C Basics
          • FLiP Try-It Kit C Tutorial SeriesFLiP Try-It Kit + C
          • FLiP Try-It Kit BlocklyProp TutorialsFLiP Try-It Kit + BlocklyProp
          • Badge WX Tutorial SeriesBadge WX
          • Propeller BlocklyProp Basics and ProjectsPropeller BlocklyProp Basics
          • View All Tutorial Series »
        • Browse Tutorials
        • Browse Tutorials

          Individual tutorials sorted by robot or kit, and language.
        • By Robot or Kit
          • ActivityBot
          • SumoBot WX
          • Boe-Bot
          • Shield-Bot
          • cyber:bot
          • Badge WX
          • ELEV-8
          • ARLO
        • By Language
        • By Language

          • Propeller C
          • Arduino
          • BlocklyProp
          • PBASIC
          • Python
          • MakeCode
          • View All Tutorials »
  • Educators
  • Reference
  • Downloads
  • Home
  • All Courses
  • Cybersecurity: Brute Force Attacks & Defenses

Cybersecurity: Brute Force Attacks & Defenses

Decimal Vault PIN

Up to this point, the projects have used simple PINs with three or four binary digits. If the projects instead use decimal digits, the increase in possible combinations improves the security by making it more time consuming to crack the PIN with brute force.

In this activity, you will use projects that repeat what you’ve done up to now, but with decimal digits in the 0 through 5 range. Since each digit has six possible values, the number of combinations is:

6 x 6 x 6 = 63 = 216 combinations

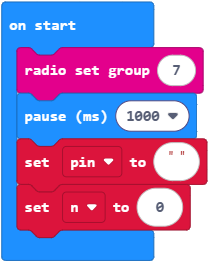
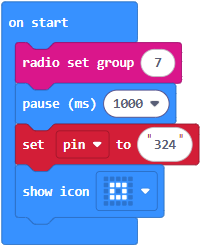
  • If you are part of a class, and have been assigned a channel, make sure to adjust the project’s radio set group (7) to your assigned channel before you flash the projects.
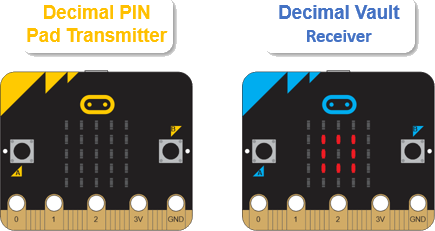
  • Enter and flash the transmitter decimal_pin_pad_transmitter project into the PIN Pad Transmitter micro:bit.
  • Enter and flash the receiver decimal_bank_vault_receiver project into the Bank Vault Receiver micro:bit. Receiver Project (decimal bank vault) is below the Transmitter Project (decimal PIN pad).
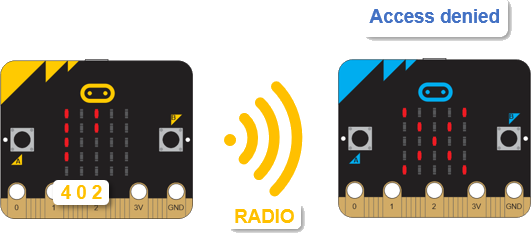
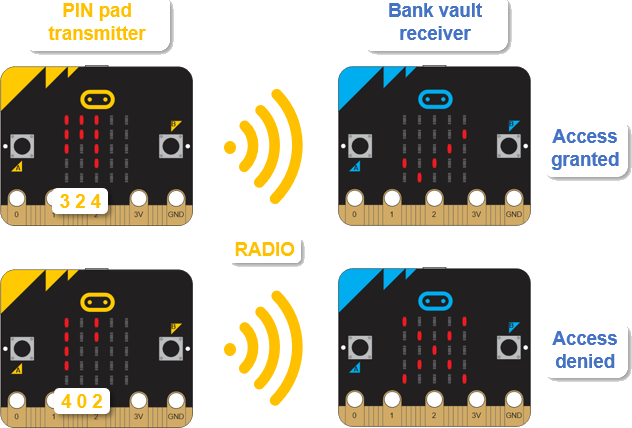
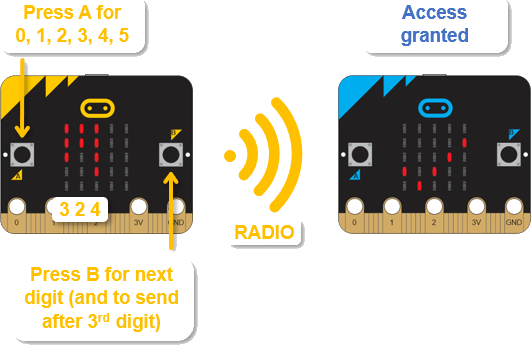
  • Before continuing, take a look at the decimal_bank_vault_receiver project’s set pin to (‘324’) statement. This is the PIN number you will have to enter into the PIN Pad Transmitter micro:bit’s A/B buttons to gain access. 

Transmitter Project: decimal_pin_pad_transmitter

Receiver Project: decimal_bank_vault_receiver

Again, let’s check to make sure each micro:bit is running the correct project. 

  • Verify that the decimal PIN Pad Transmitter micro:bit has no lights on.
  • Verify that the decimal Vault Receiver micro:bit shows a square in the center of its display.

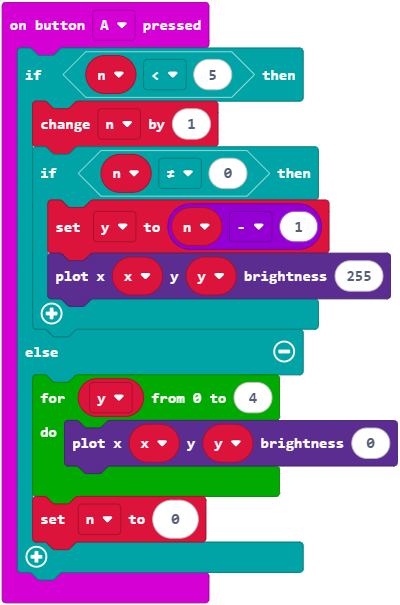
Now, as you press and release the A button, LEDs will light from the top downward. No lights in a column means 0. One light means 1, and so on, up through five lights for 5.

  • Enter the correct key like this: A A A B A A B A A A A B.
  • Verify that two things happened:
    • The decimal PIN Pad Transmitter micro:bit scrolls 3 2 4 across its display.
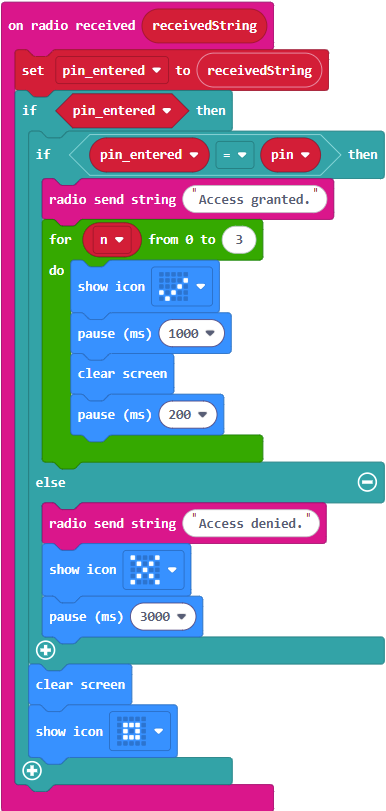
    • The decimal Bank Vault Receiver displays a flashing check mark indicating access granted:

  • As in the first round, try some other combinations and make sure that they result in the decimal Bank Vault Receiver displaying an X to indicate access denied.


Printer-friendly version
Try This: Randomized Vault Key
Prev
How the Decimal Code Works
Next

DISCUSSION FORUMS | PARALLAX INC. STORE

About | Terms of Use | Feedback: learn@parallax.com | Copyright©Parallax Inc. 2024

© 2025 Parallax Learn • Built with GeneratePress