How Radio Data Packets Work
The Dictionary is Key
The countdown_sender project prompts for countdown start and message values and adds them to a dictionary. The dictionary has a ‘start’ key that is paired with the number the receiver starts counting from. It also has a string paired with an ‘after’ key that the receiver displays after it’s done counting down. It then creates a string that represents the dictionary (the data packet) and sends it over the radio.
The countdown_reciever project receives the packet string and creates a dictionary from it. Then, it creates a value variable from the int value paired with the ‘start’ key and a string from the string value paired with the ‘after’ key.
Let’s take a closer look at how statements in each project do their jobs.
How countdown_sender works
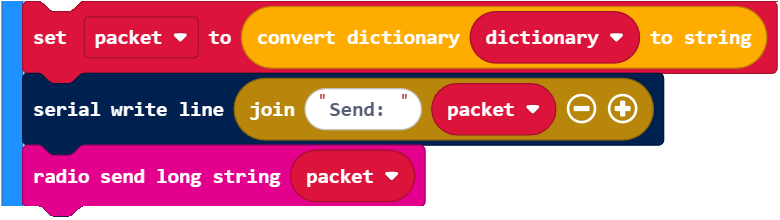
The packet in the example has a string with 37 characters. That’s larger than the default length of 19. So using the radio send long string block lets you send whatever length message you want.

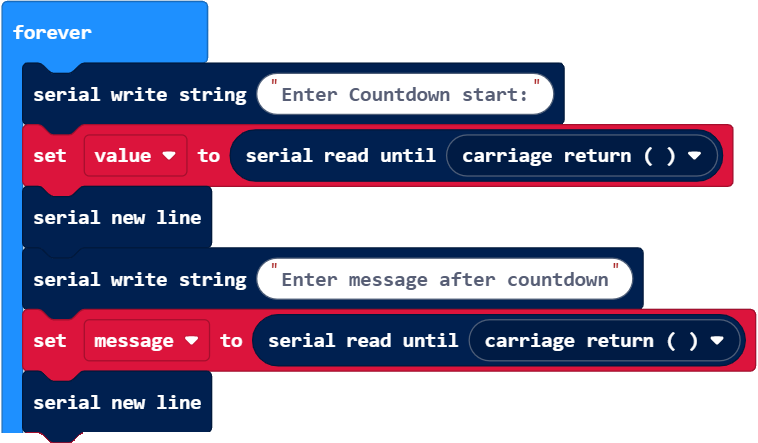
This is the same code that’s in countdown_timer from Input/Print for Applications. It gets a value and message from the terminal.
There are many ways to transmit a value and a message to another micro:bit. However, coding the receiver project to figure out what the purpose of each item is can be tricky. Dictionaries make it much easier, especially when you have more than just the two items we are starting with here.
First, a dictionary is created and two key-value pairs are added with ‘start’ paired with value and ‘after’ paired with message. (though it did not have to use dictionary as the name, it’s like naming any other variable.) Assuming you entered 3 and Liftoff! when the project was running, dictionary would look like this: {‘start’: 3, ‘after’: ‘Liftoff!’}. The receiver project will now be able to use the ‘start’ key to get the int value 3, and the ‘after’ key to get the string value ‘Liftoff!”

The following shows that you can easily grab what the receiver needs by just calling the same keys as we used in the transmitter. Change the names up and see if it still works!
Transmitter

Receiver

The radio send long string block cannot send a dictionary but can send a string. Fortunately, creating a string from other data types is simple with the dictionary to string block. The set packet to (dictionary to string(dictionary)) creates a string representation of the dictionary and names it packet. The serial write line block is there so you can see what the packet string looks like before radio send long string transmits it.
This just displays an empty line before the loop repeats.
How countdown_receiver works
If the send length is over 19, the receive length should also be more than 19. This one looks very similar but the defined variable is rLongString not receivedString and only a drop-down is displayed.
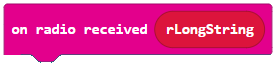
Like the other examples that use the on radio received block, action only has to be taken when on radio received returns something other than None. In other words, when on radio receive returns a string that gets stored in rLongString, which will have to be processed.

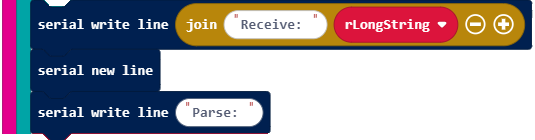
This is not a required first step in processing the packet. It’s just so you can see what’s in it before parsing. Below that, headings for the parse results are also printed.
The first step in parsing the packet is converting it from a string back to a dictionary. That’s what the string to dictionary block does. Let’s say the packet variable contains this string: “{‘start’: 3, ‘after’: ‘Liftoff!’}”. The string to dictionary block evaluates what’s in a string as an expression and returns the result. In this case, it returns the dictionary object: {‘start’: 3, ‘after’: ‘Liftoff!’}. Lastly, set dictionary to makes a name reference for that dictionary object.

Again, the name dictionary is not a requirement. For example, you could choose a brief memory-saving name like d, or a longer name like my_countdown_dictionary. Of course, if you change it in one place, you’ll also have to update the other parts of the project that use the name dictionary to make it work again.
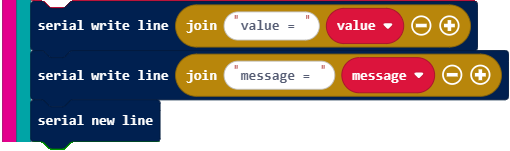
Now that there’s a dictionary, the project can use the ‘start’ key to access the value (3 in the example). Then, it can use the ‘after’ key to access the “Liftoff!” string value.

These serial write statements can help you verify that the value the receiver received matches the one the sender sent. Likewise with the message.
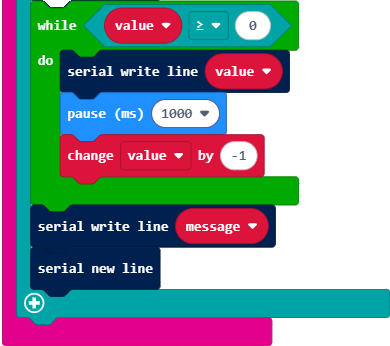
Now that the receiver project has value and message, it can finish the job, which is the loop in countdown_timer from Input/Print for Applications.