How the Tilt Radio Tests Work
How radio_transmit_tilt_test Works
The project starts with importing modules. Since this project only measures tilt and transmits, it does not need to include the cyberbot extension.
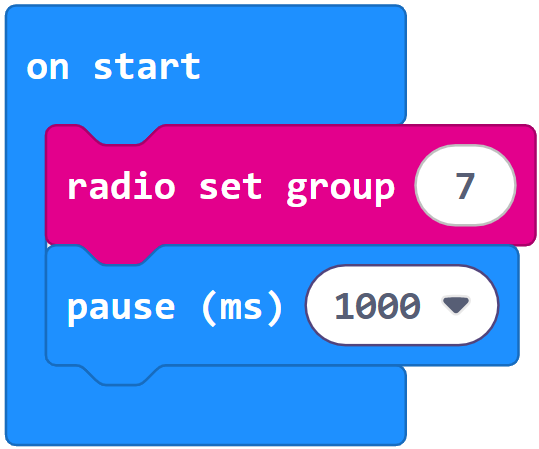
The project uses radio set group to set the channel, message queue, and message length. As explained in the Cybersecurity: Radio Basics tutorial, the channel defaults to 7, but can be adjusted to an integer from 0 to 255. Classrooms typically assign pairs of students to different channels to avoid crosstalk. The sender and receiver have to be on the same channel for communication to work.

Next, pause (1000) gives the editor time to establish the serial connection with the micro:bit before it has to display text from the micro:bit.
The main loop starts with statements from display_tilt_direction_with_leds that take the accelerometer x and y measurements and calculate/display the LED tilt direction needle. There are extra serial write statements for “Send:” and an empty line. Since the LEDs display the direction of the tilt like a compass needle, the direction variable’s name is changed to needle here.
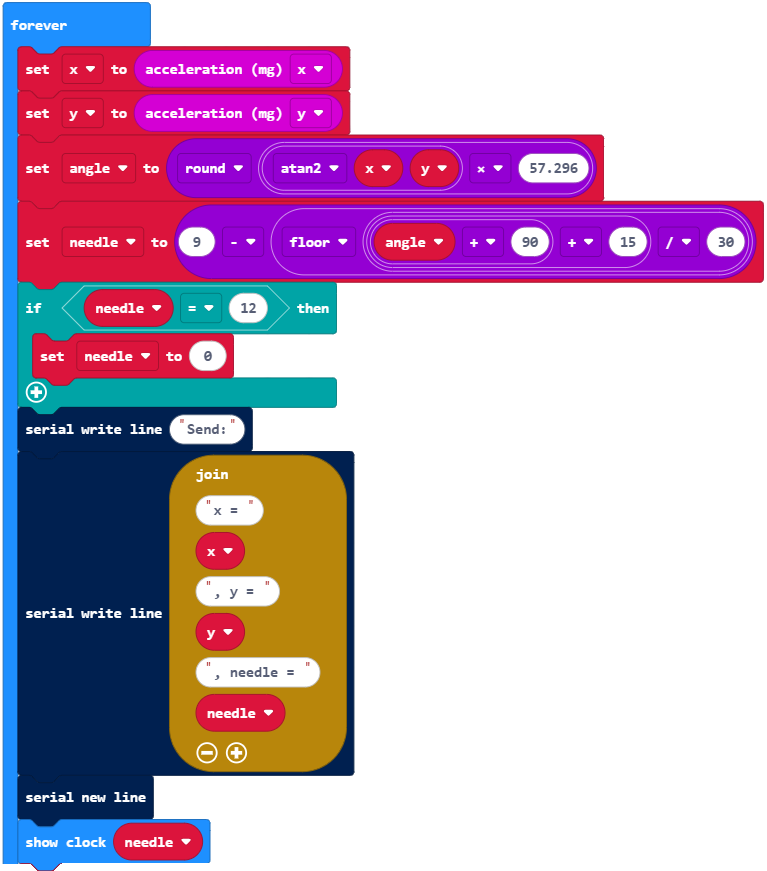
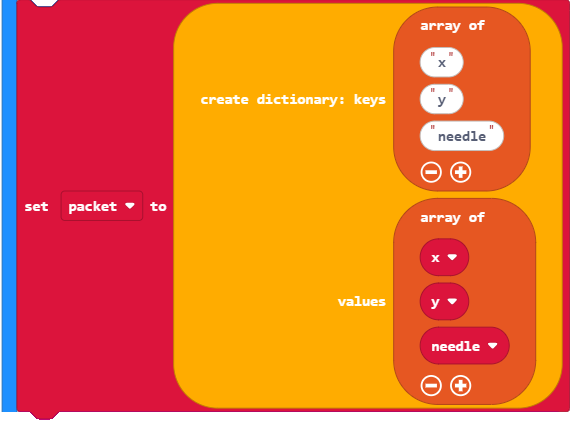
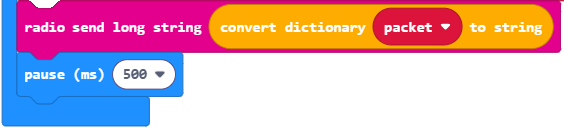
Next, the x, y, and needle values are added to a dictionary named dictionary. This step is important because it reduces the work the receiver has to do. The receiver can just get the values that correspond to the ‘x’, ‘y’, and ‘needle’ keys.
After dictionary is populated, all that remains is to convert it to a string, send it through the radio, and delay 0.5 s before repeating the forever loop.
How radio_receive_tilt_test Works
The project starts in much the same way as the radio_transmit_tilt_test.
The main loop starts by copying any data the radio might have received to a variable named rLongString. When on radio receive() returns none, the project skips everything in the if rLongString… statement and continues waiting for a signal. When on radio receive() returns a string from the transmitter micro:bit, all the statements in the if rLongString… statement get executed. First, convert string (rLongString) to dictionary converts the string that was received back to a dictionary. Then dictionary search sets the x, y, and needle variables using the ‘x’, ‘y’, and ‘needle’ keys.

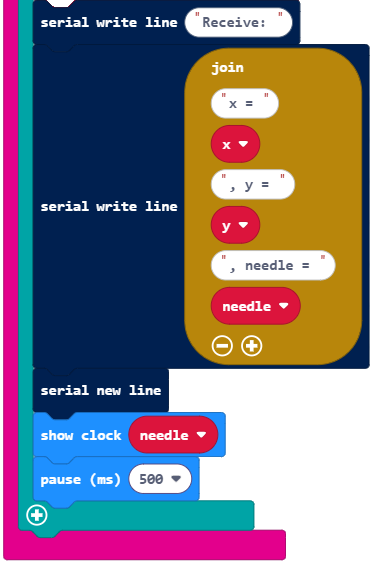
Now, that the receiver has variables with the transmitter micro:bit’s measurements, it can display them in the terminal and with the LEDs. As with the transmitter, these statements are similar to what’s in display_tilt_direction_with_leds with extra serial write line statements for “Receive:” and an empty line, the variable for displaying the tilt direction is needle instead of cardinal direction.