Share Something Personal – Unencrypted?
Imagine sharing something personal, like maybe your mood or reaction to something, with a friend. The catch is, everybody else in the class gets to read your text! That’s certainly possible if you share your data unencrypted.
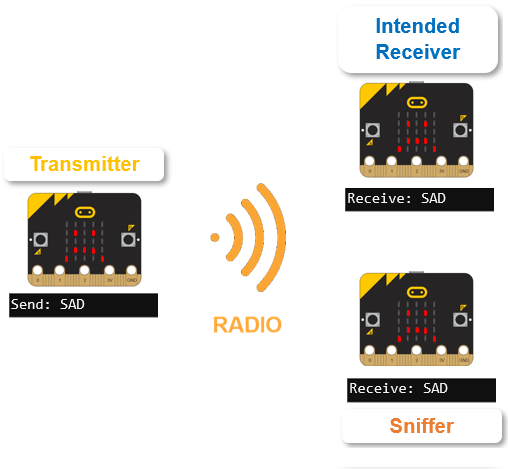
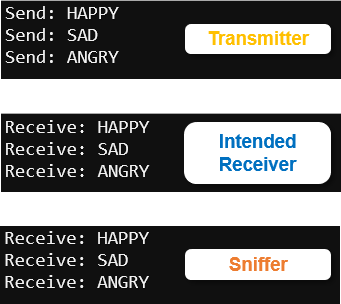
This activity uses one micro:bit to broadcast microbit.Image.HAPPY/SAD/ANGRY images. They might be only intended for one micro:bit receiver, but without encryption, any other micro:bit receiver in range can access the data too. Other people might monitor channels with their micro:bit modules and after gathering information through sniffing, then use it for purposes you would not want or intend.
After this activity, you will add encryption, and examine the difference in what the “sniffing” micro:bit is able to detect.
- Connect three micro:bit modules to three USB ports with three USB cables, and decide which one you want to be the transmitter, intended receiver, and sniffer.
If you only have two micro:bit modules you can alternate the one between intended receiver and sniffer roles. You will load the script for the intended receiver and perform any tests. Then, load the script for the sniffer, and perform tests for that role.
- Open three separate browsers and navigate each one to python.microbit.org.
- If you are part of a class and have been assigned a channel, make sure to adjust the script’s channel=7 argument to your assigned channel before you save and flash the scripts.
- Enter, name, save, and flash the radio_send_images script into the transmitter micro:bit that will send the HAPPY/SAD/ANGRY images.
(See Save & Edit Scripts and Flash Scripts with Python Editor.) - Enter, name, save, and flash the radio_receive_images receiver script into the intended receiver and the sniffer micro:bit modules. It’s below the transmitter Script.
Transmitter script: radio_send_images
# radio_send_images.py

from microbit import *
import radio

radio.on()
radio.config(channel=7)

sleep(1000)

while True:

    packet = "HAPPY"
    print("Send:", packet)
    radio.send(packet)
    sleep(2500)

    packet = "SAD"
    print("Send:", packet)
    radio.send(packet)
    sleep(2500)

    packet = "ANGRY"
    print("Send:", packet)
    radio.send(packet)
    sleep(2500)
Receiver script: radio_receive_images
# radio_receive_images.py

from microbit import *
import radio

radio.on()
radio.config(channel=7)

sleep(1000)

while True:

    packet = radio.receive()

    if packet:
        print("Receive:", packet)
        display.show(getattr(Image, packet))
Test Intended Receiver vs. Sniffer
- Click the Show serial button in all three browsers, and reset all three micro:bit modules.
- Verify that both the intended receiver and the sniffer micro:bit modules are receiving and displaying what the transmitter micro:bit sends.
If the sniffer micro:bit also displays the same images, it means the person with that micro:bit can monitor all your data exchanges!