Try This: Sniffing without Errors
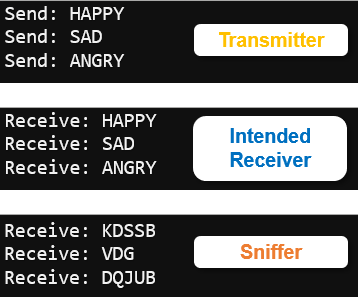
The sniffing receiver script running radio_receive_images threw an exception when it tried to look up getattr(Image, “KDSSB”). If the string was not encrypted, it would be “HAPPY”, which would work just fine.
- In the browser connected to the sniffer micro:bit:
- Comment the radio_receive_images script’s display.show(getattr(Image, packet)) statement by adding the # symbol to the left of it.
- Change the project name to radio_receive_images_sniffer, and then Save.
- Click Send to micro:bit to flash the modified script into the sniffer micro:bit.
Can you see the data in the serial monitor now?
Your Turn – Sniffing with Exception Handling
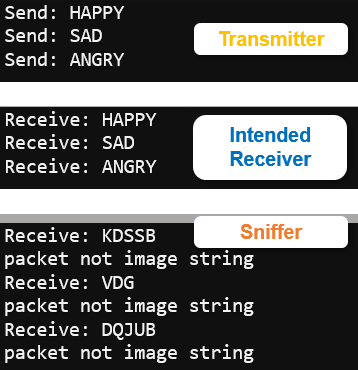
Instead of commenting display.show in radio_receive_images_sniffer, you can add exception handling code. That way, your micro:bit’s display will immediately display unencrypted images, and tell you if the data is not a valid image without halting because of an exception.
- Use techniques from Exception Handling Primer to prevent an encrypted image string from freezing your application.
Can you match the serial monitor output shown by the sniffer below? Whenever the string does not represent a valid image, it prints: packet is not an image string.
How it Works
Both the transmitter and receiver scripts have a caesar() function added above radio.on(). This function was developed step-by-step in Encryption Intro and calling the function was introduced in Caesar Cipher in a Function. Once your script has the caesar() function at its disposal, all it has to do is call it to encrypt single upper-case word strings. For example, if packet contains the string to encrypt, packet = caesar( 3, packet ) uses a key of 3 to encrypt the word in packet. To decrypt, use the negative key value with packet = caesar( -3, packet ).
Remember from the previous activity that packet contains either “HAPPY”, “SAD”, or “ANGRY” strings. In radio_send_images_caesar, it displays the packet before encrypting with print(“packet:”, packet). Then, it sends the packet through the Caesar cipher with packet = caesar(3, packet). Next, print(“Send encrypted:”, packet) prints the ciphertext version of the packet to the serial monitor. For example, after the caesar(3, packet) call, HAPPY becomes KDSSB.
        print("packet:", packet)
        packet = caesar(3, packet)
        print("Send encrypted:", packet)
        radio.send(packet)
        sleep(2500)
When the intended receiver’s radio.receive call returns an encrypted packet, it should look the same as the transmitter’s encrypted packet. To decrypt, simply call the caesar function with the negative of the key used to encrypt. Since the key was 3 to encrypt, it has to be -3 to decrypt. That’s why the intended receiver script’s packet = caesar(-3, packet) has the negative value of the transmitter’s key.
    packet = radio.receive()

    if packet:
        print("Receive encrypted:", packet)
        packet = caesar(-3, packet)
        print("packet:", packet)
        display.show(getattr(Image, packet))