Skip to content
Parallax Learn

Parallax Learn

  • Welcome
  • Tutorials
        • Tutorial Series head tag

          Tutorial Series
        • Tutorial Series

          The special, classroom-ready series pages are organized collections of tutorials for our most popular hardware and/or languages. The tutorials for each topic are conveniently accessible from a single page, shown in the order it is recommended that they be completed.
        • Robotics Series Head tag

          Robotics Series
        • Robotics Series

          • Artificial Intelligence
          • Cybersecurity: Radio Data tutorialCybersecurity
          • cyber:bot + Python
          • cyber:bot + MakeCode
          • Boe-Bot Tutorial SeriesBoe-Bot
          • Arduino Shield-Bot
          • ActivityBot with C TutorialsActivityBot + C
          • ActivityBot with BlocklyProp Tutorial SeriesActivityBot + BlocklyProp
          • Scribbler 3 Tutorial SeriesScribbler 3
        • Electronics & Programming Series Head tag

          Electronics & Programming Series
          • BS2 Board of Education Tutorial SeriesBS2 Board of Education
          • Propeller C-Language BasicsPropeller C Basics
          • FLiP Try-It Kit C Tutorial SeriesFLiP Try-It Kit + C
          • FLiP Try-It Kit BlocklyProp TutorialsFLiP Try-It Kit + BlocklyProp
          • Badge WX Tutorial SeriesBadge WX
          • Propeller BlocklyProp Basics and ProjectsPropeller BlocklyProp Basics
          • View All Tutorial Series »
        • Browse Tutorials
        • Browse Tutorials

          Individual tutorials sorted by robot or kit, and language.
        • By Robot or Kit
          • ActivityBot
          • SumoBot WX
          • Boe-Bot
          • Shield-Bot
          • cyber:bot
          • Badge WX
          • ELEV-8
          • ARLO
        • By Language
        • By Language

          • Propeller C
          • Arduino
          • BlocklyProp
          • PBASIC
          • Python
          • MakeCode
          • View All Tutorials »
  • Educators
  • Reference
  • Downloads
  • Home
  • All Courses
  • Get Started with micro:bit and MakeCode

Get Started with micro:bit and MakeCode

Flash Projects with MakeCode Editor

What is a project?

A project, also called a program, is a set of instructions that a computer runs to make the computer perform tasks. Programs make phone apps do their jobs, and they also make web pages respond to your clicks and taps. Projects for the micro:bit can make it do all kinds of interesting apps as you will see. 

For the micro:bit to run a project, it first needs to be transferred to the micro:bit module’s flash memory. 

In this activity, you will use the micro:bit MakeCode Editor to make projects and to transfer projects into the micro:bit module’s flash memory.

The micro:Bit MakeCode Editor runs in your Chrome or Microsoft Edge browser. If you must be offline while writing and loading projects for your micro:bit, you may use the optional MakeCode installed on your computer.


Using the MakeCode Editor

The instructions below guide you step-by-step through connecting your micro:bit to your computer and running your first project.

Make sure to follow along and repeat the steps with your own micro:bit.

  • Open a browser and go to makecode.microbit.org.
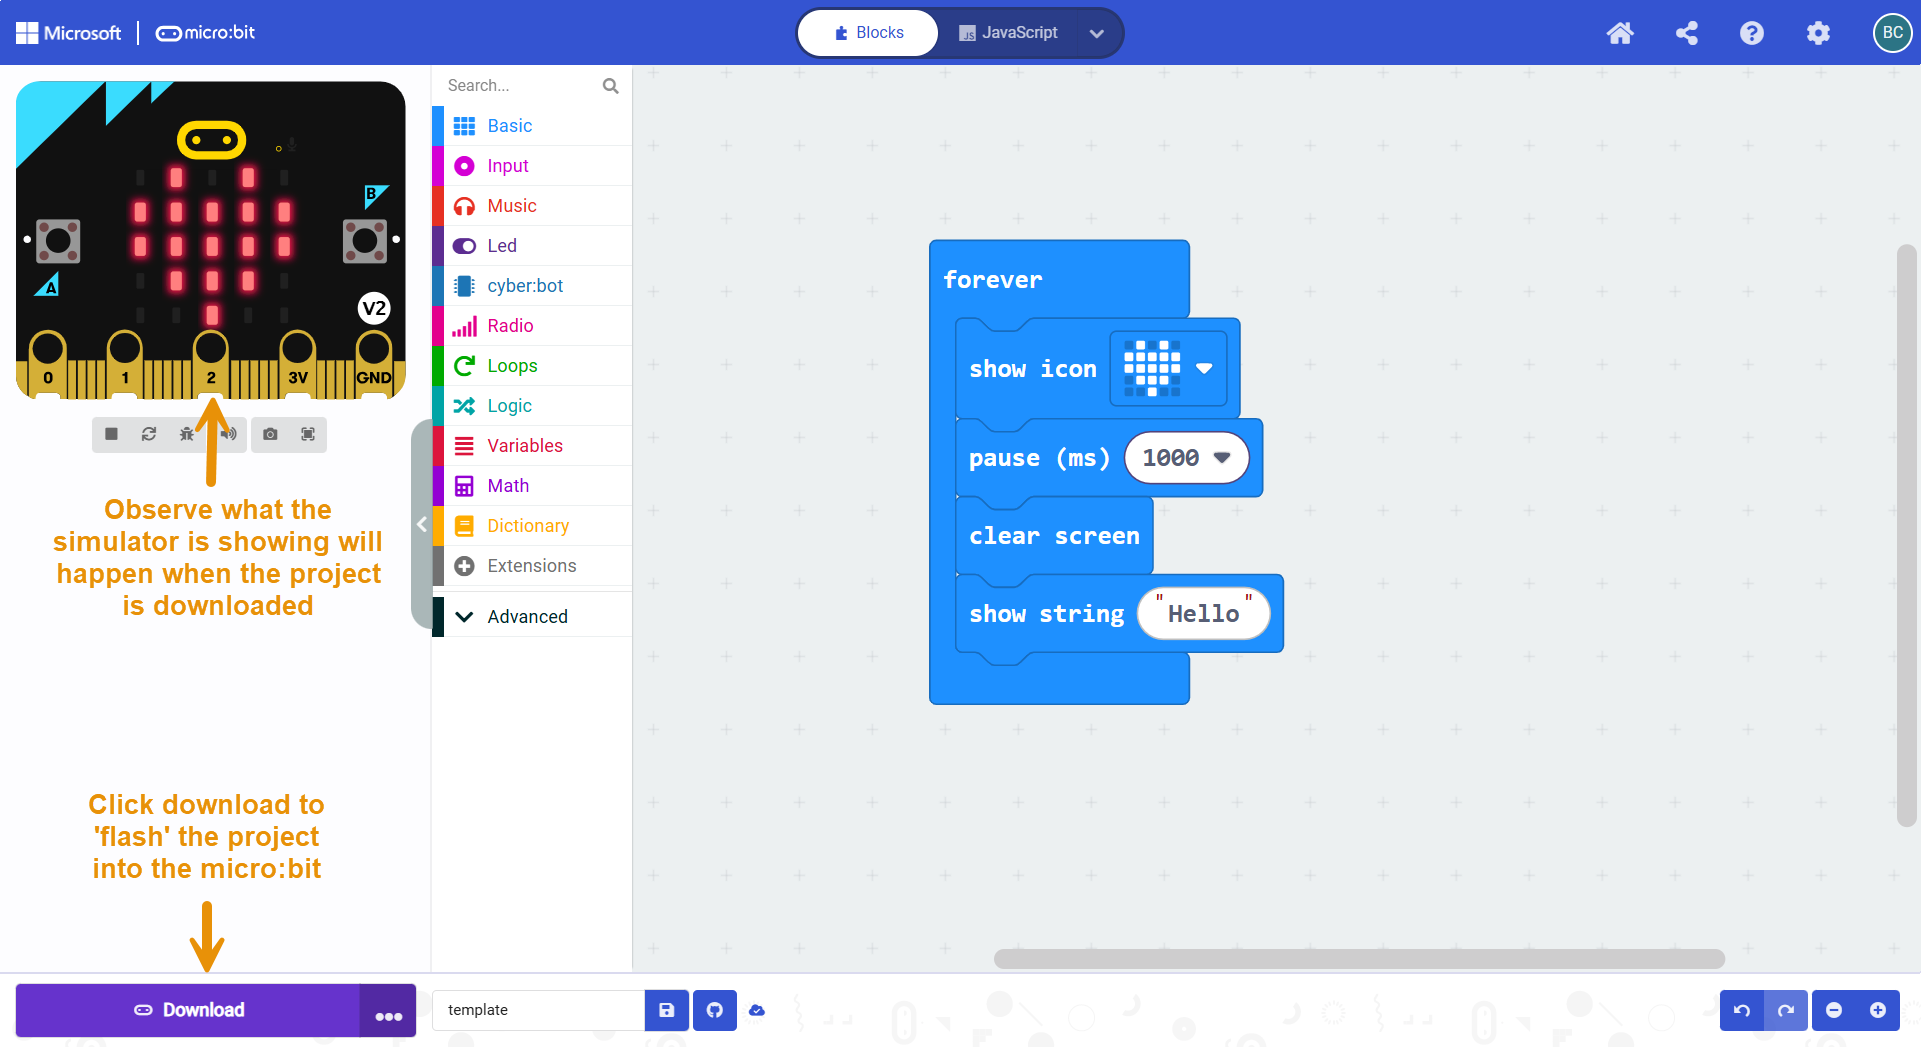
  • Enter the blocks shown below, look at the simulator on the left, and observe what the project will make the micro:bit do.
  • Click the Download button.
  • Observe what happens to your micro:bit, it should look the same as what the simulator is doing.

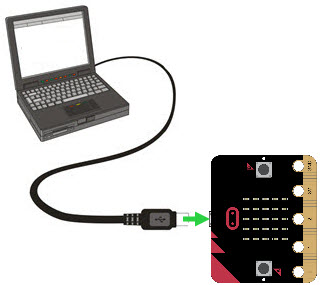
  • When the ‘Connect your micro:bit to your computer’ popup appears, connect the micro:bit to your computer with the USB cable (using your USB A to C Adapter if you need it). Then, click Next.

  • When the Pair your micro:bit to your browser popup appears, make a note of what it’s telling you to do in the next popup, namely: choose your micro:bit and then select Connect.  Click Next.
  • In the ‘makecode.microbit.org wants to connect’ popup: choose your micro:bit and click Connect.
  • Check for the micro:bit flashed image; it’s right next to the Download words on the button.

  • Check the micro:bit module’s LED matrix display to make sure what it displays matches what you saw in the simulation.


Printer-friendly version

Leave a Comment Cancel reply

Try This: Make Changes
Next

DISCUSSION FORUMS | PARALLAX INC. STORE

About | Terms of Use | Feedback: learn@parallax.com | Copyright©Parallax Inc. 2024

© 2025 Parallax Learn • Built with GeneratePress