Wire it: Connect with I²C (Python)
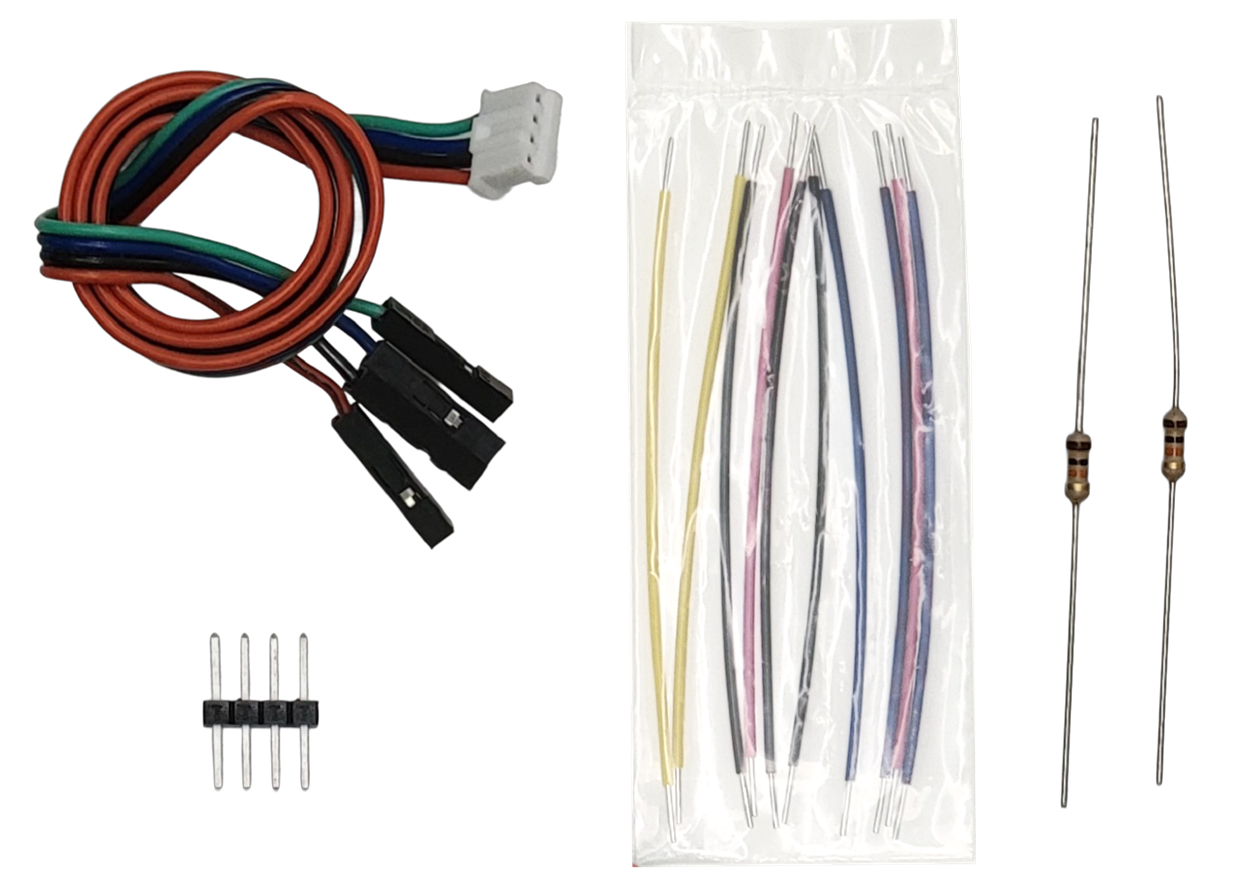
Parts
(1) JST plug to 4-socket cable
(1) Header: 4-pin
(2) Resistors: 10 kΩ (brown-black-orange-gold)
(4) Jumper wires
Recommended: 1 red, 1 black, 2 blue
Circuit
Build the circuit exactly as shown using the two 10 kΩ resistors, four jumper wires, and the four-post header.
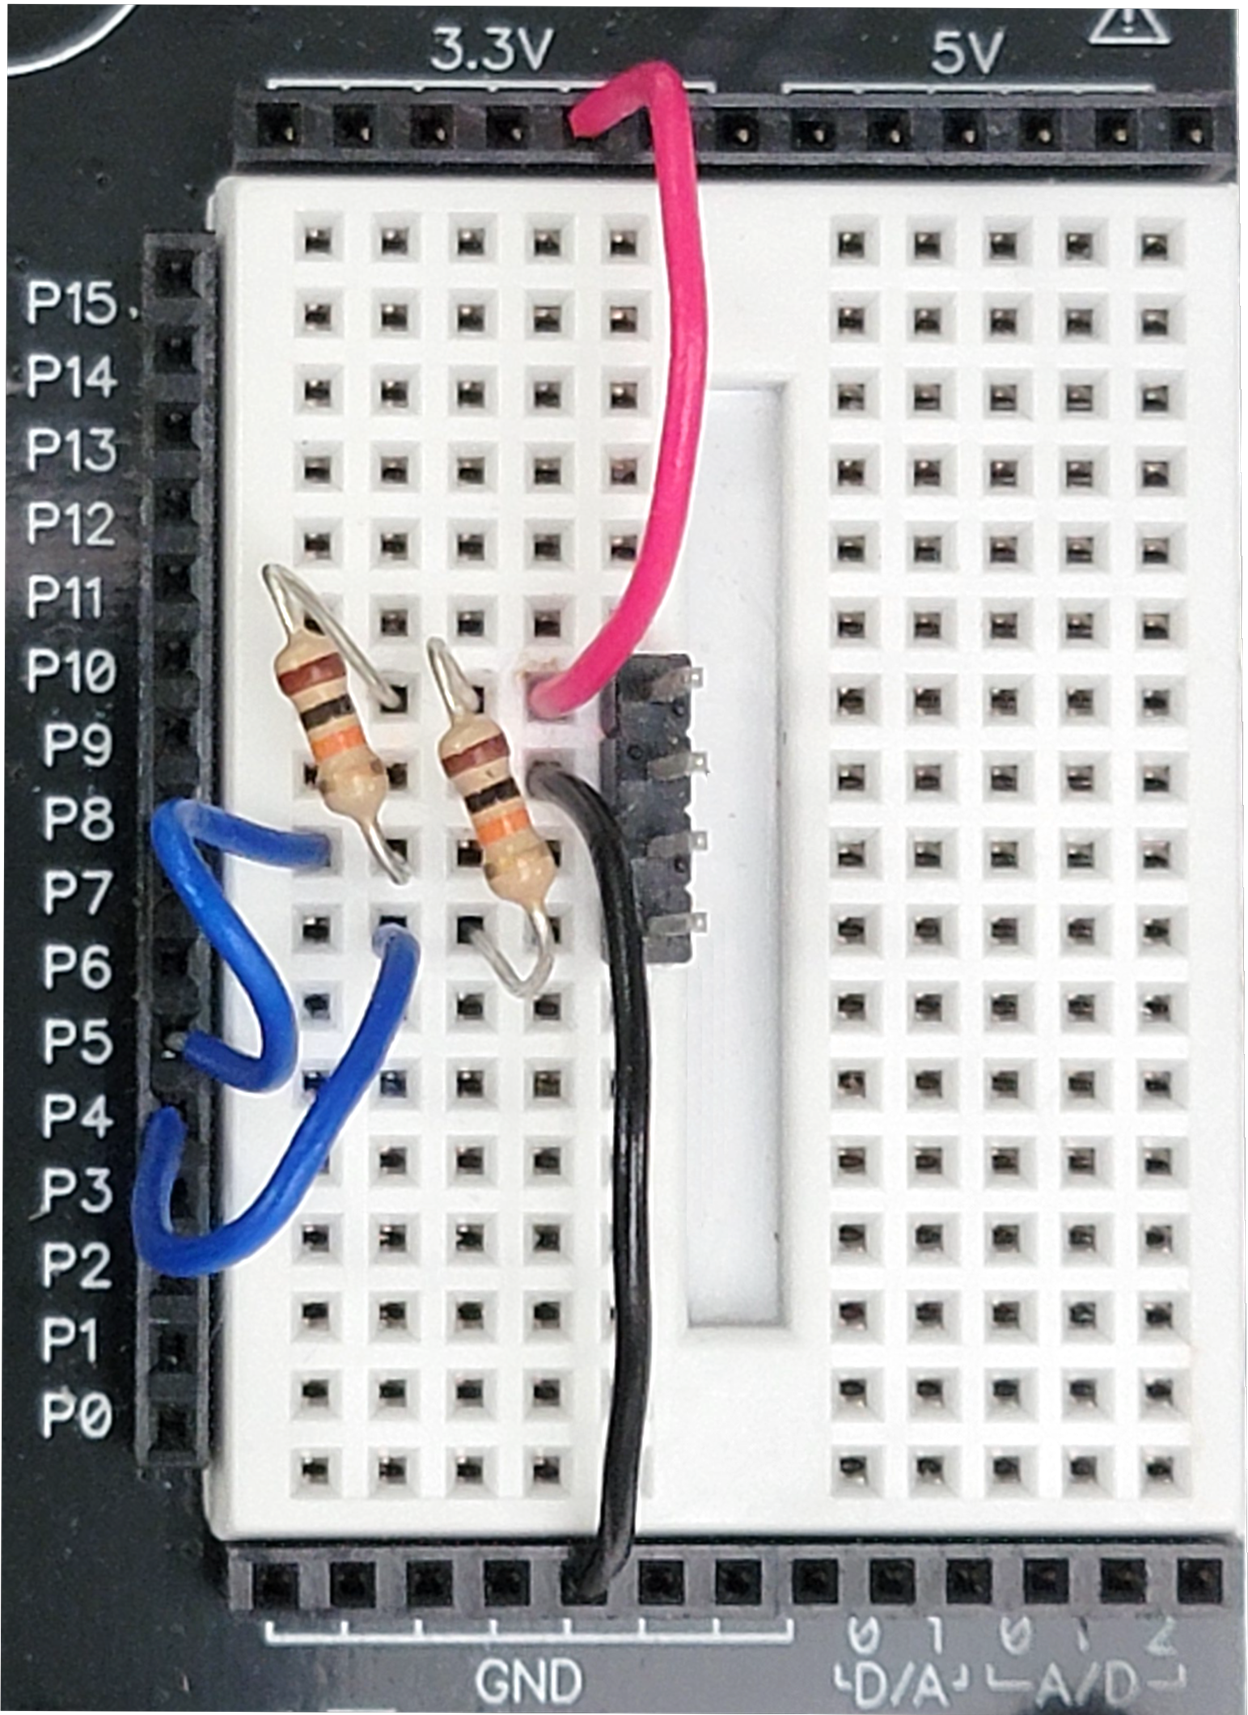
Connect the 4-wire harness’ sockets to the 4-pin header as shown: Red, black, blue, green
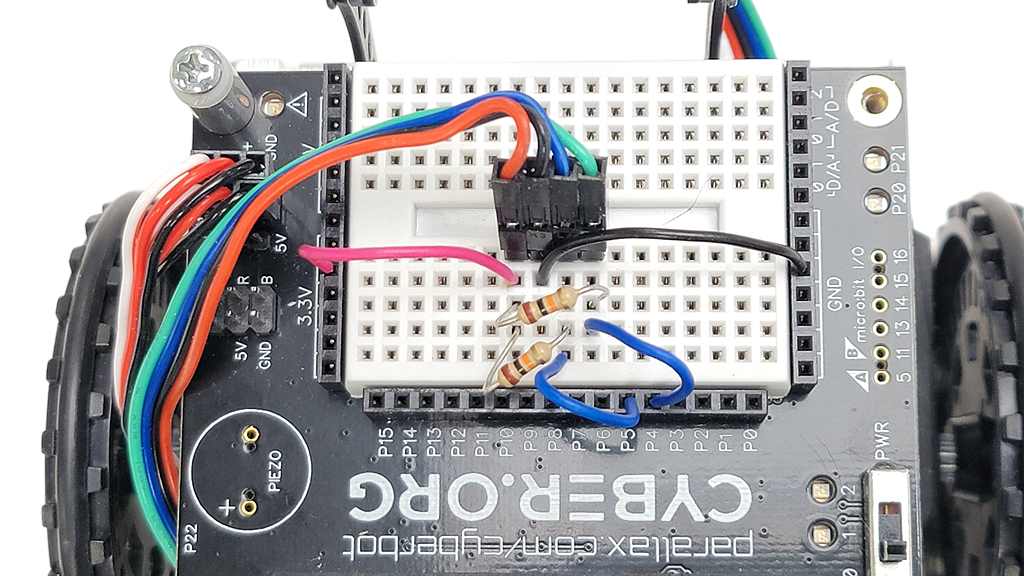
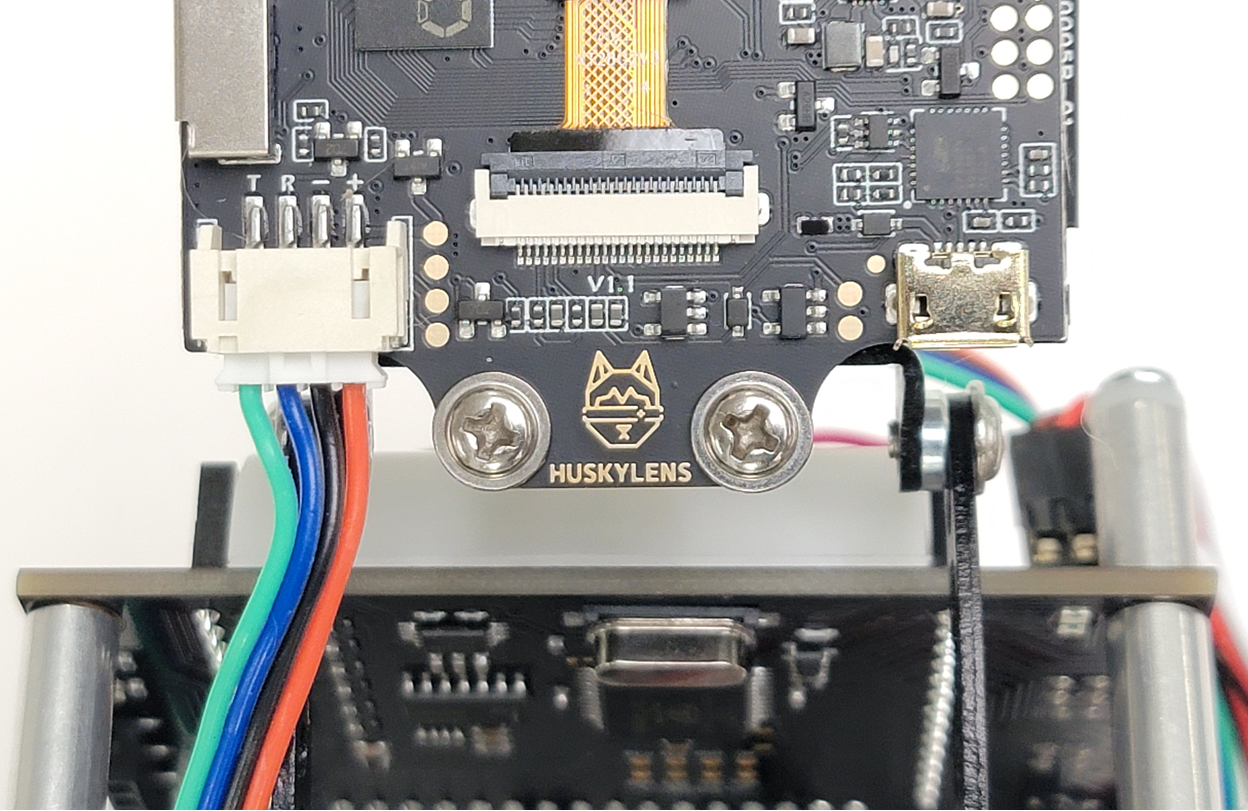
Connect the JST plug end of the cable to the HUSKYLENS JST socket.
About the Circuit
The four colored wires that connect the cyber:bot to the HUSKYLENS are:
- Red: 3.3 V power
- Blue: I²C serial clock (SCL) signal
- Green: I²C serial data (SDA) signal
- Black: Common ground
The micro:bit exchanges data with the HUSKYLENS with a communication protocol called I²C (pronounced eye-squared-see). P5 is connected to the I²C SCL line and P4 to SDA.

Did You Know
I²C (Inter-Integrated Circuit) is one of the most common communication protocols for connecting sensors and devices to microcontrollers. It uses just two wires—SDA (data) and SCL (clock)—to send information back and forth between devices like the micro#bit and the HUSKYLENS camera.