Skip to content
Parallax Learn

Parallax Learn

  • Welcome
  • Tutorials
        • Tutorial Series head tag

          Tutorial Series
        • Tutorial Series

          The special, classroom-ready series pages are organized collections of tutorials for our most popular hardware and/or languages. The tutorials for each topic are conveniently accessible from a single page, shown in the order it is recommended that they be completed.
        • Robotics Series Head tag

          Robotics Series
        • Robotics Series

          • Artificial Intelligence
          • Cybersecurity: Radio Data tutorialCybersecurity
          • cyber:bot + Python
          • cyber:bot + MakeCode
          • Boe-Bot Tutorial SeriesBoe-Bot
          • Arduino Shield-Bot
          • ActivityBot with C TutorialsActivityBot + C
          • ActivityBot with BlocklyProp Tutorial SeriesActivityBot + BlocklyProp
          • Scribbler 3 Tutorial SeriesScribbler 3
        • Electronics & Programming Series Head tag

          Electronics & Programming Series
          • BS2 Board of Education Tutorial SeriesBS2 Board of Education
          • Propeller C-Language BasicsPropeller C Basics
          • FLiP Try-It Kit C Tutorial SeriesFLiP Try-It Kit + C
          • FLiP Try-It Kit BlocklyProp TutorialsFLiP Try-It Kit + BlocklyProp
          • Badge WX Tutorial SeriesBadge WX
          • Propeller BlocklyProp Basics and ProjectsPropeller BlocklyProp Basics
          • View All Tutorial Series »
        • Browse Tutorials
        • Browse Tutorials

          Individual tutorials sorted by robot or kit, and language.
        • By Robot or Kit
          • ActivityBot
          • SumoBot WX
          • Boe-Bot
          • Shield-Bot
          • cyber:bot
          • Badge WX
          • ELEV-8
          • ARLO
        • By Language
        • By Language

          • Propeller C
          • Arduino
          • BlocklyProp
          • PBASIC
          • Python
          • MakeCode
          • View All Tutorials »
  • Educators
  • Reference
  • Downloads
  • Home
  • All Courses
  • Gripper 3.0 Assembly Instructions

Gripper 3.0 Assembly Instructions

Connect Brass Rod to Servo

Put the safety glasses on immediately! The Gripper has small parts, including a torsion spring which may be inadvertently released during assembly.

Note that this step has slightly modified instructions if you are using a Shield-Bot with Arduino.

  • Locate the small bag of servo horn connector parts. 

  • Remove the servo horn from the servo and SAVE THE BLACK SCREW.

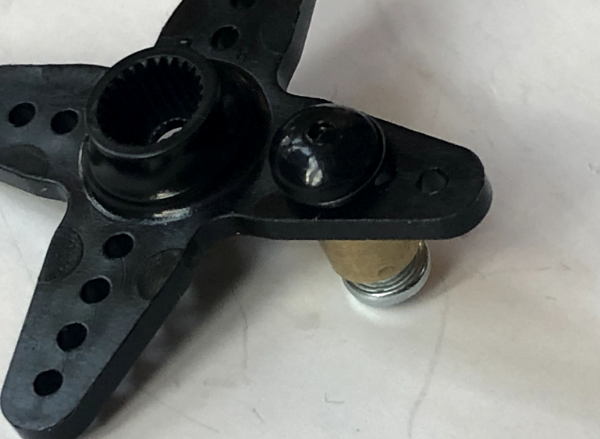
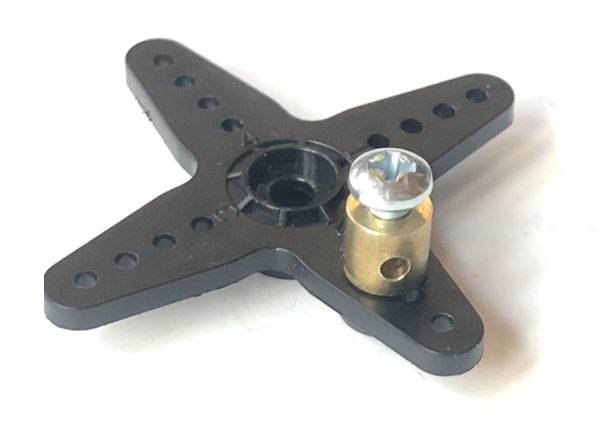
  • Mount the connector to the top of the servo horn. The hole to use depends on which robot you have:
    • For the Boe-Bot, ActivityBot, or cyber:bot: mount the servo horn connector parts on the second hole from the inside.
    • For the Shield-Bot, mount the servo horn connector parts on the third hole from the inside, to provide clearance for the Arduino Uno.
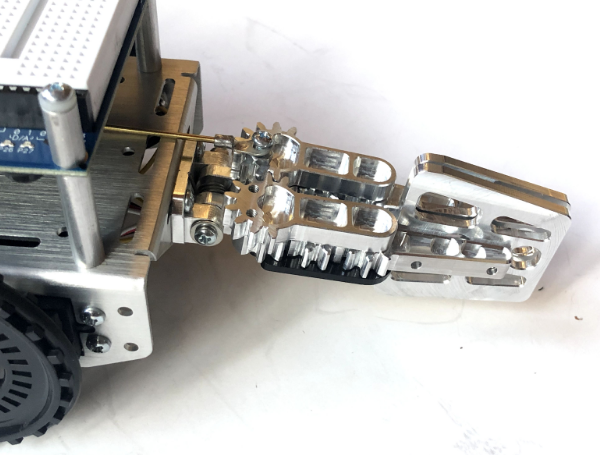
  • Find the flat, metal internal star-shaped keeper that attaches to the brass post. Press it on carefully and put the rubber dome over the top. Use pliers to lightly press the entire assembly together.
  • Attach the small screw to the brass keeper.

  • Close the Gripper as shown.

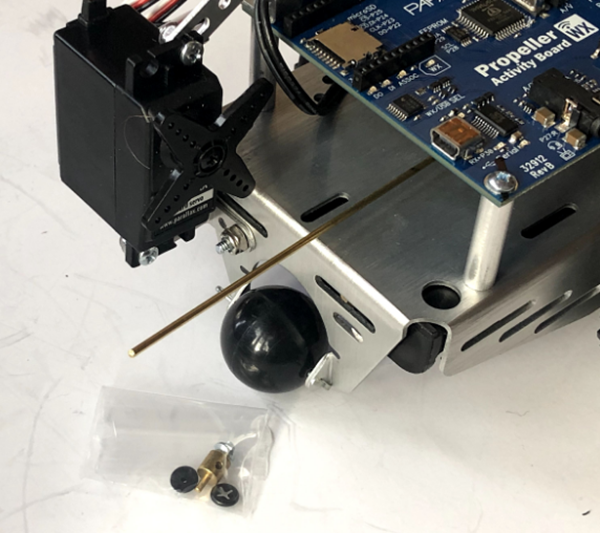
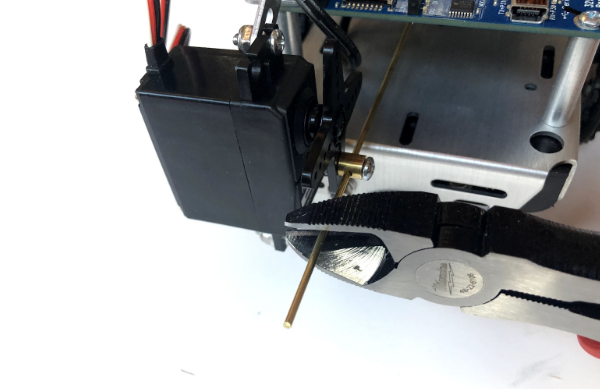
  • Place the servo horn back on the servo, with the brass wire keeper and brass rod in place. When centering the servo horn on the servo spline, verify that the middle of the servo’s range of motion moves freely at least 90 degrees (in both directions).
  •  Secure the servo horn with the saved black servo screw.
  • Cut the excess brass rod with right-angle cutters, allowing an inch or two of extra wire in case adjustments need to be made.

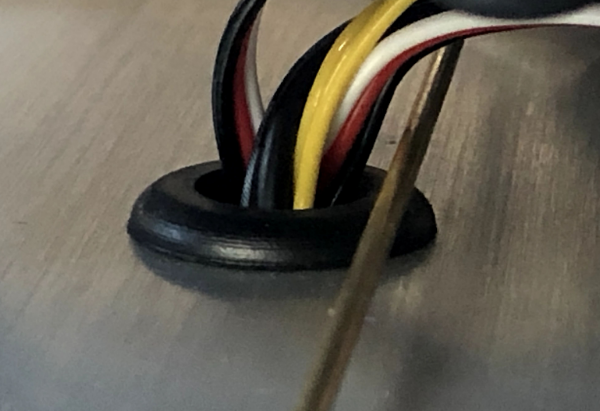
  • Check the brass rod for clearance from other wires in the robot chassis. Move the wires around as necessary to ensure that the brass rod doesn’t touch.
  • If you are using a Shield-Bot, make sure the brass rod does not touch the bottom of the Arduino Uno. If you need more clearance, move the brass keeper to the outermost hole in the servo horn.


Printer-friendly version

Leave a Comment Cancel reply

Attach the Servo
Prev
More Gear Grease and Foam Pads
Next

DISCUSSION FORUMS | PARALLAX INC. STORE

About | Terms of Use | Feedback: learn@parallax.com | Copyright©Parallax Inc. 2024

© 2025 Parallax Learn • Built with GeneratePress