Check for IR Interference
You might have found that your cyber:bot said it detected something even though nothing was in range. That may mean a nearby device is generating some IR light at a frequency close to 37.5 kHz. It might also mean that direct sunlight streaming through a window is causing false detections.
If you try to have a cyber:bot contest or demonstration near one of these light sources, your infrared systems could end up performing very poorly! So, before any public demo, make sure to check the prospective navigation area with this IR interference “sniffer” script ahead of time.
The concept behind this script is simple: don’t transmit any IR through the IR LEDs, just monitor to see if any IR is detected. If IR is detected, sound the alarm using the piezospeaker.
Many handheld remotes generate IR interference.
Many TVs, VCRs, CD/DVD players, and projectors use the same type of IR detectors you have on your cyber:bot right now. Look at the end of the device’s remote for an LED. If it is the kind of remote that must point directly at the device with a clear line of sight to work, it is likely using infrared. Try pointing it at your cyber:bot and repeatedly press/release one of the remote’s buttons to generate IR interference.
Example Script: IR_interference_sniffer
With this script, your cyber:bot will play a tone and turn on its indicator LEDs if it detects IR 37.5 kHz infrared signals. Since the script does not turn on the IR LEDs on the cyber:bot breadboard, a response means the IR interference has to be coming from an outside source.
If you are in a classroom, you can test with a separate cyber:bot that’s running test_both_IR_indicators. Just point its IR LEDs into the IR_interference_sniffer bot’s IR receivers.
If you don’t have a second cyber:bot, just use a handheld IR remote for a TV, VCR, CD/DVD player, or projector. Simply point the remote at the cyber:bot and repeatedly press and release one of its buttons. If the cyber:bot responds by sounding the alarm, you know your IR interference sniffer is working.
- Use the micro:bit Python Editor to open a previous cyber:bot project, like test_both_IR_indicators or cyberbot-template-with-blink.
- Set the project’s name to IR_interference_sniffer, update the script so that it matches the one below, and then click Save.
- Click Send to micro:bit.
# IR_interference_sniffer

from cyberbot import *

while True:
    while bot(2).read_digital() and bot(13).read_digital():
        bot(20).write_digital(0)
        bot(21).write_digital(0)
    bot(20).write_digital(1)
    bot(21).write_digital(1)
    bot(22).tone(4000, 20)
    sleep(20)
Your Turn – Test for IR Interference
- Set the cyber:bot board’s PWR switch to 1.
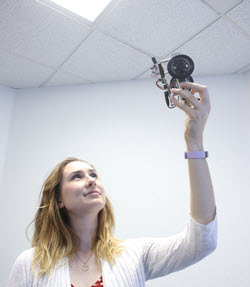
- Disconnect your cyber:bot from its programming cable, and walk around the room. Point your cyber:bot at light fixtures, uncovered windows, and electronic devices. Pay extra attention to fluorescent overhead lights where you plan to use your cyber:bot.
- If you get an alarm under a fluorescent light or near a device, try turning off that light or device and retesting to see if it is the source of the interference.
- If the IR interference source turns out to be sunlight streaming in through a window, close the blinds and retest, or move your obstacle course to a location that’s well away from the window.
- When you are done, set the cyber:bot board’s PWR switch to 0.
Always use this IR_interference_sniffer script to make sure that any area where you are using the cyber:bot is free of infrared interference.