Making Functions
In some of the earlier examples, your projects used a function named pause. This function made the micro:bit wait for a certain amount of time before allowing it to execute the next block in your project.
A function is a block of code that your project can call to make it do a certain job. In the case of pause, the block of code is tucked away with other functions in the microbit. When your project starts, it gets access to pause and several other functions through the categories.
Functions aren’t only found in places like the categories. You can also make your own functions and call them, all from within the same project. This is especially useful when you have a group of blocks that gets used in several different places in your program. After putting that group of blocks into a function and giving it a name, it just takes one block to call the function at any point.
Imagine you have ten blocks that need to be executed at four different locations in your project. With a function, you can reduce the extra code from forty blocks to fifteen. That’s ten blocks of code, one block to define the function’s name, and then single-block function calls from the four locations.
Since functions are such an important tool for keeping your program small and organized, this activity will guide you through adding functions to your Makecode projects and calling them.
Define a Function
The following project defines one function. The smile function simply displays a smile on the microbit’s display. It doesn’t take any inputs nor does it return anything.
Function definition: smile
- Examine the smile function definition project below.
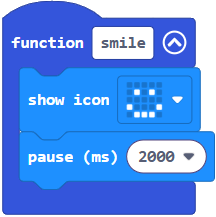
To make a function all you need to do is go to the functions category in the advanced section, then press make a function. After that, you can type in the desired name and choose the variable types that you want, you’re also able to name the variables that are used. If you add a return to the function a new type of call block becomes available that you can use to save the returned value in a variable.
- Enter, name, and flash the smile function definition project above to the micro:bit module.
The project doesn’t do anything! We defined a function but we didn’t call upon it.
- Add a call to the function in the smile project, and re-flash.
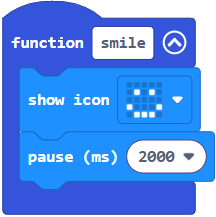
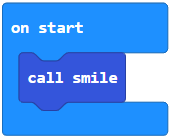
Example project: emote
The project smile didn’t have a very complex function. Let’s see what else we can do with functions! For example, we can nest if…else… blocks inside functions.
- Enter, name, and flash the project emote to your micro:bit.
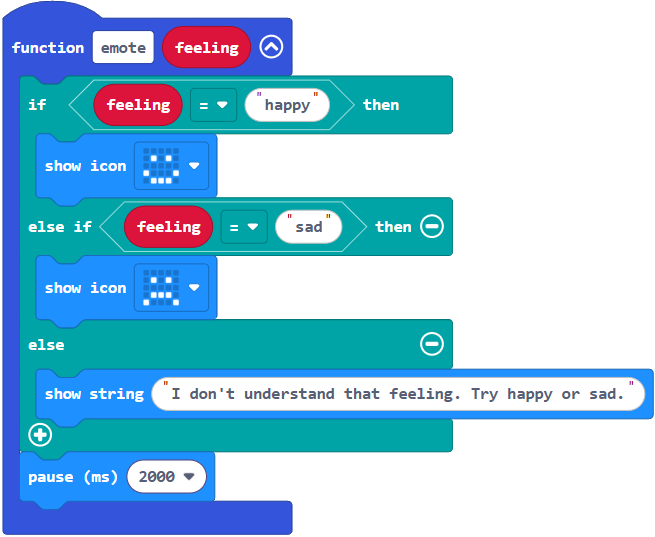
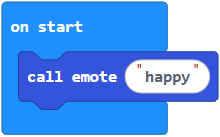
In the emote project, our function now has an input. That input is either the word “happy” or the word “sad”. When the function is called, it will use the nested if..else if..else block to determine if the feeling is happy, sad, or not understandable!
- Replace the word “happy” with “sad” and re-flash the project onto the microbit. What do you expect to see on the display?
Example project: adding
While the function in the emote project has an input, or parameter, that we can pass through it, it still doesn’t have anything it returns. The functions in the project adding both have parameters and return values.
- Enter, name, and flash the project adding to your micro:bit.
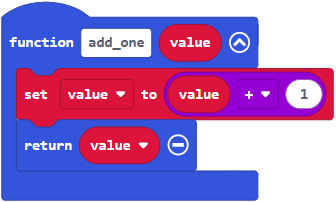
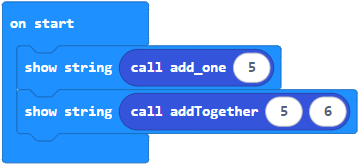
Notice how the add_one function takes one input. It then takes the input and adds one to it. It then returns the new result of that addition.
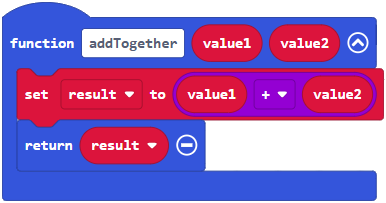
The addTogether function takes two inputs. It then adds those two inputs together and assigns the result to a new variable called result. It then returns that result.
Since neither of these functions cause the value to display, we can instead call them inside of the display’s show string method. This means we can pass functions through methods!
