Using RGB Color Values
Microcontrollers are built using lots and lots of transistors – and transistors are like switches. Switches can either be off or on. This means that microcontrollers only understand numbers when they can be written as a series of 1’s and 0’s. This is called binary. The Propeller microcontroller stores numbers as a series of 32 1’s and 0’s. For example, the number 238,472,910 in binary is:
0001110001101101100111011001110
The nice thing about binary numbers is that we can use them to store a few pieces of information in a single number. In BlocklyProp, color is stored into 24 of the 32 bits. 8 of the bits represent how much red there is, 8 of the bits represent how much green there is, and 8 of the bits represent how much blue there is in a color:
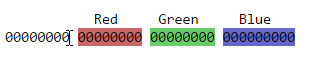
Each 8-bit part of the 32-bit number can hold a value ranging from 0 to 255.
You may have noticed a few blocks in the VALUES menu that refer to color:

You will use some of these blocks to generate different colors for the shapes you will draw on your Color OLED’s screen.
Example Program – RGB Values
This program will use the terminal to ask you for an amount of Red, Green, and Blue and use that information to draw a colored rectangle on the Color OLED’s screen. You will then be able to use this program to experiment with color and learn how the primary colors (Red, Green, and Blue) colors can be mixed together to create all of the other visible colors.
- In BlocklyProp Solo, make a new project for your board.
- Build the program shown below:
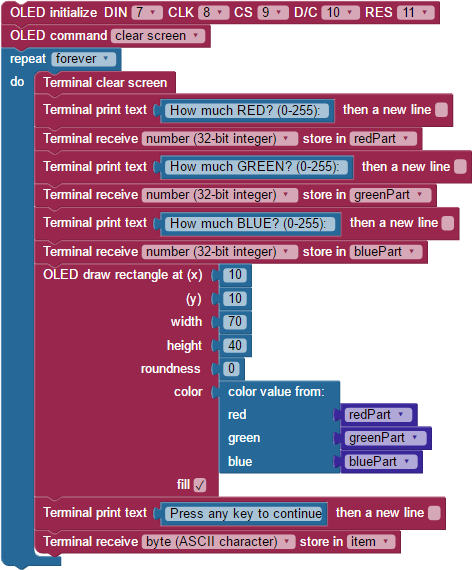
- Save the program, and then click the Run once button.
The Terminal window will appear and ask you to enter three values (one for red, one for green, and one for blue) between 0 and 255.
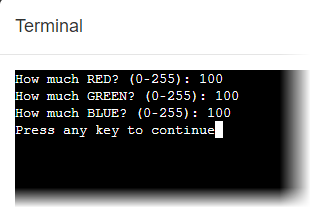
The program will combine the individual amounts of red, green, and blue into a color value and send it to the Color OLED screen:
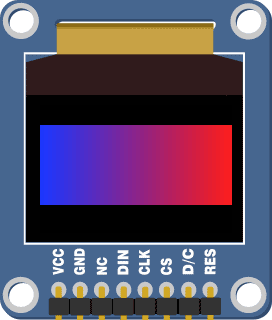
You may notice that your screen doesn’t represent the color exactly correctly – the Color OLED module uses very small Red, Green, and Blue LEDs inside each pixel to create a color, and the brightness of the component colors can vary slightly from module to module. This means that one module might have a slightly reddish tone while another module could have a slightly blueish tone.
Did You Know?
Color Models — This display is using the RGB color model, where red, green, and blue light are mixed to produce many other colors. It is an excellent model for electronic displays that emit light, and its array of three values in the 0-255 range is an easy format to understand. However, in programming there are other formats for representing color, including Hex and CYMK. To learn more about the other systems, and to easily convert from RGB to other formats, see https://www.w3schools.com/colors/colors_converter.asp.
Try This
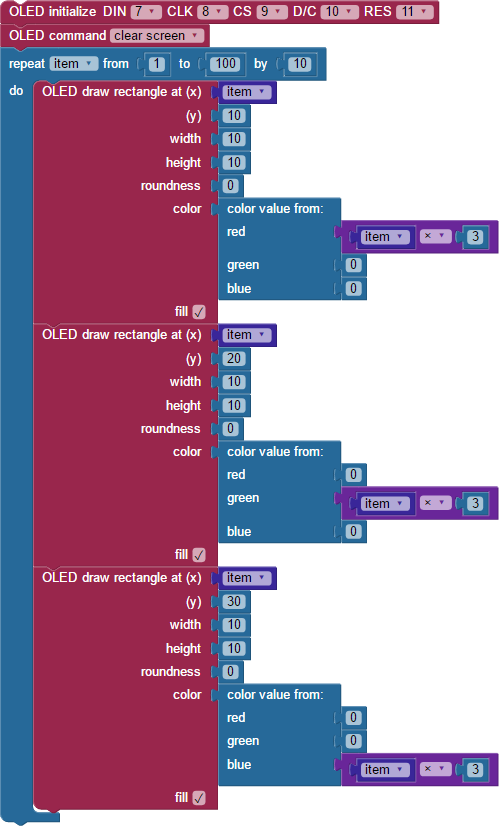
The next program will use the repeat item block to set the color (and position) of a rectangle.
- In BlocklyProp Solo, make a new project for your board.
- Build the program shown below:
- Save the program, and then click the Run once button.
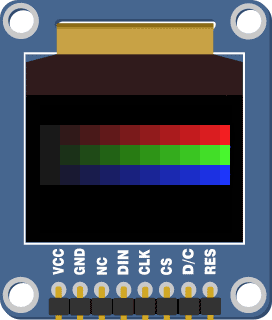
The Color OLED should display:
Your Turn
Instead of drawing a rectangle, try drawing lines to create a gradient – an area that transitions from one color to another: