Relay Information with JavaScript
One common task for Internet of Things (IoT) applications is for a page to send information to a “thing” on the internet. Whether it’s a web-controlled robot, a remote-controlled alarm system, or whatever else you can imagine, the principle is pretty much the same: the JavaScript code has to be able to accept an input, and send information to the Internet thing about the input it received.
Before sending info to your Activity Board’s Propeller microcontroller through the Wi-Fi module, let’s start with using JavaScript to change text in a web page.
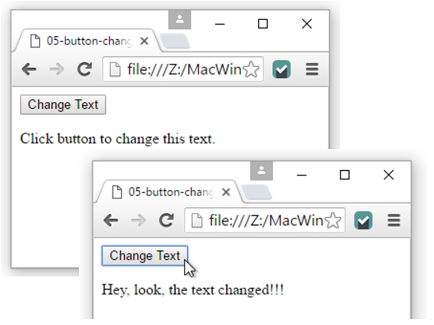
- Use your text editor to enter and save this as 05-button-changes-text.html.
- Open it with your Chrome browser and verify that the text below the button changes after you click it.
<html>
  <button onclick = "changeText()">Change Text</button>
  <p id = "myText">Click button to change this text.</p>

  <script>
    function changeText()
    {
       document.getElementById("myText").innerHTML =
       "Hey, look, the text changed!!!";
    }
  </script>
</html>
How it Works
In this example, the paragraph <p> tag was expanded to <p id = “myText”>. With this identifier, the JavaScript can modify this paragraph element using document.getElementById(“myText”).innerHTML = “Hey, look, the text changed!!!”;
In JavaScript, document is an example of an object. Objects have methods, which are actions that can be performed on their data, like getElementById(“myText”), which finds the element with the myText ID. Objects also have properties, and innerHTML is an example of one of the document object’s properties. By setting that innerHTML equal to “Hey, look, the text has changed!!!”, it replaces the existing innerHTML – Click button to change this text.”
Try This
We’ve given HTML button and paragraph elements IDs so that JavaScript can access and modify them. In this example, JavaScript uses a text input’s ID to get information, adds some text to it, and then displays that text in the web page.
- Click your text editor’s file menu, and select Save As…
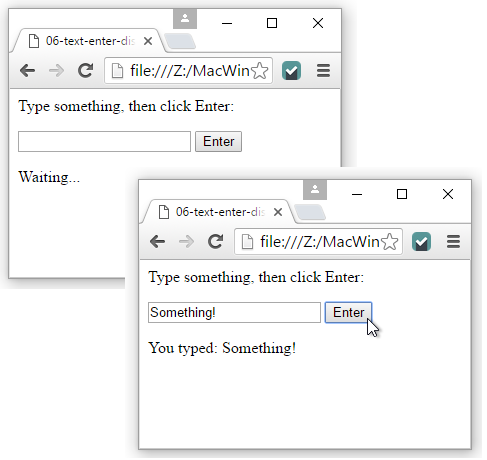
- This time, name your file 06-text-enter-display.html.
- Open it with your Chrome browser.
- Type some text into the text input.
- Click the Enter button and verify that it displays “You typed: “ followed by the message you typed.
<html>
  <p>Type something, then click Enter: </p>
  <input type = "text" id = "textField">
  <button onclick = "changeText()">Enter</button>
  <p id = "myText">Waiting...</p>

  <script>
    function changeText()
    {
       var x = document.getElementById("textField").value;

       document.getElementById("myText").innerHTML =
       "You typed: " + x;
    }
  </script>
</html>
How it Works
This creates the text input and gives it an ID <input type = “text” id = “textField”>. The button and paragraph also have IDs: <button onclick = “changeText()”>Enter</button> and <p id = “myText”>Waiting…</p>.
Inside the changeText function, var x = document.getElementById(“textField”).value declares a variable named x that receives the value contained in the text input. Next, document.getElementById(“myText”).innerHTML = “You typed: ” + x; adds “You typed: “ to whatever you typed in the text input and puts it in the paragraph with the myText ID.
This application of client server communication through JavaScript is called AJAX, and there’s some great tutorials on it too:
- w3schools.com AJAX Tutorial
- Tutorialspoint.com AJAX Tutorial