Skip to content
Parallax Learn

Parallax Learn

  • Welcome
  • Tutorials
        • Tutorial Series head tag

          Tutorial Series
        • Tutorial Series

          The special, classroom-ready series pages are organized collections of tutorials for our most popular hardware and/or languages. The tutorials for each topic are conveniently accessible from a single page, shown in the order it is recommended that they be completed.
        • Robotics Series Head tag

          Robotics Series
        • Robotics Series

          • Artificial Intelligence
          • Cybersecurity: Radio Data tutorialCybersecurity
          • cyber:bot + Python
          • cyber:bot + MakeCode
          • Boe-Bot Tutorial SeriesBoe-Bot
          • Arduino Shield-Bot
          • ActivityBot with C TutorialsActivityBot + C
          • ActivityBot with BlocklyProp Tutorial SeriesActivityBot + BlocklyProp
          • Scribbler 3 Tutorial SeriesScribbler 3
        • Electronics & Programming Series Head tag

          Electronics & Programming Series
          • BS2 Board of Education Tutorial SeriesBS2 Board of Education
          • Propeller C-Language BasicsPropeller C Basics
          • FLiP Try-It Kit C Tutorial SeriesFLiP Try-It Kit + C
          • FLiP Try-It Kit BlocklyProp TutorialsFLiP Try-It Kit + BlocklyProp
          • Badge WX Tutorial SeriesBadge WX
          • Propeller BlocklyProp Basics and ProjectsPropeller BlocklyProp Basics
          • View All Tutorial Series »
        • Browse Tutorials
        • Browse Tutorials

          Individual tutorials sorted by robot or kit, and language.
        • By Robot or Kit
          • ActivityBot
          • SumoBot WX
          • Boe-Bot
          • Shield-Bot
          • cyber:bot
          • Badge WX
          • ELEV-8
          • ARLO
        • By Language
        • By Language

          • Propeller C
          • Arduino
          • BlocklyProp
          • PBASIC
          • Python
          • MakeCode
          • View All Tutorials »
  • Educators
  • Reference
  • Downloads
  • Home
  • All Courses

Peeking Doll Project

Curriculum

  • 1 Section
  • 3 Lessons
  • Lifetime
Expand all sectionsCollapse all sections
  • Peeking Doll Project
    3
    • 1.0
      Build the Body Movement Mechanism
    • 1.1
      Build the Head Movement Mechanism
    • 1.2
      Wire and Program

Build the Body Movement Mechanism

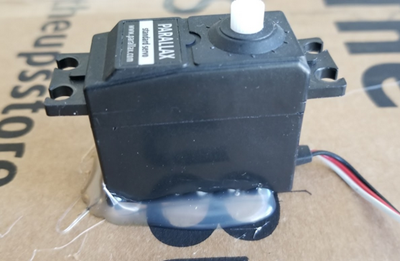
  • Take one of the standard servos from your Animation Kit and remove the servo horn.
  • Enlarge the outermost hole of one of the four points using a drill with a 32 bit (see picture below), and also drill a hole into one of the ends of the 12″ wooden dowel using the same size drill bit. These two pieces will be held together with a #4-40 screw and a #4-40 nut.

You don’t necessarily have to use this specific bit, screw and nut size; however, the idea is to attach these two pieces together so you’ll need to make sure the holes you choose to make are compatible with your mounting hardware and each other.

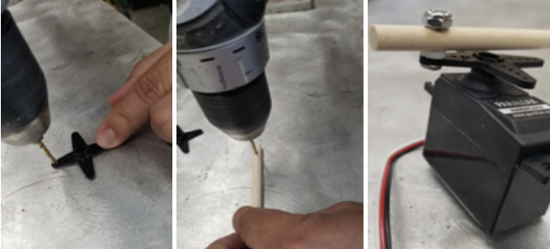
Make sure the screw and nut are not to tight, you want the joint it creates to move freely.

  • Reattach the servo horn to the servo after screwing together the dowel and horn.

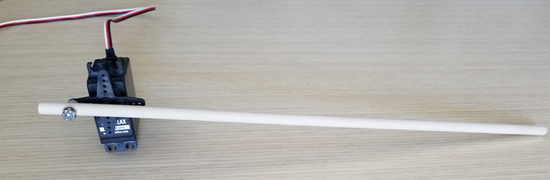
The body movement mechanism should end up looking like this:

 
Mount the Movement Parts to the Doll

Now that you have your two servo motion mechanisms built, it is time to mount them to the doll. Again, servo positioning is very important to get your desired motion. The combination of what position you mounted the servo horn into its spline and the actual position of the servo when you glue into the doll’s body makes a huge difference in the range of motion you’re going to get.

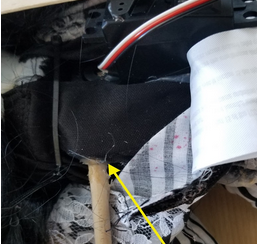
  • Use a pair of scissors to cut a small hole in the front fabric or body material so you can get to the doll’s audio box. If there is no audio box you may need to improvise a hard object in the doll to glue to dowel to.
  • Glue the side of the dowel opposite to the servo to the doll’s audio box.

Now you are ready to mount the servo on your platform of choice. You can mount the servo to a wall, bookshelf, waste basket etc. I chose to mount it onto a box. Remember the doll’s front needs to face the object you mount the servo to so it can “peek” out from behind it. If it’s an object you don’t want to potentially ruin with hot glue, you might need to find alternative ways to mount the servo or use a different item.

  • Gently turn the servo horn to observe its range of motion.
  • Make sure to arrange the servo in a way that gives the doll’s body the maximum horizontal rotational motion when your project is finished.
  • If you are satisfied with were the servo is and its rotational motion, go ahead and hot glue it.


Printer-friendly version
Build the Head Movement Mechanism
Next

DISCUSSION FORUMS | PARALLAX INC. STORE

About | Terms of Use | Feedback: learn@parallax.com | Copyright©Parallax Inc. 2024

© 2026 Parallax Learn • Built with GeneratePress