Skip to content
Parallax Learn

Parallax Learn

  • Welcome
  • Tutorials
        • Tutorial Series head tag

          Tutorial Series
        • Tutorial Series

          The special, classroom-ready series pages are organized collections of tutorials for our most popular hardware and/or languages. The tutorials for each topic are conveniently accessible from a single page, shown in the order it is recommended that they be completed.
        • Robotics Series Head tag

          Robotics Series
        • Robotics Series

          • Artificial Intelligence
          • Cybersecurity: Radio Data tutorialCybersecurity
          • cyber:bot + Python
          • cyber:bot + MakeCode
          • Boe-Bot Tutorial SeriesBoe-Bot
          • Arduino Shield-Bot
          • ActivityBot with C TutorialsActivityBot + C
          • ActivityBot with BlocklyProp Tutorial SeriesActivityBot + BlocklyProp
          • Scribbler 3 Tutorial SeriesScribbler 3
        • Electronics & Programming Series Head tag

          Electronics & Programming Series
          • BS2 Board of Education Tutorial SeriesBS2 Board of Education
          • Propeller C-Language BasicsPropeller C Basics
          • FLiP Try-It Kit C Tutorial SeriesFLiP Try-It Kit + C
          • FLiP Try-It Kit BlocklyProp TutorialsFLiP Try-It Kit + BlocklyProp
          • Badge WX Tutorial SeriesBadge WX
          • Propeller BlocklyProp Basics and ProjectsPropeller BlocklyProp Basics
          • View All Tutorial Series »
        • Browse Tutorials
        • Browse Tutorials

          Individual tutorials sorted by robot or kit, and language.
        • By Robot or Kit
          • ActivityBot
          • SumoBot WX
          • Boe-Bot
          • Shield-Bot
          • cyber:bot
          • Badge WX
          • ELEV-8
          • ARLO
        • By Language
        • By Language

          • Propeller C
          • Arduino
          • BlocklyProp
          • PBASIC
          • Python
          • MakeCode
          • View All Tutorials »
  • Educators
  • Reference
  • Downloads
  • Home
  • All Courses
  • Robotics with the Board of Education Shield for Arduino

Robotics with the Board of Education Shield for Arduino

Activity 1: Build and Test the Whiskers

Remember subsystem testing? First, we’ll build the whiskers circuits and write code to check their input states before using them in navigation sketches.

Whisker Circuit and Assembly

  • Gather the wisker hardware in the parts list.
  • Disconnect power from your board and servos.
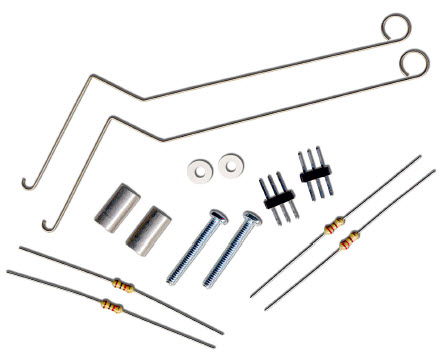
Parts List

(2)  whisker wires
(2)  7/8″ pan head 4-40 Phillips screws
(2)  ½″ round spacer
(2)  nylon washers,  size #4
(2)  3-pin m/m headers
(2)  resistors, 220 Ω (red-red-brown)
(2) resistors, 10 kΩ (brown-black-orange)
(misc) jumper wires

Building the Whiskers

  • Remove the LED circuits that were used as signal monitors while testing the servo navigation. 
  • Remove the two front screws that hold your board to the front standoffs.
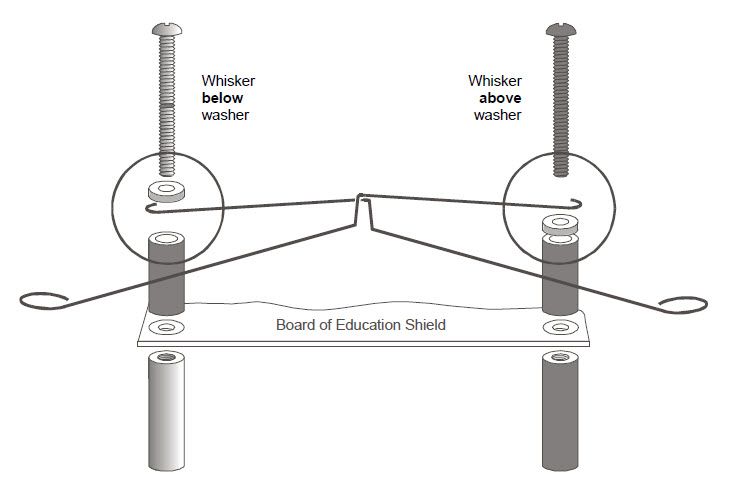
  • Thread a nylon washer and then a ½″ round spacer on each of the 7/8″ screws.
  • Attach the screws through the holes in your board and into the standoffs below, but do not tighten them all the way yet.
  • Slip the hooked ends of the whisker wires around the screws, one above a washer and the other below a washer, positioning them so they cross over each other without touching.
  • Tighten the screws into the standoffs.

  • Use the 220 Ω resistors (red‑red-brown) to connect digital pins 5 and 7 to their corresponding 3-pin headers.
  • Use the 10 kΩ resistors (brown-black-orange) to connect 5 V to each 3-pin header.
  • Make sure to adjust each whisker so that it is close to, but not touching, the 3-pin header on the breadboard.  A distance of about 1/8″ (3 mm) is about right.


Printer-friendly version
Chapter 5. Tactile Navigation with Whiskers
Prev
How Whisker Switches Work
Next

DISCUSSION FORUMS | PARALLAX INC. STORE

About | Terms of Use | Feedback: learn@parallax.com | Copyright©Parallax Inc. 2024

© 2025 Parallax Learn • Built with GeneratePress