Edit the FC Firmware for LEDs
If you haven’t done so already, follow the directions here (/courses/elev-8-v3-quadcopter-assembly-guide/step-22-install-software) to download the ELEV-8 v3 firmware using SimpleIDE. Make sure you understand how to upload firmware to your ELEV-8 v3. This project was tested with firmware version 1.0.2 and 1.0.3.
- Follow the instructions in step 23 to find and open the Flight Controller Firmware.
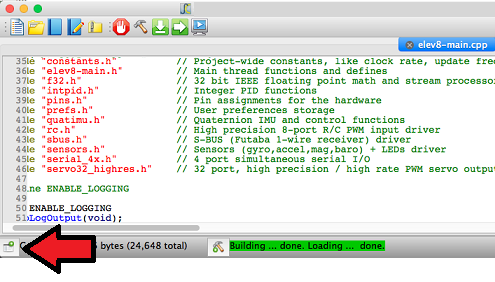
- With elev8-main.side open, click on the “Open Project Manager” icon in the lower left corner of the window:
A list of files will appear on the left side of the window.
- Click on elev8-main.h to open that file.
- Scroll down until you you find the line
#define LED_COUNT 2
- Edit the line to say
#define LED_COUNT 21

- Next, click on the elev8-main.cpp file in the Project Manager Window.
- In the elev8-main.cpp file, scroll down until you find the line (around line 135)
static long LEDModeColor;
- After that line, add the following code:
static short RunningLightModeStep; //LED Running light mode setting and counter variables
static char RunningLightMode;
- Next, scoll down until you find (around line 620)
UpdateFlightLEDColor();

//Test for flight mode change-----------------------------------------------
if( FlightEnabled == 0 )
{
- Inside of that if statement (immediately after the code listed above), add the following code. Pay close attention to the highlighted line. If you add or take away running light modes, you will need to come back and modify this line. If you have 4 modes, this line will say “RunningLightMode > 3” since the first mode is 0:
if( (Radio.Rudd < -750) && (-350 < Radio.Thro) && (Radio.Thro < 350) )  //is the left stick pushed straight to the left?
{
  if( (Radio.Aile > 750) && (-350 < Radio.Elev) && (Radio.Elev < 350) ) //is the right stick pushed straight to the right?
  {
    RunningLightModeStep++;               // add to the counter
    if (RunningLightModeStep >= 325)      // have the sticks been held there for 1.5 seconds?
    {
      RunningLightModeStep = 0;           // reset the counter
      RunningLightMode++;                 // increment to the next running light mode
      if (RunningLightMode > 1)  RunningLightMode = 0;   // This must be set for the number of different modes
      for( int i=0; i <= RunningLightMode; i++ )         // x short beep(s) to indicate the mode
      {
        BeepHz(4500, 100);
        waitcnt( CNT + 5000000 );
      }
      loopTimer = CNT;                    // because the beeper overruns the main loop timer, it must be reset
    }
  }
}
- Next, scroll all of the way to the bottom of the elev8-main.cpp code.
- Inside the last function in the elev8-main.cpp code, delete or comment out this line of code:
for( int i=0; i<led_count; i++ )
- Replace it with the following code:
  int idx = (LEDColorTable[FlightMode & 3] & LEDBrightMask) >> LEDBrightShift;   // get the color representing the current flight mode

  if(RunningLightMode == 0)   //Dim Running Lights
  {
    LEDValue[0]  = Color;
    LEDValue[1]  = LEDValue[6]  = LEDValue[11] = LEDValue[16] = idx;
    LEDValue[2]  = LEDValue[3]  = LEDValue[4]  = LEDValue[5]  = LED_Green & LED_Quarter;
    LEDValue[7]  = LEDValue[8]  = LEDValue[9]  = LEDValue[10] = LED_Green & LED_Quarter;
    LEDValue[12] = LEDValue[13] = LEDValue[14] = LEDValue[15] = LED_Red & LED_Quarter;
    LEDValue[17] = LEDValue[18] = LEDValue[19] = LEDValue[20] = LED_Red & LED_Quarter;
  }

  if(RunningLightMode == 1)   //Standard Running Lights
  {
    LEDValue[0]  = Color;
    LEDValue[1]  = LEDValue[6]  = LEDValue[11] = LEDValue[16] = idx;
    LEDValue[2]  = LEDValue[3]  = LEDValue[4]  = LEDValue[5]  = LED_Green;
    LEDValue[7]  = LEDValue[8]  = LEDValue[9]  = LEDValue[10] = LED_Green;
    LEDValue[12] = LEDValue[13] = LEDValue[14] = LEDValue[15] = LED_Red;
    LEDValue[17] = LEDValue[18] = LEDValue[19] = LEDValue[20] = LED_Red;
  }
- Save your project.
DO NOT CONNECT YOUR ELEV-8’s Battery. Make sure the propellers have been removed from your ELEV-8 quadcopter before continuing.
- Plug your ELEV-8 v3 Flight Controller into your computer and select the corresponding port from the drop-down menu.
- Click the Upload to EEPROM button.