Equations for Setting Servo Angles
Did you know? Two Equations in Two Unknowns
Two equations in two unknowns can be used to derive a formula for turning the servo to an angle of your choice. The final result needs to be y = mx + b, where x is the desired angle in degrees, and y is the argument for write_analog.
After solving for unknowns of m and b, we’ll have an equation that can be used in hand calculations, or in a script. You can also rearrange the terms in y = mx + b to x = (y – b) / m to solve for the angle if only the write_analog argument is known.
Since we want to be able to solve for the write_analog argument, let’s set y1 to 25.6 and y2 to 128.0. Then, x1 should be 0° and x2 should be 180°. The animation below shows how to solve for m and b. (See the .mp4 here.)

With these formulas, you can calculate:
y = 0.5689x + 25.6 duty cycle if angle is known
x = (y – 25.6) / 0.5689 angle if duty cycle is known
Example: The angle we want is 30°, calculate the duty cycle..
y = m x + b
= 0.5689 x 30 + 25.6
= 17.067 + 25.6
= 42.667
≈ 43
Example: The duty cycle is 43, what’s the resulting angle?
x = (y – 25.6) / 0.5689
= (43-25.6) / 0.5689
= 17.4 / 0.5689
≈ 30.59
≈ 31
Keep in mind that 26…128 is 103 possible integer duty cycle values (including 26). There would have to be more than 180 or more possible integers to get closer to all possible servo degree angles. Other microcontrollers do have the ability to split this duty cycle range into many hundreds or even thousands of integer options.
Your Turn
You can control the servo’s position with the Serial terminal, entering integers in the 23…128 range to set the servo horn’s angle.
Example script: terminal_controlled_servo
- Set the project name field to terminal_controlled_servo.
- Update your script to match the one below, then click Save.
- Click Send to micro:bit.
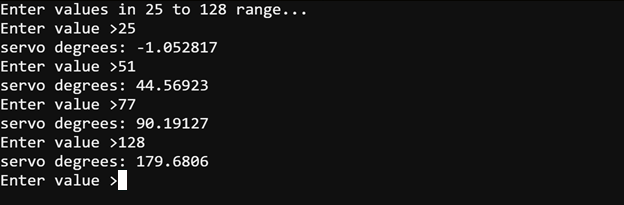
- Type in values in the 23 to 128 range at the prompt, and (roughly) compare the calculated horn angle to where the servo positioned it.
# terminal_controlled_servo

from microbit import *

pin16.set_analog_period(20)

print("Enter values in 26 to 128 range...")

while True:
    text = input("Enter value >")
    y = int(text)
    if y < 129 and y > 25:
        pin16.write_analog(y)
        x = (y - 25.6) / 0.5699
        print("servo degrees:", x)
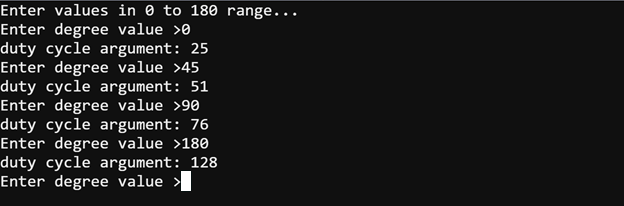
Your challenge is to modify the script so that you can enter degree values in the 0 to 180 range, and it will correctly calculate and set the position.
Hints:
- Convert the result of int(text) to x instead of y.
- In the if statement, restrict the values to below 181 and above -1
- Use y = x * 0.5689 + 25.6
- To get the integer results shown below, use y = int(y) as a step before using it in write_analog and print.