Skip to content
Parallax Learn

Parallax Learn

  • Welcome
  • Tutorials
        • Tutorial Series head tag

          Tutorial Series
        • Tutorial Series

          The special, classroom-ready series pages are organized collections of tutorials for our most popular hardware and/or languages. The tutorials for each topic are conveniently accessible from a single page, shown in the order it is recommended that they be completed.
        • Robotics Series Head tag

          Robotics Series
        • Robotics Series

          • Artificial Intelligence
          • Cybersecurity: Radio Data tutorialCybersecurity
          • cyber:bot + Python
          • cyber:bot + MakeCode
          • Boe-Bot Tutorial SeriesBoe-Bot
          • Arduino Shield-Bot
          • ActivityBot with C TutorialsActivityBot + C
          • ActivityBot with BlocklyProp Tutorial SeriesActivityBot + BlocklyProp
          • Scribbler 3 Tutorial SeriesScribbler 3
        • Electronics & Programming Series Head tag

          Electronics & Programming Series
          • BS2 Board of Education Tutorial SeriesBS2 Board of Education
          • Propeller C-Language BasicsPropeller C Basics
          • FLiP Try-It Kit C Tutorial SeriesFLiP Try-It Kit + C
          • FLiP Try-It Kit BlocklyProp TutorialsFLiP Try-It Kit + BlocklyProp
          • Badge WX Tutorial SeriesBadge WX
          • Propeller BlocklyProp Basics and ProjectsPropeller BlocklyProp Basics
          • View All Tutorial Series »
        • Browse Tutorials
        • Browse Tutorials

          Individual tutorials sorted by robot or kit, and language.
        • By Robot or Kit
          • ActivityBot
          • SumoBot WX
          • Boe-Bot
          • Shield-Bot
          • cyber:bot
          • Badge WX
          • ELEV-8
          • ARLO
        • By Language
        • By Language

          • Propeller C
          • Arduino
          • BlocklyProp
          • PBASIC
          • Python
          • MakeCode
          • View All Tutorials »
  • Educators
  • Reference
  • Downloads
  • Home
  • All Courses
  • Strings & Characters Primer

Strings & Characters Primer

Characters Inside Strings

Each string is a sequence of characters, where each character is defined by a code number.  For example, the string “ABC 123” is stored as a sequence of numbers: 65 65 66 67 32 49 50 51 66 49 50 51.  These numbers are called ASCII codes.  ASCII stands for American Standard Code for Information Exchange.  

  • Open the ASCII chart at this link.
  • Find the Dec ASCII codes for upper-case A, B, and Z.   
  • Find the Dec ASCII codes for lower-case a through z.
  • Find the Dec ASCII codes for digits.

You can use Python statements to return the ASCII code of a character, and also to return the character for a given ASCII code.  Let’s try that!

Example script: chars_in_strings_intro

  • Enter, name, and save chars_in_strings_intro.
  • Click the Send to micro:bit button.
# chars_in_strings_intro

from microbit import *

sleep(1000)

print("n = ASCII code for A")
n = ord("A")
print("n =", n)
print()
 
print("c = character with ASCII code 66")
c = chr(66)
print("c =", c)
print()
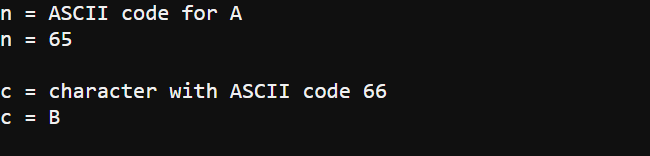
  • Check the results in the serial monitor.
  • Verify that it displays a message that the ASCII code for A is 65, and the character with the ASCII code 66 is B.
  • Try some of your own characters and ASCII codes.

How chars_in_strings_intro Works

The statement print(“n = ASCII code for A”) displays a heading to help give context to the messages below it.  

print("n = ASCII code for A")

The function ord() returns the ASCII code of a string that contains a single character.  The ASCII code for the character A is 65.  So, ord(“A”) returns 65, and n = ord(“A”) stores the value 65 in the variable n.  

n = ord("A")

After that, print(“n = “, n) displays “n =”, followed by the value of n, which is 65.  Lastly, the print() just prints an empty line.

print("n =", n)
print()

Note: the ord() function only works if the string contains a single character!   The MicroPython runtime doesn’t care whether you enclose characters in single or double-quotes, but single quotes for single characters are more readable.  Consider “A” vs. ’A’.

After that empty line, print(“c = character with ASCII code 66”) prints another heading.  

print("c = character with ASCII code 66")

The chr() function accepts an ASCII code, and returns that ASCII code’s character.  So, c = chr(66) stores the character B in a variable named c.  

c = chr(66)

Since c now stores the character B, print(“c =”, c) prints c = B.

print("c =", c)
print()


Printer-friendly version
Try This: Display with Variable Labels
Prev
Try This: Print Alphabets
Next

DISCUSSION FORUMS | PARALLAX INC. STORE

About | Terms of Use | Feedback: learn@parallax.com | Copyright©Parallax Inc. 2024

© 2025 Parallax Learn • Built with GeneratePress