Skip to content
Parallax Learn

Parallax Learn

  • Welcome
  • Tutorials
        • Tutorial Series head tag

          Tutorial Series
        • Tutorial Series

          The special, classroom-ready series pages are organized collections of tutorials for our most popular hardware and/or languages. The tutorials for each topic are conveniently accessible from a single page, shown in the order it is recommended that they be completed.
        • Robotics Series Head tag

          Robotics Series
        • Robotics Series

          • Artificial Intelligence
          • Cybersecurity: Radio Data tutorialCybersecurity
          • cyber:bot + Python
          • cyber:bot + MakeCode
          • Boe-Bot Tutorial SeriesBoe-Bot
          • Arduino Shield-Bot
          • ActivityBot with C TutorialsActivityBot + C
          • ActivityBot with BlocklyProp Tutorial SeriesActivityBot + BlocklyProp
          • Scribbler 3 Tutorial SeriesScribbler 3
        • Electronics & Programming Series Head tag

          Electronics & Programming Series
          • BS2 Board of Education Tutorial SeriesBS2 Board of Education
          • Propeller C-Language BasicsPropeller C Basics
          • FLiP Try-It Kit C Tutorial SeriesFLiP Try-It Kit + C
          • FLiP Try-It Kit BlocklyProp TutorialsFLiP Try-It Kit + BlocklyProp
          • Badge WX Tutorial SeriesBadge WX
          • Propeller BlocklyProp Basics and ProjectsPropeller BlocklyProp Basics
          • View All Tutorial Series »
        • Browse Tutorials
        • Browse Tutorials

          Individual tutorials sorted by robot or kit, and language.
        • By Robot or Kit
          • ActivityBot
          • SumoBot WX
          • Boe-Bot
          • Shield-Bot
          • cyber:bot
          • Badge WX
          • ELEV-8
          • ARLO
        • By Language
        • By Language

          • Propeller C
          • Arduino
          • BlocklyProp
          • PBASIC
          • Python
          • MakeCode
          • View All Tutorials »
  • Educators
  • Reference
  • Downloads
  • Home
  • All Courses
  • Strings & Characters Primer

Strings & Characters Primer

Try This: Print Alphabets

The variable name s is often used in projects to name strings. In projects where many string operations are performed, s might be used repeatedly as a temporary or working variable that ends up being many different strings, each for a brief period of time. Strings in the project that have important meanings should be given descriptive names. One example would be password = “abc123”. 

The variable name c can often be found as the name of a string if it stores a single character. 

A built-in function is a block that’s always there in Makecode. For strings, Makecode has four important built-in blocks:

  • char code from (“ ”) at () — Returns the ASCII value of a character
  • text from char code () — Returns the character of an ASCII value
  • length of () — Returns the length of a string
  • convert () to text — Converts other types of objects to string

The first and second blocks were just used in the last example project, and you will get to experiment with the third and fourth blocks in another activity.

The first 32 ASCII codes are control characters intended for older printers and storage devices. Some of them are still used with terminals today. For example, ASCII character 10, the line feed character, causes the terminal’s cursor to move down a line. In the previous activity, you used the escape sequence \n to add the ASCII 10 to strings.

Printable characters range from 32 (space) to 126 (~). As you have seen from experimentation, the upper-case alphabet uses codes 65 through 90, the lower-case alphabet uses 97-122, and digits are codes 48-57.

Imagine a project that repeatedly calls the text from char code () block inside a for… loop. The first time, it prints text from char code (65), the second time, it prints text from char code (66), and continues all the way through text from char code (90). What do you think you’d see? 

Example project: chars_in_strings_try_this

  • Enter and name characters_in_strings_try_this. 
  • Click the Download button.

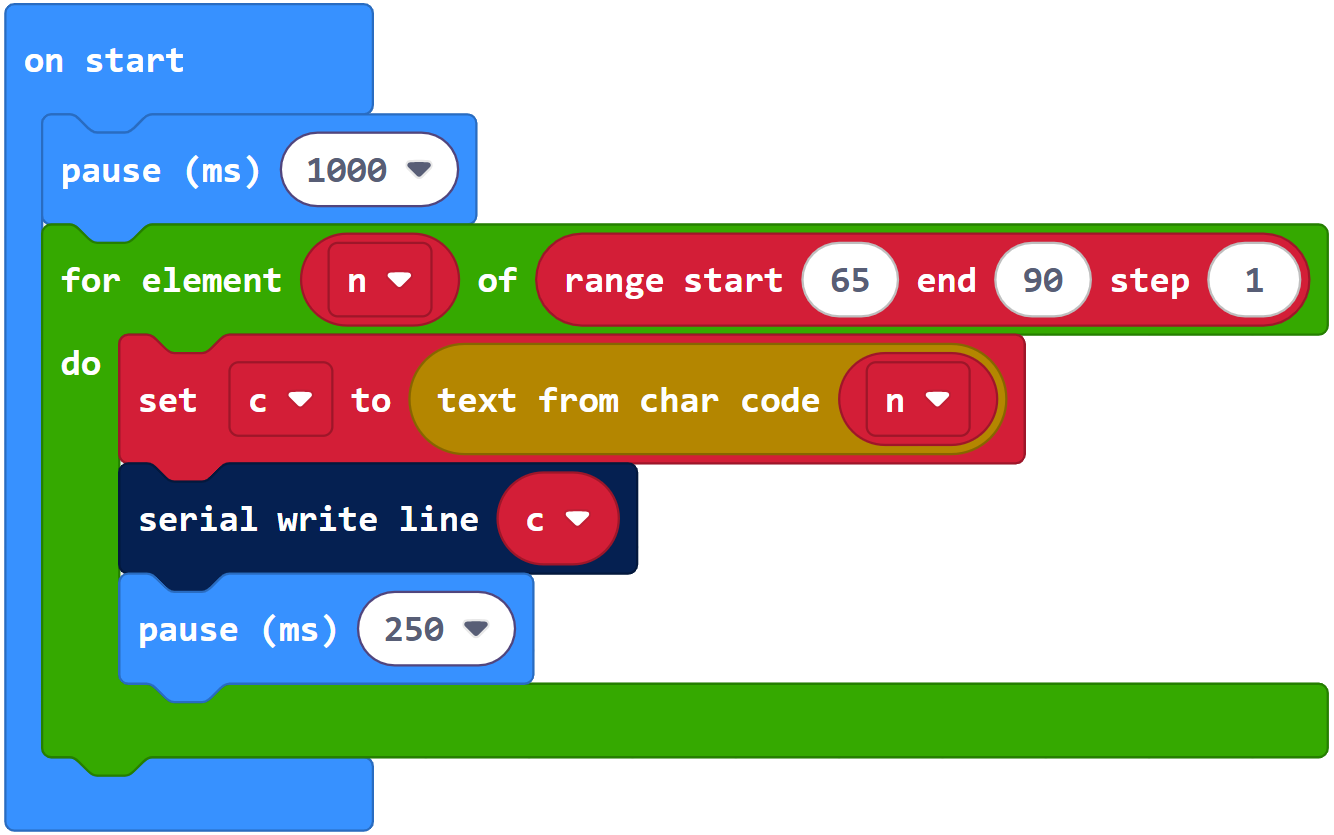
  • Check the results in the serial terminal.
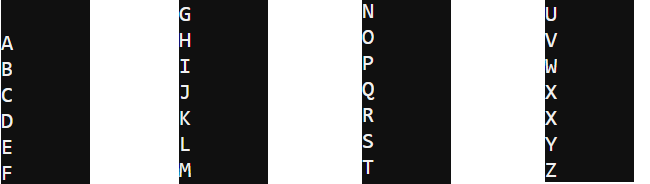
  • Verify that the terminal displays the characters A through Z.

  • For lowercase characters, try changing range start (65) end (90) step (1) to range start (97) end (122) step (1) and re-flashing the project. See the difference?
  • How about characters that represent digits? Try range start (48) end (57) step (1).

Printer-friendly version

Leave a Comment Cancel reply

Characters Inside Strings
Prev
Your Turn: Print ASCII Chart
Next

DISCUSSION FORUMS | PARALLAX INC. STORE

About | Terms of Use | Feedback: learn@parallax.com | Copyright©Parallax Inc. 2024

© 2025 Parallax Learn • Built with GeneratePress