")
Item code: 28036
What It Can Do
- Measures rotatation position in four directions
- Basic tilt sensing when accelerometer is not required
- Easy interface with two digital on/off outputs
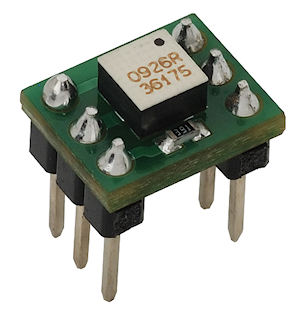
The 4-Directional Tilt Sensor indicates rotational position. Two digital (on/off) outputs indicate which side of the sensor is pointing down: the top, bottom, left, or right. The tilt sensor is an economical alternative to more expensive accelerometers, when precise angular feedback isn’t necessary.
The sensor provides two independent outputs, labeled Out 1 and Out 2, which together indicate which side of the device (top, bottom, left, right) is facing the ground. Inside the 4-Directional Tilt Sensor is a small captive ball that alternately blocks or allows light to strike a pair of photodetectors. Because this ball is sensitive to both gravity and very fast motion, the tilt sensor is best when attached to stationary or slower-moving objects.

The tilt sensor indicates rotational position in a single plane only. You can get rotational position in two planes by adding a second tilt sensor. Orient this sensor so that it’s at a right angle to the first.
Parts List
- 4-Directional Tilt Sensor
- BASIC Stamp 2 HomeWork board, Propeller Board of Education, Propeller QuickStart, or Arduino Uno microcontroller (solderless breadboard as needed)
- 22 gauge solid conductor hookup wire
Basic Wiring

- Power requirements: 3 to 5.5 VDC
- Communication: 2-pin high/low output for four sensor states
- Dimensions: 0.42 x 0.32 x 0.49 in (1.07 x 0.81 x 1.24 cm)
Program KickStarts
The example programs display the current Out 1 and Out 2 values of the 4-Directional Tilt Sensor in a terminal/debug window. The program is set to repeat indefinitely. Demonstrate the operation of the module by slowly rotating it on its four sides.
For all microcontrollers the values displayed in the window represent whether each output is off (0 is displayed) or on (1 is displayed).
BASIC Stamp HomeWork Board

Download BASIC Stamp 2 code for the 4-Directional Tilt Sensor
' {$STAMP BS2}
' {$PBASIC 2.5}

PAUSE 500	 ' Brief wait at start

DO
  DEBUG HOME, "Phototransistor 1: ", BIN1 IN0, CR,
              "Phototransistor 2: ", BIN1 IN1
  PAUSE 250  ' Wait 1/4 second
LOOP
When this program is run the BASIC Stamp Debug window will automatically open.
Propeller BOE and Propeller QuickStart

Propeller BOE Wiring Diagram

Propeller QuickStart Wiring Diagram
Download Propeller Spin code for the 4-Directional Tilt Sensor
OBJ

  pst : "Parallax Serial Terminal.spin"

CON

  _clkmode = xtal1 + PLL16X
  _xinfreq = 5_000_000

PUB Main

  dira[0..1]~ 	   ' Set pins 0 and 1 to inputs
  pst.Start(115_200) ' Parallax Serial Terminal at 115,200 baud

  repeat
    pst.Home
    pst.str(string("Phototransistor 1: "))
    pst.bin(ina[0], 1)   ' Display value for Out 1
    pst.NewLine
    pst.str(string("Phototransistor 2: "))
    pst.bin(ina[1], 1)   ' Display value for Out 2
    waitcnt(clkfreq / 4 + cnt)  'Wait 1/4 second
This program uses the Parallax Serial Terminal object, which is included with the Propeller Tool software download.
To view the results of the demonstration, after uploading is complete run the Parallax Serial Terminal from the Run menu, or press F12. Momentarily depress the Reset button on the Propeller QuickStart board to restart the program.
Arduino Uno

Download Arduino 1.0 Code for the 4-Directional Tilt Sensor
Download Arduino Pre-release Version Code for the 4-Directional Tilt Sensor
void setup() {
  Serial.begin(9600);
}

void loop() {
  Serial.print("Photo 1: ");
  Serial.print(digitalRead(6), DEC);   // Display Out 1 value
  Serial.print("; ");
  Serial.print("Photo 2: ");
  Serial.println(digitalRead(7), DEC); // Display Out 2 value
  delay(250);  // Wiat 1/4 second
}
To view the results of the demonstration, after uploading is complete click the Serial Monitor icon in the Arduino IDE. This displays the Serial Monitor window. Momentarily depress the Reset button on the Arduino board to restart the sketch.
For More Information
- Visit the full documentation for the 4-Directional Tilt Sensor (#28036).
- For precise tilt angles use an accelerometer, such as Memsic 2125 Dual-axis Accelerometer (#28017).