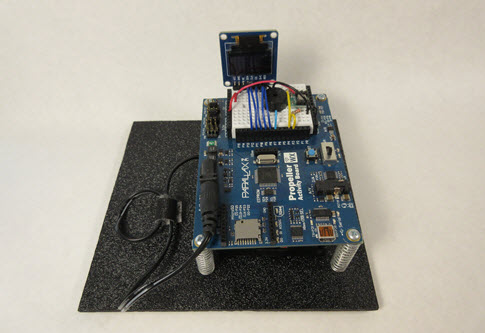
This Learn project was written by a long-time Parallax friend and robotics enthusiast, Carol Hazlett. Most of the parts come from the BlocklyProp Starter Kit, but several components will likely require a trip to a local hardware store.
This can be made with the Blocklyprop Starter Kit with the addition of four 5/8-inch-wide springs, eight 4/40 screws 5/8 inch in length, eight 4/40 nuts and a flat base which can be made of plastic, wood, or metal. This project can be done in just a couple of hours and will be fun for everybody.
From the BlocklyProp Starter Kit (#32520):
Additional hardware:
See picture below. The nuts should be positioned on the underside of the Activity Board, and on the top side of the base.
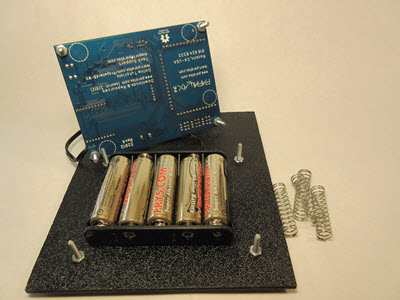
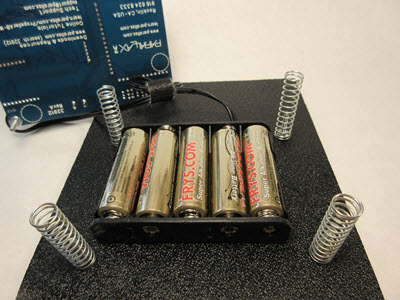
I used 1.5 inch-long by 5/8 inch-wide springs for the seismometer mounting. You want the springs to move freely so they should be long enough to keep screws from touching each other. This gives a very responsive base for the movement of whatever you set your seismometer on. I refer to the springs as “force amplifiers”. It is sensitive enough to drive you a little crazy if you put it on your desk! The width of the springs is to keep them in place by fitting snugly around the nuts.
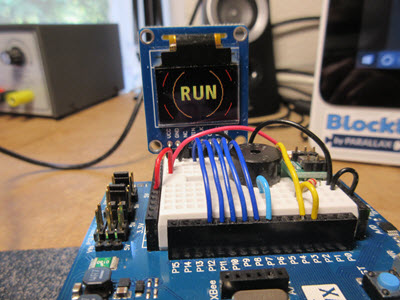
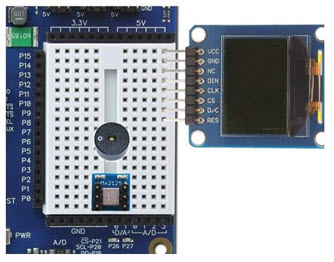
There are tutorials on these sensors on the Parallax Learn website using several languages to program them with, like Prop C, Spin, and Blocklyprop. We will be using Blocklyprop for this project because of its ease of use. Below on the left is a picture of the breadboard wiring without the sensors, and on the right is the sensor placement. You might want to place the piezospeaker and accelerometer before beginning your wiring, to make it easier. The OLED can be added after the wiring is complete.
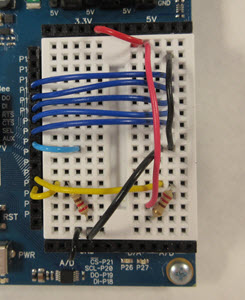
Below is a graphic representation of the wiring diagram without sensors installed, plus the schematics for each of the 3 sensors we’re using in this project. The brown lines are the 220-ohm resistors pictured above, and the line colors match the colors on the sensor schematics. Make sure your project agrees with these pinouts.
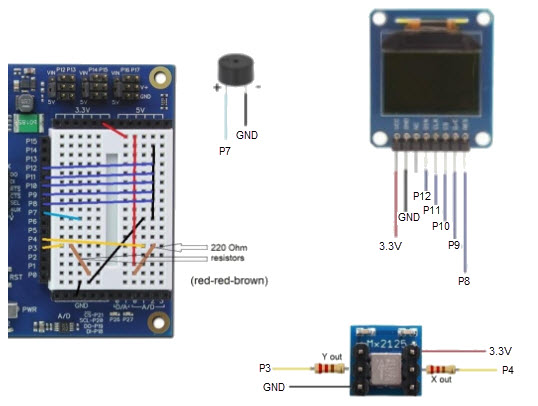
This is an image of the board fully wired, with sensors installed:


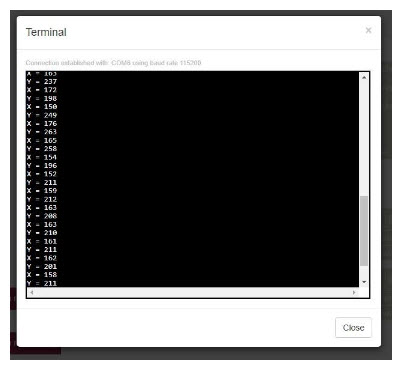
Once you have your wiring done you will want to know the numerical range of your Memsic sensor in order to give your program the correct numbers to look for when the board is shaken.
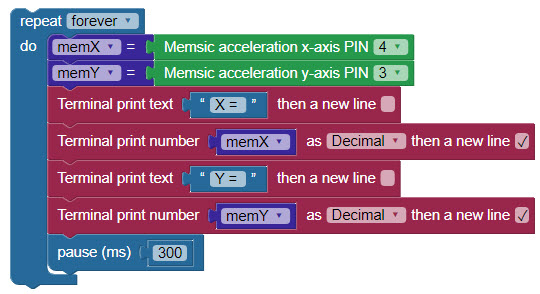
Anything over that will indicate movement.
Once you have your baseline numbers you can use them to program the logic to let your seismometer know when to sound off. The following Blocklyprop program is what I wrote for my seismometer but you can make your own noises and OLED graphics to suit yourself. It is easy to modify and there are many things you can do with the OLED! Be sure to replace my Memsic baseline numbers with your own.

The logic I used for the seismometer is: if the numbers coming from the Memsic sensor are greater than the numbers when it is in its steady state it will sound the alarm. I put the speaker and the OLED in their own functions to make it easy to change them when the whim hits me for something different or better. Do not forget to right click on a block and use the help function to get the information on a block and how to use it. I hope you enjoy this project!