Propeller BlocklyProp Block Reference
-
About Board Types
- About Board Types
- About Naming Things
- About Multicore
- About BlocklyProp Updates
- BlocklyProp Bulk Project Download
- Control
- Operators
- Values
- Arrays
- Variables
- Functions
- Pin states
- Communicate
- Sensor
- Memory
- Analog / Pulses
- Sound Impact Wiring & Example Code
- Audio
- ColorPal Wiring & Code Example
- Servo
- Badge Lock
- Robot
- Badge LEDs
- PIR Wiring & Example Code
- System
- Temp & Humidity
- Temperature & Humidity Sensor Wiring & Example Code
- Badge Buttons
- Memsic 2125 Wiring & Example Code
- GPS
- Fingerprint Scanner Wiring & Example Code
- Graph
- Joystick Wiring & Example Code
- RFID Wiring & Example Code
- PING))) Wiring & Example Code
- 4×4 Keypad Wiring & Example Code
- Air Quality BME680
- Badge Display
- LIS3DH Accelerometer
- 4 x 4 Keypad
- ePaper
- GPS Wiring & Example Code
- IR Remote Wiring & Example Code
- Fingerprint Scanner
- Advanced WX
- Simple WX
- WX WiFi
- RGB LEDs
- LSM9DS1 9-axis IMU
- PWM
- Pulse in / out
- Voltage
- RC time
- ColorPal
- Sound Impact Sensor
- Sony Remote
- RFID
- PIR
- Ping))) Distance
- MMA7455
- Memsic 2-axis
- 2-Axis Joystick
- HMC5883L
- XBee
- Protocols
- Terminal
- OLED
- Serial LCD
-
About Naming Things
- About Board Types
- About Naming Things
- About Multicore
- About BlocklyProp Updates
- BlocklyProp Bulk Project Download
- Control
- Operators
- Values
- Arrays
- Variables
- Functions
- Pin states
- Communicate
- Sensor
- Memory
- Analog / Pulses
- Sound Impact Wiring & Example Code
- Audio
- ColorPal Wiring & Code Example
- Servo
- Badge Lock
- Robot
- Badge LEDs
- PIR Wiring & Example Code
- System
- Temp & Humidity
- Temperature & Humidity Sensor Wiring & Example Code
- Badge Buttons
- Memsic 2125 Wiring & Example Code
- GPS
- Fingerprint Scanner Wiring & Example Code
- Graph
- Joystick Wiring & Example Code
- RFID Wiring & Example Code
- PING))) Wiring & Example Code
- 4×4 Keypad Wiring & Example Code
- Air Quality BME680
- Badge Display
- LIS3DH Accelerometer
- 4 x 4 Keypad
- ePaper
- GPS Wiring & Example Code
- IR Remote Wiring & Example Code
- Fingerprint Scanner
- Advanced WX
- Simple WX
- WX WiFi
- RGB LEDs
- LSM9DS1 9-axis IMU
- PWM
- Pulse in / out
- Voltage
- RC time
- ColorPal
- Sound Impact Sensor
- Sony Remote
- RFID
- PIR
- Ping))) Distance
- MMA7455
- Memsic 2-axis
- 2-Axis Joystick
- HMC5883L
- XBee
- Protocols
- Terminal
- OLED
- Serial LCD
-
About Multicore
- About Board Types
- About Naming Things
- About Multicore
- About BlocklyProp Updates
- BlocklyProp Bulk Project Download
- Control
- Operators
- Values
- Arrays
- Variables
- Functions
- Pin states
- Communicate
- Sensor
- Memory
- Analog / Pulses
- Sound Impact Wiring & Example Code
- Audio
- ColorPal Wiring & Code Example
- Servo
- Badge Lock
- Robot
- Badge LEDs
- PIR Wiring & Example Code
- System
- Temp & Humidity
- Temperature & Humidity Sensor Wiring & Example Code
- Badge Buttons
- Memsic 2125 Wiring & Example Code
- GPS
- Fingerprint Scanner Wiring & Example Code
- Graph
- Joystick Wiring & Example Code
- RFID Wiring & Example Code
- PING))) Wiring & Example Code
- 4×4 Keypad Wiring & Example Code
- Air Quality BME680
- Badge Display
- LIS3DH Accelerometer
- 4 x 4 Keypad
- ePaper
- GPS Wiring & Example Code
- IR Remote Wiring & Example Code
- Fingerprint Scanner
- Advanced WX
- Simple WX
- WX WiFi
- RGB LEDs
- LSM9DS1 9-axis IMU
- PWM
- Pulse in / out
- Voltage
- RC time
- ColorPal
- Sound Impact Sensor
- Sony Remote
- RFID
- PIR
- Ping))) Distance
- MMA7455
- Memsic 2-axis
- 2-Axis Joystick
- HMC5883L
- XBee
- Protocols
- Terminal
- OLED
- Serial LCD
-
About BlocklyProp Updates
- About Board Types
- About Naming Things
- About Multicore
- About BlocklyProp Updates
- BlocklyProp Bulk Project Download
- Control
- Operators
- Values
- Arrays
- Variables
- Functions
- Pin states
- Communicate
- Sensor
- Memory
- Analog / Pulses
- Sound Impact Wiring & Example Code
- Audio
- ColorPal Wiring & Code Example
- Servo
- Badge Lock
- Robot
- Badge LEDs
- PIR Wiring & Example Code
- System
- Temp & Humidity
- Temperature & Humidity Sensor Wiring & Example Code
- Badge Buttons
- Memsic 2125 Wiring & Example Code
- GPS
- Fingerprint Scanner Wiring & Example Code
- Graph
- Joystick Wiring & Example Code
- RFID Wiring & Example Code
- PING))) Wiring & Example Code
- 4×4 Keypad Wiring & Example Code
- Air Quality BME680
- Badge Display
- LIS3DH Accelerometer
- 4 x 4 Keypad
- ePaper
- GPS Wiring & Example Code
- IR Remote Wiring & Example Code
- Fingerprint Scanner
- Advanced WX
- Simple WX
- WX WiFi
- RGB LEDs
- LSM9DS1 9-axis IMU
- PWM
- Pulse in / out
- Voltage
- RC time
- ColorPal
- Sound Impact Sensor
- Sony Remote
- RFID
- PIR
- Ping))) Distance
- MMA7455
- Memsic 2-axis
- 2-Axis Joystick
- HMC5883L
- XBee
- Protocols
- Terminal
- OLED
- Serial LCD
-
BlocklyProp Bulk Project Download
- About Board Types
- About Naming Things
- About Multicore
- About BlocklyProp Updates
- BlocklyProp Bulk Project Download
- Control
- Operators
- Values
- Arrays
- Variables
- Functions
- Pin states
- Communicate
- Sensor
- Memory
- Analog / Pulses
- Sound Impact Wiring & Example Code
- Audio
- ColorPal Wiring & Code Example
- Servo
- Badge Lock
- Robot
- Badge LEDs
- PIR Wiring & Example Code
- System
- Temp & Humidity
- Temperature & Humidity Sensor Wiring & Example Code
- Badge Buttons
- Memsic 2125 Wiring & Example Code
- GPS
- Fingerprint Scanner Wiring & Example Code
- Graph
- Joystick Wiring & Example Code
- RFID Wiring & Example Code
- PING))) Wiring & Example Code
- 4×4 Keypad Wiring & Example Code
- Air Quality BME680
- Badge Display
- LIS3DH Accelerometer
- 4 x 4 Keypad
- ePaper
- GPS Wiring & Example Code
- IR Remote Wiring & Example Code
- Fingerprint Scanner
- Advanced WX
- Simple WX
- WX WiFi
- RGB LEDs
- LSM9DS1 9-axis IMU
- PWM
- Pulse in / out
- Voltage
- RC time
- ColorPal
- Sound Impact Sensor
- Sony Remote
- RFID
- PIR
- Ping))) Distance
- MMA7455
- Memsic 2-axis
- 2-Axis Joystick
- HMC5883L
- XBee
- Protocols
- Terminal
- OLED
- Serial LCD
-
Control
- About Board Types
- About Naming Things
- About Multicore
- About BlocklyProp Updates
- BlocklyProp Bulk Project Download
- Control
- Operators
- Values
- Arrays
- Variables
- Functions
- Pin states
- Communicate
- Sensor
- Memory
- Analog / Pulses
- Sound Impact Wiring & Example Code
- Audio
- ColorPal Wiring & Code Example
- Servo
- Badge Lock
- Robot
- Badge LEDs
- PIR Wiring & Example Code
- System
- Temp & Humidity
- Temperature & Humidity Sensor Wiring & Example Code
- Badge Buttons
- Memsic 2125 Wiring & Example Code
- GPS
- Fingerprint Scanner Wiring & Example Code
- Graph
- Joystick Wiring & Example Code
- RFID Wiring & Example Code
- PING))) Wiring & Example Code
- 4×4 Keypad Wiring & Example Code
- Air Quality BME680
- Badge Display
- LIS3DH Accelerometer
- 4 x 4 Keypad
- ePaper
- GPS Wiring & Example Code
- IR Remote Wiring & Example Code
- Fingerprint Scanner
- Advanced WX
- Simple WX
- WX WiFi
- RGB LEDs
- LSM9DS1 9-axis IMU
- PWM
- Pulse in / out
- Voltage
- RC time
- ColorPal
- Sound Impact Sensor
- Sony Remote
- RFID
- PIR
- Ping))) Distance
- MMA7455
- Memsic 2-axis
- 2-Axis Joystick
- HMC5883L
- XBee
- Protocols
- Terminal
- OLED
- Serial LCD
-
Operators
- About Board Types
- About Naming Things
- About Multicore
- About BlocklyProp Updates
- BlocklyProp Bulk Project Download
- Control
- Operators
- Values
- Arrays
- Variables
- Functions
- Pin states
- Communicate
- Sensor
- Memory
- Analog / Pulses
- Sound Impact Wiring & Example Code
- Audio
- ColorPal Wiring & Code Example
- Servo
- Badge Lock
- Robot
- Badge LEDs
- PIR Wiring & Example Code
- System
- Temp & Humidity
- Temperature & Humidity Sensor Wiring & Example Code
- Badge Buttons
- Memsic 2125 Wiring & Example Code
- GPS
- Fingerprint Scanner Wiring & Example Code
- Graph
- Joystick Wiring & Example Code
- RFID Wiring & Example Code
- PING))) Wiring & Example Code
- 4×4 Keypad Wiring & Example Code
- Air Quality BME680
- Badge Display
- LIS3DH Accelerometer
- 4 x 4 Keypad
- ePaper
- GPS Wiring & Example Code
- IR Remote Wiring & Example Code
- Fingerprint Scanner
- Advanced WX
- Simple WX
- WX WiFi
- RGB LEDs
- LSM9DS1 9-axis IMU
- PWM
- Pulse in / out
- Voltage
- RC time
- ColorPal
- Sound Impact Sensor
- Sony Remote
- RFID
- PIR
- Ping))) Distance
- MMA7455
- Memsic 2-axis
- 2-Axis Joystick
- HMC5883L
- XBee
- Protocols
- Terminal
- OLED
- Serial LCD
-
Values
- About Board Types
- About Naming Things
- About Multicore
- About BlocklyProp Updates
- BlocklyProp Bulk Project Download
- Control
- Operators
- Values
- Arrays
- Variables
- Functions
- Pin states
- Communicate
- Sensor
- Memory
- Analog / Pulses
- Sound Impact Wiring & Example Code
- Audio
- ColorPal Wiring & Code Example
- Servo
- Badge Lock
- Robot
- Badge LEDs
- PIR Wiring & Example Code
- System
- Temp & Humidity
- Temperature & Humidity Sensor Wiring & Example Code
- Badge Buttons
- Memsic 2125 Wiring & Example Code
- GPS
- Fingerprint Scanner Wiring & Example Code
- Graph
- Joystick Wiring & Example Code
- RFID Wiring & Example Code
- PING))) Wiring & Example Code
- 4×4 Keypad Wiring & Example Code
- Air Quality BME680
- Badge Display
- LIS3DH Accelerometer
- 4 x 4 Keypad
- ePaper
- GPS Wiring & Example Code
- IR Remote Wiring & Example Code
- Fingerprint Scanner
- Advanced WX
- Simple WX
- WX WiFi
- RGB LEDs
- LSM9DS1 9-axis IMU
- PWM
- Pulse in / out
- Voltage
- RC time
- ColorPal
- Sound Impact Sensor
- Sony Remote
- RFID
- PIR
- Ping))) Distance
- MMA7455
- Memsic 2-axis
- 2-Axis Joystick
- HMC5883L
- XBee
- Protocols
- Terminal
- OLED
- Serial LCD
-
Arrays
- About Board Types
- About Naming Things
- About Multicore
- About BlocklyProp Updates
- BlocklyProp Bulk Project Download
- Control
- Operators
- Values
- Arrays
- Variables
- Functions
- Pin states
- Communicate
- Sensor
- Memory
- Analog / Pulses
- Sound Impact Wiring & Example Code
- Audio
- ColorPal Wiring & Code Example
- Servo
- Badge Lock
- Robot
- Badge LEDs
- PIR Wiring & Example Code
- System
- Temp & Humidity
- Temperature & Humidity Sensor Wiring & Example Code
- Badge Buttons
- Memsic 2125 Wiring & Example Code
- GPS
- Fingerprint Scanner Wiring & Example Code
- Graph
- Joystick Wiring & Example Code
- RFID Wiring & Example Code
- PING))) Wiring & Example Code
- 4×4 Keypad Wiring & Example Code
- Air Quality BME680
- Badge Display
- LIS3DH Accelerometer
- 4 x 4 Keypad
- ePaper
- GPS Wiring & Example Code
- IR Remote Wiring & Example Code
- Fingerprint Scanner
- Advanced WX
- Simple WX
- WX WiFi
- RGB LEDs
- LSM9DS1 9-axis IMU
- PWM
- Pulse in / out
- Voltage
- RC time
- ColorPal
- Sound Impact Sensor
- Sony Remote
- RFID
- PIR
- Ping))) Distance
- MMA7455
- Memsic 2-axis
- 2-Axis Joystick
- HMC5883L
- XBee
- Protocols
- Terminal
- OLED
- Serial LCD
-
Variables
- About Board Types
- About Naming Things
- About Multicore
- About BlocklyProp Updates
- BlocklyProp Bulk Project Download
- Control
- Operators
- Values
- Arrays
- Variables
- Functions
- Pin states
- Communicate
- Sensor
- Memory
- Analog / Pulses
- Sound Impact Wiring & Example Code
- Audio
- ColorPal Wiring & Code Example
- Servo
- Badge Lock
- Robot
- Badge LEDs
- PIR Wiring & Example Code
- System
- Temp & Humidity
- Temperature & Humidity Sensor Wiring & Example Code
- Badge Buttons
- Memsic 2125 Wiring & Example Code
- GPS
- Fingerprint Scanner Wiring & Example Code
- Graph
- Joystick Wiring & Example Code
- RFID Wiring & Example Code
- PING))) Wiring & Example Code
- 4×4 Keypad Wiring & Example Code
- Air Quality BME680
- Badge Display
- LIS3DH Accelerometer
- 4 x 4 Keypad
- ePaper
- GPS Wiring & Example Code
- IR Remote Wiring & Example Code
- Fingerprint Scanner
- Advanced WX
- Simple WX
- WX WiFi
- RGB LEDs
- LSM9DS1 9-axis IMU
- PWM
- Pulse in / out
- Voltage
- RC time
- ColorPal
- Sound Impact Sensor
- Sony Remote
- RFID
- PIR
- Ping))) Distance
- MMA7455
- Memsic 2-axis
- 2-Axis Joystick
- HMC5883L
- XBee
- Protocols
- Terminal
- OLED
- Serial LCD
-
Functions
- About Board Types
- About Naming Things
- About Multicore
- About BlocklyProp Updates
- BlocklyProp Bulk Project Download
- Control
- Operators
- Values
- Arrays
- Variables
- Functions
- Pin states
- Communicate
- Sensor
- Memory
- Analog / Pulses
- Sound Impact Wiring & Example Code
- Audio
- ColorPal Wiring & Code Example
- Servo
- Badge Lock
- Robot
- Badge LEDs
- PIR Wiring & Example Code
- System
- Temp & Humidity
- Temperature & Humidity Sensor Wiring & Example Code
- Badge Buttons
- Memsic 2125 Wiring & Example Code
- GPS
- Fingerprint Scanner Wiring & Example Code
- Graph
- Joystick Wiring & Example Code
- RFID Wiring & Example Code
- PING))) Wiring & Example Code
- 4×4 Keypad Wiring & Example Code
- Air Quality BME680
- Badge Display
- LIS3DH Accelerometer
- 4 x 4 Keypad
- ePaper
- GPS Wiring & Example Code
- IR Remote Wiring & Example Code
- Fingerprint Scanner
- Advanced WX
- Simple WX
- WX WiFi
- RGB LEDs
- LSM9DS1 9-axis IMU
- PWM
- Pulse in / out
- Voltage
- RC time
- ColorPal
- Sound Impact Sensor
- Sony Remote
- RFID
- PIR
- Ping))) Distance
- MMA7455
- Memsic 2-axis
- 2-Axis Joystick
- HMC5883L
- XBee
- Protocols
- Terminal
- OLED
- Serial LCD
-
Pin states
- About Board Types
- About Naming Things
- About Multicore
- About BlocklyProp Updates
- BlocklyProp Bulk Project Download
- Control
- Operators
- Values
- Arrays
- Variables
- Functions
- Pin states
- Communicate
- Sensor
- Memory
- Analog / Pulses
- Sound Impact Wiring & Example Code
- Audio
- ColorPal Wiring & Code Example
- Servo
- Badge Lock
- Robot
- Badge LEDs
- PIR Wiring & Example Code
- System
- Temp & Humidity
- Temperature & Humidity Sensor Wiring & Example Code
- Badge Buttons
- Memsic 2125 Wiring & Example Code
- GPS
- Fingerprint Scanner Wiring & Example Code
- Graph
- Joystick Wiring & Example Code
- RFID Wiring & Example Code
- PING))) Wiring & Example Code
- 4×4 Keypad Wiring & Example Code
- Air Quality BME680
- Badge Display
- LIS3DH Accelerometer
- 4 x 4 Keypad
- ePaper
- GPS Wiring & Example Code
- IR Remote Wiring & Example Code
- Fingerprint Scanner
- Advanced WX
- Simple WX
- WX WiFi
- RGB LEDs
- LSM9DS1 9-axis IMU
- PWM
- Pulse in / out
- Voltage
- RC time
- ColorPal
- Sound Impact Sensor
- Sony Remote
- RFID
- PIR
- Ping))) Distance
- MMA7455
- Memsic 2-axis
- 2-Axis Joystick
- HMC5883L
- XBee
- Protocols
- Terminal
- OLED
- Serial LCD
-
Communicate
- About Board Types
- About Naming Things
- About Multicore
- About BlocklyProp Updates
- BlocklyProp Bulk Project Download
- Control
- Operators
- Values
- Arrays
- Variables
- Functions
- Pin states
- Communicate
- Sensor
- Memory
- Analog / Pulses
- Sound Impact Wiring & Example Code
- Audio
- ColorPal Wiring & Code Example
- Servo
- Badge Lock
- Robot
- Badge LEDs
- PIR Wiring & Example Code
- System
- Temp & Humidity
- Temperature & Humidity Sensor Wiring & Example Code
- Badge Buttons
- Memsic 2125 Wiring & Example Code
- GPS
- Fingerprint Scanner Wiring & Example Code
- Graph
- Joystick Wiring & Example Code
- RFID Wiring & Example Code
- PING))) Wiring & Example Code
- 4×4 Keypad Wiring & Example Code
- Air Quality BME680
- Badge Display
- LIS3DH Accelerometer
- 4 x 4 Keypad
- ePaper
- GPS Wiring & Example Code
- IR Remote Wiring & Example Code
- Fingerprint Scanner
- Advanced WX
- Simple WX
- WX WiFi
- RGB LEDs
- LSM9DS1 9-axis IMU
- PWM
- Pulse in / out
- Voltage
- RC time
- ColorPal
- Sound Impact Sensor
- Sony Remote
- RFID
- PIR
- Ping))) Distance
- MMA7455
- Memsic 2-axis
- 2-Axis Joystick
- HMC5883L
- XBee
- Protocols
- Terminal
- OLED
- Serial LCD
-
Sensor
- About Board Types
- About Naming Things
- About Multicore
- About BlocklyProp Updates
- BlocklyProp Bulk Project Download
- Control
- Operators
- Values
- Arrays
- Variables
- Functions
- Pin states
- Communicate
- Sensor
- Memory
- Analog / Pulses
- Sound Impact Wiring & Example Code
- Audio
- ColorPal Wiring & Code Example
- Servo
- Badge Lock
- Robot
- Badge LEDs
- PIR Wiring & Example Code
- System
- Temp & Humidity
- Temperature & Humidity Sensor Wiring & Example Code
- Badge Buttons
- Memsic 2125 Wiring & Example Code
- GPS
- Fingerprint Scanner Wiring & Example Code
- Graph
- Joystick Wiring & Example Code
- RFID Wiring & Example Code
- PING))) Wiring & Example Code
- 4×4 Keypad Wiring & Example Code
- Air Quality BME680
- Badge Display
- LIS3DH Accelerometer
- 4 x 4 Keypad
- ePaper
- GPS Wiring & Example Code
- IR Remote Wiring & Example Code
- Fingerprint Scanner
- Advanced WX
- Simple WX
- WX WiFi
- RGB LEDs
- LSM9DS1 9-axis IMU
- PWM
- Pulse in / out
- Voltage
- RC time
- ColorPal
- Sound Impact Sensor
- Sony Remote
- RFID
- PIR
- Ping))) Distance
- MMA7455
- Memsic 2-axis
- 2-Axis Joystick
- HMC5883L
- XBee
- Protocols
- Terminal
- OLED
- Serial LCD
-
Memory
- About Board Types
- About Naming Things
- About Multicore
- About BlocklyProp Updates
- BlocklyProp Bulk Project Download
- Control
- Operators
- Values
- Arrays
- Variables
- Functions
- Pin states
- Communicate
- Sensor
- Memory
- Analog / Pulses
- Sound Impact Wiring & Example Code
- Audio
- ColorPal Wiring & Code Example
- Servo
- Badge Lock
- Robot
- Badge LEDs
- PIR Wiring & Example Code
- System
- Temp & Humidity
- Temperature & Humidity Sensor Wiring & Example Code
- Badge Buttons
- Memsic 2125 Wiring & Example Code
- GPS
- Fingerprint Scanner Wiring & Example Code
- Graph
- Joystick Wiring & Example Code
- RFID Wiring & Example Code
- PING))) Wiring & Example Code
- 4×4 Keypad Wiring & Example Code
- Air Quality BME680
- Badge Display
- LIS3DH Accelerometer
- 4 x 4 Keypad
- ePaper
- GPS Wiring & Example Code
- IR Remote Wiring & Example Code
- Fingerprint Scanner
- Advanced WX
- Simple WX
- WX WiFi
- RGB LEDs
- LSM9DS1 9-axis IMU
- PWM
- Pulse in / out
- Voltage
- RC time
- ColorPal
- Sound Impact Sensor
- Sony Remote
- RFID
- PIR
- Ping))) Distance
- MMA7455
- Memsic 2-axis
- 2-Axis Joystick
- HMC5883L
- XBee
- Protocols
- Terminal
- OLED
- Serial LCD
-
Analog / Pulses
- About Board Types
- About Naming Things
- About Multicore
- About BlocklyProp Updates
- BlocklyProp Bulk Project Download
- Control
- Operators
- Values
- Arrays
- Variables
- Functions
- Pin states
- Communicate
- Sensor
- Memory
- Analog / Pulses
- Sound Impact Wiring & Example Code
- Audio
- ColorPal Wiring & Code Example
- Servo
- Badge Lock
- Robot
- Badge LEDs
- PIR Wiring & Example Code
- System
- Temp & Humidity
- Temperature & Humidity Sensor Wiring & Example Code
- Badge Buttons
- Memsic 2125 Wiring & Example Code
- GPS
- Fingerprint Scanner Wiring & Example Code
- Graph
- Joystick Wiring & Example Code
- RFID Wiring & Example Code
- PING))) Wiring & Example Code
- 4×4 Keypad Wiring & Example Code
- Air Quality BME680
- Badge Display
- LIS3DH Accelerometer
- 4 x 4 Keypad
- ePaper
- GPS Wiring & Example Code
- IR Remote Wiring & Example Code
- Fingerprint Scanner
- Advanced WX
- Simple WX
- WX WiFi
- RGB LEDs
- LSM9DS1 9-axis IMU
- PWM
- Pulse in / out
- Voltage
- RC time
- ColorPal
- Sound Impact Sensor
- Sony Remote
- RFID
- PIR
- Ping))) Distance
- MMA7455
- Memsic 2-axis
- 2-Axis Joystick
- HMC5883L
- XBee
- Protocols
- Terminal
- OLED
- Serial LCD
-
Sound Impact Wiring & Example Code
- About Board Types
- About Naming Things
- About Multicore
- About BlocklyProp Updates
- BlocklyProp Bulk Project Download
- Control
- Operators
- Values
- Arrays
- Variables
- Functions
- Pin states
- Communicate
- Sensor
- Memory
- Analog / Pulses
- Sound Impact Wiring & Example Code
- Audio
- ColorPal Wiring & Code Example
- Servo
- Badge Lock
- Robot
- Badge LEDs
- PIR Wiring & Example Code
- System
- Temp & Humidity
- Temperature & Humidity Sensor Wiring & Example Code
- Badge Buttons
- Memsic 2125 Wiring & Example Code
- GPS
- Fingerprint Scanner Wiring & Example Code
- Graph
- Joystick Wiring & Example Code
- RFID Wiring & Example Code
- PING))) Wiring & Example Code
- 4×4 Keypad Wiring & Example Code
- Air Quality BME680
- Badge Display
- LIS3DH Accelerometer
- 4 x 4 Keypad
- ePaper
- GPS Wiring & Example Code
- IR Remote Wiring & Example Code
- Fingerprint Scanner
- Advanced WX
- Simple WX
- WX WiFi
- RGB LEDs
- LSM9DS1 9-axis IMU
- PWM
- Pulse in / out
- Voltage
- RC time
- ColorPal
- Sound Impact Sensor
- Sony Remote
- RFID
- PIR
- Ping))) Distance
- MMA7455
- Memsic 2-axis
- 2-Axis Joystick
- HMC5883L
- XBee
- Protocols
- Terminal
- OLED
- Serial LCD
-
Audio
- About Board Types
- About Naming Things
- About Multicore
- About BlocklyProp Updates
- BlocklyProp Bulk Project Download
- Control
- Operators
- Values
- Arrays
- Variables
- Functions
- Pin states
- Communicate
- Sensor
- Memory
- Analog / Pulses
- Sound Impact Wiring & Example Code
- Audio
- ColorPal Wiring & Code Example
- Servo
- Badge Lock
- Robot
- Badge LEDs
- PIR Wiring & Example Code
- System
- Temp & Humidity
- Temperature & Humidity Sensor Wiring & Example Code
- Badge Buttons
- Memsic 2125 Wiring & Example Code
- GPS
- Fingerprint Scanner Wiring & Example Code
- Graph
- Joystick Wiring & Example Code
- RFID Wiring & Example Code
- PING))) Wiring & Example Code
- 4×4 Keypad Wiring & Example Code
- Air Quality BME680
- Badge Display
- LIS3DH Accelerometer
- 4 x 4 Keypad
- ePaper
- GPS Wiring & Example Code
- IR Remote Wiring & Example Code
- Fingerprint Scanner
- Advanced WX
- Simple WX
- WX WiFi
- RGB LEDs
- LSM9DS1 9-axis IMU
- PWM
- Pulse in / out
- Voltage
- RC time
- ColorPal
- Sound Impact Sensor
- Sony Remote
- RFID
- PIR
- Ping))) Distance
- MMA7455
- Memsic 2-axis
- 2-Axis Joystick
- HMC5883L
- XBee
- Protocols
- Terminal
- OLED
- Serial LCD
-
ColorPal Wiring & Code Example
- About Board Types
- About Naming Things
- About Multicore
- About BlocklyProp Updates
- BlocklyProp Bulk Project Download
- Control
- Operators
- Values
- Arrays
- Variables
- Functions
- Pin states
- Communicate
- Sensor
- Memory
- Analog / Pulses
- Sound Impact Wiring & Example Code
- Audio
- ColorPal Wiring & Code Example
- Servo
- Badge Lock
- Robot
- Badge LEDs
- PIR Wiring & Example Code
- System
- Temp & Humidity
- Temperature & Humidity Sensor Wiring & Example Code
- Badge Buttons
- Memsic 2125 Wiring & Example Code
- GPS
- Fingerprint Scanner Wiring & Example Code
- Graph
- Joystick Wiring & Example Code
- RFID Wiring & Example Code
- PING))) Wiring & Example Code
- 4×4 Keypad Wiring & Example Code
- Air Quality BME680
- Badge Display
- LIS3DH Accelerometer
- 4 x 4 Keypad
- ePaper
- GPS Wiring & Example Code
- IR Remote Wiring & Example Code
- Fingerprint Scanner
- Advanced WX
- Simple WX
- WX WiFi
- RGB LEDs
- LSM9DS1 9-axis IMU
- PWM
- Pulse in / out
- Voltage
- RC time
- ColorPal
- Sound Impact Sensor
- Sony Remote
- RFID
- PIR
- Ping))) Distance
- MMA7455
- Memsic 2-axis
- 2-Axis Joystick
- HMC5883L
- XBee
- Protocols
- Terminal
- OLED
- Serial LCD
-
Servo
- About Board Types
- About Naming Things
- About Multicore
- About BlocklyProp Updates
- BlocklyProp Bulk Project Download
- Control
- Operators
- Values
- Arrays
- Variables
- Functions
- Pin states
- Communicate
- Sensor
- Memory
- Analog / Pulses
- Sound Impact Wiring & Example Code
- Audio
- ColorPal Wiring & Code Example
- Servo
- Badge Lock
- Robot
- Badge LEDs
- PIR Wiring & Example Code
- System
- Temp & Humidity
- Temperature & Humidity Sensor Wiring & Example Code
- Badge Buttons
- Memsic 2125 Wiring & Example Code
- GPS
- Fingerprint Scanner Wiring & Example Code
- Graph
- Joystick Wiring & Example Code
- RFID Wiring & Example Code
- PING))) Wiring & Example Code
- 4×4 Keypad Wiring & Example Code
- Air Quality BME680
- Badge Display
- LIS3DH Accelerometer
- 4 x 4 Keypad
- ePaper
- GPS Wiring & Example Code
- IR Remote Wiring & Example Code
- Fingerprint Scanner
- Advanced WX
- Simple WX
- WX WiFi
- RGB LEDs
- LSM9DS1 9-axis IMU
- PWM
- Pulse in / out
- Voltage
- RC time
- ColorPal
- Sound Impact Sensor
- Sony Remote
- RFID
- PIR
- Ping))) Distance
- MMA7455
- Memsic 2-axis
- 2-Axis Joystick
- HMC5883L
- XBee
- Protocols
- Terminal
- OLED
- Serial LCD
-
Badge Lock
- About Board Types
- About Naming Things
- About Multicore
- About BlocklyProp Updates
- BlocklyProp Bulk Project Download
- Control
- Operators
- Values
- Arrays
- Variables
- Functions
- Pin states
- Communicate
- Sensor
- Memory
- Analog / Pulses
- Sound Impact Wiring & Example Code
- Audio
- ColorPal Wiring & Code Example
- Servo
- Badge Lock
- Robot
- Badge LEDs
- PIR Wiring & Example Code
- System
- Temp & Humidity
- Temperature & Humidity Sensor Wiring & Example Code
- Badge Buttons
- Memsic 2125 Wiring & Example Code
- GPS
- Fingerprint Scanner Wiring & Example Code
- Graph
- Joystick Wiring & Example Code
- RFID Wiring & Example Code
- PING))) Wiring & Example Code
- 4×4 Keypad Wiring & Example Code
- Air Quality BME680
- Badge Display
- LIS3DH Accelerometer
- 4 x 4 Keypad
- ePaper
- GPS Wiring & Example Code
- IR Remote Wiring & Example Code
- Fingerprint Scanner
- Advanced WX
- Simple WX
- WX WiFi
- RGB LEDs
- LSM9DS1 9-axis IMU
- PWM
- Pulse in / out
- Voltage
- RC time
- ColorPal
- Sound Impact Sensor
- Sony Remote
- RFID
- PIR
- Ping))) Distance
- MMA7455
- Memsic 2-axis
- 2-Axis Joystick
- HMC5883L
- XBee
- Protocols
- Terminal
- OLED
- Serial LCD
-
Robot
- About Board Types
- About Naming Things
- About Multicore
- About BlocklyProp Updates
- BlocklyProp Bulk Project Download
- Control
- Operators
- Values
- Arrays
- Variables
- Functions
- Pin states
- Communicate
- Sensor
- Memory
- Analog / Pulses
- Sound Impact Wiring & Example Code
- Audio
- ColorPal Wiring & Code Example
- Servo
- Badge Lock
- Robot
- Badge LEDs
- PIR Wiring & Example Code
- System
- Temp & Humidity
- Temperature & Humidity Sensor Wiring & Example Code
- Badge Buttons
- Memsic 2125 Wiring & Example Code
- GPS
- Fingerprint Scanner Wiring & Example Code
- Graph
- Joystick Wiring & Example Code
- RFID Wiring & Example Code
- PING))) Wiring & Example Code
- 4×4 Keypad Wiring & Example Code
- Air Quality BME680
- Badge Display
- LIS3DH Accelerometer
- 4 x 4 Keypad
- ePaper
- GPS Wiring & Example Code
- IR Remote Wiring & Example Code
- Fingerprint Scanner
- Advanced WX
- Simple WX
- WX WiFi
- RGB LEDs
- LSM9DS1 9-axis IMU
- PWM
- Pulse in / out
- Voltage
- RC time
- ColorPal
- Sound Impact Sensor
- Sony Remote
- RFID
- PIR
- Ping))) Distance
- MMA7455
- Memsic 2-axis
- 2-Axis Joystick
- HMC5883L
- XBee
- Protocols
- Terminal
- OLED
- Serial LCD
-
Badge LEDs
- About Board Types
- About Naming Things
- About Multicore
- About BlocklyProp Updates
- BlocklyProp Bulk Project Download
- Control
- Operators
- Values
- Arrays
- Variables
- Functions
- Pin states
- Communicate
- Sensor
- Memory
- Analog / Pulses
- Sound Impact Wiring & Example Code
- Audio
- ColorPal Wiring & Code Example
- Servo
- Badge Lock
- Robot
- Badge LEDs
- PIR Wiring & Example Code
- System
- Temp & Humidity
- Temperature & Humidity Sensor Wiring & Example Code
- Badge Buttons
- Memsic 2125 Wiring & Example Code
- GPS
- Fingerprint Scanner Wiring & Example Code
- Graph
- Joystick Wiring & Example Code
- RFID Wiring & Example Code
- PING))) Wiring & Example Code
- 4×4 Keypad Wiring & Example Code
- Air Quality BME680
- Badge Display
- LIS3DH Accelerometer
- 4 x 4 Keypad
- ePaper
- GPS Wiring & Example Code
- IR Remote Wiring & Example Code
- Fingerprint Scanner
- Advanced WX
- Simple WX
- WX WiFi
- RGB LEDs
- LSM9DS1 9-axis IMU
- PWM
- Pulse in / out
- Voltage
- RC time
- ColorPal
- Sound Impact Sensor
- Sony Remote
- RFID
- PIR
- Ping))) Distance
- MMA7455
- Memsic 2-axis
- 2-Axis Joystick
- HMC5883L
- XBee
- Protocols
- Terminal
- OLED
- Serial LCD
-
PIR Wiring & Example Code
- About Board Types
- About Naming Things
- About Multicore
- About BlocklyProp Updates
- BlocklyProp Bulk Project Download
- Control
- Operators
- Values
- Arrays
- Variables
- Functions
- Pin states
- Communicate
- Sensor
- Memory
- Analog / Pulses
- Sound Impact Wiring & Example Code
- Audio
- ColorPal Wiring & Code Example
- Servo
- Badge Lock
- Robot
- Badge LEDs
- PIR Wiring & Example Code
- System
- Temp & Humidity
- Temperature & Humidity Sensor Wiring & Example Code
- Badge Buttons
- Memsic 2125 Wiring & Example Code
- GPS
- Fingerprint Scanner Wiring & Example Code
- Graph
- Joystick Wiring & Example Code
- RFID Wiring & Example Code
- PING))) Wiring & Example Code
- 4×4 Keypad Wiring & Example Code
- Air Quality BME680
- Badge Display
- LIS3DH Accelerometer
- 4 x 4 Keypad
- ePaper
- GPS Wiring & Example Code
- IR Remote Wiring & Example Code
- Fingerprint Scanner
- Advanced WX
- Simple WX
- WX WiFi
- RGB LEDs
- LSM9DS1 9-axis IMU
- PWM
- Pulse in / out
- Voltage
- RC time
- ColorPal
- Sound Impact Sensor
- Sony Remote
- RFID
- PIR
- Ping))) Distance
- MMA7455
- Memsic 2-axis
- 2-Axis Joystick
- HMC5883L
- XBee
- Protocols
- Terminal
- OLED
- Serial LCD
-
System
- About Board Types
- About Naming Things
- About Multicore
- About BlocklyProp Updates
- BlocklyProp Bulk Project Download
- Control
- Operators
- Values
- Arrays
- Variables
- Functions
- Pin states
- Communicate
- Sensor
- Memory
- Analog / Pulses
- Sound Impact Wiring & Example Code
- Audio
- ColorPal Wiring & Code Example
- Servo
- Badge Lock
- Robot
- Badge LEDs
- PIR Wiring & Example Code
- System
- Temp & Humidity
- Temperature & Humidity Sensor Wiring & Example Code
- Badge Buttons
- Memsic 2125 Wiring & Example Code
- GPS
- Fingerprint Scanner Wiring & Example Code
- Graph
- Joystick Wiring & Example Code
- RFID Wiring & Example Code
- PING))) Wiring & Example Code
- 4×4 Keypad Wiring & Example Code
- Air Quality BME680
- Badge Display
- LIS3DH Accelerometer
- 4 x 4 Keypad
- ePaper
- GPS Wiring & Example Code
- IR Remote Wiring & Example Code
- Fingerprint Scanner
- Advanced WX
- Simple WX
- WX WiFi
- RGB LEDs
- LSM9DS1 9-axis IMU
- PWM
- Pulse in / out
- Voltage
- RC time
- ColorPal
- Sound Impact Sensor
- Sony Remote
- RFID
- PIR
- Ping))) Distance
- MMA7455
- Memsic 2-axis
- 2-Axis Joystick
- HMC5883L
- XBee
- Protocols
- Terminal
- OLED
- Serial LCD
-
Temp & Humidity
- About Board Types
- About Naming Things
- About Multicore
- About BlocklyProp Updates
- BlocklyProp Bulk Project Download
- Control
- Operators
- Values
- Arrays
- Variables
- Functions
- Pin states
- Communicate
- Sensor
- Memory
- Analog / Pulses
- Sound Impact Wiring & Example Code
- Audio
- ColorPal Wiring & Code Example
- Servo
- Badge Lock
- Robot
- Badge LEDs
- PIR Wiring & Example Code
- System
- Temp & Humidity
- Temperature & Humidity Sensor Wiring & Example Code
- Badge Buttons
- Memsic 2125 Wiring & Example Code
- GPS
- Fingerprint Scanner Wiring & Example Code
- Graph
- Joystick Wiring & Example Code
- RFID Wiring & Example Code
- PING))) Wiring & Example Code
- 4×4 Keypad Wiring & Example Code
- Air Quality BME680
- Badge Display
- LIS3DH Accelerometer
- 4 x 4 Keypad
- ePaper
- GPS Wiring & Example Code
- IR Remote Wiring & Example Code
- Fingerprint Scanner
- Advanced WX
- Simple WX
- WX WiFi
- RGB LEDs
- LSM9DS1 9-axis IMU
- PWM
- Pulse in / out
- Voltage
- RC time
- ColorPal
- Sound Impact Sensor
- Sony Remote
- RFID
- PIR
- Ping))) Distance
- MMA7455
- Memsic 2-axis
- 2-Axis Joystick
- HMC5883L
- XBee
- Protocols
- Terminal
- OLED
- Serial LCD
-
Temperature & Humidity Sensor Wiring & Example Code
- About Board Types
- About Naming Things
- About Multicore
- About BlocklyProp Updates
- BlocklyProp Bulk Project Download
- Control
- Operators
- Values
- Arrays
- Variables
- Functions
- Pin states
- Communicate
- Sensor
- Memory
- Analog / Pulses
- Sound Impact Wiring & Example Code
- Audio
- ColorPal Wiring & Code Example
- Servo
- Badge Lock
- Robot
- Badge LEDs
- PIR Wiring & Example Code
- System
- Temp & Humidity
- Temperature & Humidity Sensor Wiring & Example Code
- Badge Buttons
- Memsic 2125 Wiring & Example Code
- GPS
- Fingerprint Scanner Wiring & Example Code
- Graph
- Joystick Wiring & Example Code
- RFID Wiring & Example Code
- PING))) Wiring & Example Code
- 4×4 Keypad Wiring & Example Code
- Air Quality BME680
- Badge Display
- LIS3DH Accelerometer
- 4 x 4 Keypad
- ePaper
- GPS Wiring & Example Code
- IR Remote Wiring & Example Code
- Fingerprint Scanner
- Advanced WX
- Simple WX
- WX WiFi
- RGB LEDs
- LSM9DS1 9-axis IMU
- PWM
- Pulse in / out
- Voltage
- RC time
- ColorPal
- Sound Impact Sensor
- Sony Remote
- RFID
- PIR
- Ping))) Distance
- MMA7455
- Memsic 2-axis
- 2-Axis Joystick
- HMC5883L
- XBee
- Protocols
- Terminal
- OLED
- Serial LCD
-
Badge Buttons
- About Board Types
- About Naming Things
- About Multicore
- About BlocklyProp Updates
- BlocklyProp Bulk Project Download
- Control
- Operators
- Values
- Arrays
- Variables
- Functions
- Pin states
- Communicate
- Sensor
- Memory
- Analog / Pulses
- Sound Impact Wiring & Example Code
- Audio
- ColorPal Wiring & Code Example
- Servo
- Badge Lock
- Robot
- Badge LEDs
- PIR Wiring & Example Code
- System
- Temp & Humidity
- Temperature & Humidity Sensor Wiring & Example Code
- Badge Buttons
- Memsic 2125 Wiring & Example Code
- GPS
- Fingerprint Scanner Wiring & Example Code
- Graph
- Joystick Wiring & Example Code
- RFID Wiring & Example Code
- PING))) Wiring & Example Code
- 4×4 Keypad Wiring & Example Code
- Air Quality BME680
- Badge Display
- LIS3DH Accelerometer
- 4 x 4 Keypad
- ePaper
- GPS Wiring & Example Code
- IR Remote Wiring & Example Code
- Fingerprint Scanner
- Advanced WX
- Simple WX
- WX WiFi
- RGB LEDs
- LSM9DS1 9-axis IMU
- PWM
- Pulse in / out
- Voltage
- RC time
- ColorPal
- Sound Impact Sensor
- Sony Remote
- RFID
- PIR
- Ping))) Distance
- MMA7455
- Memsic 2-axis
- 2-Axis Joystick
- HMC5883L
- XBee
- Protocols
- Terminal
- OLED
- Serial LCD
-
Memsic 2125 Wiring & Example Code
- About Board Types
- About Naming Things
- About Multicore
- About BlocklyProp Updates
- BlocklyProp Bulk Project Download
- Control
- Operators
- Values
- Arrays
- Variables
- Functions
- Pin states
- Communicate
- Sensor
- Memory
- Analog / Pulses
- Sound Impact Wiring & Example Code
- Audio
- ColorPal Wiring & Code Example
- Servo
- Badge Lock
- Robot
- Badge LEDs
- PIR Wiring & Example Code
- System
- Temp & Humidity
- Temperature & Humidity Sensor Wiring & Example Code
- Badge Buttons
- Memsic 2125 Wiring & Example Code
- GPS
- Fingerprint Scanner Wiring & Example Code
- Graph
- Joystick Wiring & Example Code
- RFID Wiring & Example Code
- PING))) Wiring & Example Code
- 4×4 Keypad Wiring & Example Code
- Air Quality BME680
- Badge Display
- LIS3DH Accelerometer
- 4 x 4 Keypad
- ePaper
- GPS Wiring & Example Code
- IR Remote Wiring & Example Code
- Fingerprint Scanner
- Advanced WX
- Simple WX
- WX WiFi
- RGB LEDs
- LSM9DS1 9-axis IMU
- PWM
- Pulse in / out
- Voltage
- RC time
- ColorPal
- Sound Impact Sensor
- Sony Remote
- RFID
- PIR
- Ping))) Distance
- MMA7455
- Memsic 2-axis
- 2-Axis Joystick
- HMC5883L
- XBee
- Protocols
- Terminal
- OLED
- Serial LCD
-
GPS
- About Board Types
- About Naming Things
- About Multicore
- About BlocklyProp Updates
- BlocklyProp Bulk Project Download
- Control
- Operators
- Values
- Arrays
- Variables
- Functions
- Pin states
- Communicate
- Sensor
- Memory
- Analog / Pulses
- Sound Impact Wiring & Example Code
- Audio
- ColorPal Wiring & Code Example
- Servo
- Badge Lock
- Robot
- Badge LEDs
- PIR Wiring & Example Code
- System
- Temp & Humidity
- Temperature & Humidity Sensor Wiring & Example Code
- Badge Buttons
- Memsic 2125 Wiring & Example Code
- GPS
- Fingerprint Scanner Wiring & Example Code
- Graph
- Joystick Wiring & Example Code
- RFID Wiring & Example Code
- PING))) Wiring & Example Code
- 4×4 Keypad Wiring & Example Code
- Air Quality BME680
- Badge Display
- LIS3DH Accelerometer
- 4 x 4 Keypad
- ePaper
- GPS Wiring & Example Code
- IR Remote Wiring & Example Code
- Fingerprint Scanner
- Advanced WX
- Simple WX
- WX WiFi
- RGB LEDs
- LSM9DS1 9-axis IMU
- PWM
- Pulse in / out
- Voltage
- RC time
- ColorPal
- Sound Impact Sensor
- Sony Remote
- RFID
- PIR
- Ping))) Distance
- MMA7455
- Memsic 2-axis
- 2-Axis Joystick
- HMC5883L
- XBee
- Protocols
- Terminal
- OLED
- Serial LCD
-
Fingerprint Scanner Wiring & Example Code
- About Board Types
- About Naming Things
- About Multicore
- About BlocklyProp Updates
- BlocklyProp Bulk Project Download
- Control
- Operators
- Values
- Arrays
- Variables
- Functions
- Pin states
- Communicate
- Sensor
- Memory
- Analog / Pulses
- Sound Impact Wiring & Example Code
- Audio
- ColorPal Wiring & Code Example
- Servo
- Badge Lock
- Robot
- Badge LEDs
- PIR Wiring & Example Code
- System
- Temp & Humidity
- Temperature & Humidity Sensor Wiring & Example Code
- Badge Buttons
- Memsic 2125 Wiring & Example Code
- GPS
- Fingerprint Scanner Wiring & Example Code
- Graph
- Joystick Wiring & Example Code
- RFID Wiring & Example Code
- PING))) Wiring & Example Code
- 4×4 Keypad Wiring & Example Code
- Air Quality BME680
- Badge Display
- LIS3DH Accelerometer
- 4 x 4 Keypad
- ePaper
- GPS Wiring & Example Code
- IR Remote Wiring & Example Code
- Fingerprint Scanner
- Advanced WX
- Simple WX
- WX WiFi
- RGB LEDs
- LSM9DS1 9-axis IMU
- PWM
- Pulse in / out
- Voltage
- RC time
- ColorPal
- Sound Impact Sensor
- Sony Remote
- RFID
- PIR
- Ping))) Distance
- MMA7455
- Memsic 2-axis
- 2-Axis Joystick
- HMC5883L
- XBee
- Protocols
- Terminal
- OLED
- Serial LCD
-
Graph
- About Board Types
- About Naming Things
- About Multicore
- About BlocklyProp Updates
- BlocklyProp Bulk Project Download
- Control
- Operators
- Values
- Arrays
- Variables
- Functions
- Pin states
- Communicate
- Sensor
- Memory
- Analog / Pulses
- Sound Impact Wiring & Example Code
- Audio
- ColorPal Wiring & Code Example
- Servo
- Badge Lock
- Robot
- Badge LEDs
- PIR Wiring & Example Code
- System
- Temp & Humidity
- Temperature & Humidity Sensor Wiring & Example Code
- Badge Buttons
- Memsic 2125 Wiring & Example Code
- GPS
- Fingerprint Scanner Wiring & Example Code
- Graph
- Joystick Wiring & Example Code
- RFID Wiring & Example Code
- PING))) Wiring & Example Code
- 4×4 Keypad Wiring & Example Code
- Air Quality BME680
- Badge Display
- LIS3DH Accelerometer
- 4 x 4 Keypad
- ePaper
- GPS Wiring & Example Code
- IR Remote Wiring & Example Code
- Fingerprint Scanner
- Advanced WX
- Simple WX
- WX WiFi
- RGB LEDs
- LSM9DS1 9-axis IMU
- PWM
- Pulse in / out
- Voltage
- RC time
- ColorPal
- Sound Impact Sensor
- Sony Remote
- RFID
- PIR
- Ping))) Distance
- MMA7455
- Memsic 2-axis
- 2-Axis Joystick
- HMC5883L
- XBee
- Protocols
- Terminal
- OLED
- Serial LCD
-
Joystick Wiring & Example Code
- About Board Types
- About Naming Things
- About Multicore
- About BlocklyProp Updates
- BlocklyProp Bulk Project Download
- Control
- Operators
- Values
- Arrays
- Variables
- Functions
- Pin states
- Communicate
- Sensor
- Memory
- Analog / Pulses
- Sound Impact Wiring & Example Code
- Audio
- ColorPal Wiring & Code Example
- Servo
- Badge Lock
- Robot
- Badge LEDs
- PIR Wiring & Example Code
- System
- Temp & Humidity
- Temperature & Humidity Sensor Wiring & Example Code
- Badge Buttons
- Memsic 2125 Wiring & Example Code
- GPS
- Fingerprint Scanner Wiring & Example Code
- Graph
- Joystick Wiring & Example Code
- RFID Wiring & Example Code
- PING))) Wiring & Example Code
- 4×4 Keypad Wiring & Example Code
- Air Quality BME680
- Badge Display
- LIS3DH Accelerometer
- 4 x 4 Keypad
- ePaper
- GPS Wiring & Example Code
- IR Remote Wiring & Example Code
- Fingerprint Scanner
- Advanced WX
- Simple WX
- WX WiFi
- RGB LEDs
- LSM9DS1 9-axis IMU
- PWM
- Pulse in / out
- Voltage
- RC time
- ColorPal
- Sound Impact Sensor
- Sony Remote
- RFID
- PIR
- Ping))) Distance
- MMA7455
- Memsic 2-axis
- 2-Axis Joystick
- HMC5883L
- XBee
- Protocols
- Terminal
- OLED
- Serial LCD
-
RFID Wiring & Example Code
- About Board Types
- About Naming Things
- About Multicore
- About BlocklyProp Updates
- BlocklyProp Bulk Project Download
- Control
- Operators
- Values
- Arrays
- Variables
- Functions
- Pin states
- Communicate
- Sensor
- Memory
- Analog / Pulses
- Sound Impact Wiring & Example Code
- Audio
- ColorPal Wiring & Code Example
- Servo
- Badge Lock
- Robot
- Badge LEDs
- PIR Wiring & Example Code
- System
- Temp & Humidity
- Temperature & Humidity Sensor Wiring & Example Code
- Badge Buttons
- Memsic 2125 Wiring & Example Code
- GPS
- Fingerprint Scanner Wiring & Example Code
- Graph
- Joystick Wiring & Example Code
- RFID Wiring & Example Code
- PING))) Wiring & Example Code
- 4×4 Keypad Wiring & Example Code
- Air Quality BME680
- Badge Display
- LIS3DH Accelerometer
- 4 x 4 Keypad
- ePaper
- GPS Wiring & Example Code
- IR Remote Wiring & Example Code
- Fingerprint Scanner
- Advanced WX
- Simple WX
- WX WiFi
- RGB LEDs
- LSM9DS1 9-axis IMU
- PWM
- Pulse in / out
- Voltage
- RC time
- ColorPal
- Sound Impact Sensor
- Sony Remote
- RFID
- PIR
- Ping))) Distance
- MMA7455
- Memsic 2-axis
- 2-Axis Joystick
- HMC5883L
- XBee
- Protocols
- Terminal
- OLED
- Serial LCD
-
PING))) Wiring & Example Code
- About Board Types
- About Naming Things
- About Multicore
- About BlocklyProp Updates
- BlocklyProp Bulk Project Download
- Control
- Operators
- Values
- Arrays
- Variables
- Functions
- Pin states
- Communicate
- Sensor
- Memory
- Analog / Pulses
- Sound Impact Wiring & Example Code
- Audio
- ColorPal Wiring & Code Example
- Servo
- Badge Lock
- Robot
- Badge LEDs
- PIR Wiring & Example Code
- System
- Temp & Humidity
- Temperature & Humidity Sensor Wiring & Example Code
- Badge Buttons
- Memsic 2125 Wiring & Example Code
- GPS
- Fingerprint Scanner Wiring & Example Code
- Graph
- Joystick Wiring & Example Code
- RFID Wiring & Example Code
- PING))) Wiring & Example Code
- 4×4 Keypad Wiring & Example Code
- Air Quality BME680
- Badge Display
- LIS3DH Accelerometer
- 4 x 4 Keypad
- ePaper
- GPS Wiring & Example Code
- IR Remote Wiring & Example Code
- Fingerprint Scanner
- Advanced WX
- Simple WX
- WX WiFi
- RGB LEDs
- LSM9DS1 9-axis IMU
- PWM
- Pulse in / out
- Voltage
- RC time
- ColorPal
- Sound Impact Sensor
- Sony Remote
- RFID
- PIR
- Ping))) Distance
- MMA7455
- Memsic 2-axis
- 2-Axis Joystick
- HMC5883L
- XBee
- Protocols
- Terminal
- OLED
- Serial LCD
-
4×4 Keypad Wiring & Example Code
- About Board Types
- About Naming Things
- About Multicore
- About BlocklyProp Updates
- BlocklyProp Bulk Project Download
- Control
- Operators
- Values
- Arrays
- Variables
- Functions
- Pin states
- Communicate
- Sensor
- Memory
- Analog / Pulses
- Sound Impact Wiring & Example Code
- Audio
- ColorPal Wiring & Code Example
- Servo
- Badge Lock
- Robot
- Badge LEDs
- PIR Wiring & Example Code
- System
- Temp & Humidity
- Temperature & Humidity Sensor Wiring & Example Code
- Badge Buttons
- Memsic 2125 Wiring & Example Code
- GPS
- Fingerprint Scanner Wiring & Example Code
- Graph
- Joystick Wiring & Example Code
- RFID Wiring & Example Code
- PING))) Wiring & Example Code
- 4×4 Keypad Wiring & Example Code
- Air Quality BME680
- Badge Display
- LIS3DH Accelerometer
- 4 x 4 Keypad
- ePaper
- GPS Wiring & Example Code
- IR Remote Wiring & Example Code
- Fingerprint Scanner
- Advanced WX
- Simple WX
- WX WiFi
- RGB LEDs
- LSM9DS1 9-axis IMU
- PWM
- Pulse in / out
- Voltage
- RC time
- ColorPal
- Sound Impact Sensor
- Sony Remote
- RFID
- PIR
- Ping))) Distance
- MMA7455
- Memsic 2-axis
- 2-Axis Joystick
- HMC5883L
- XBee
- Protocols
- Terminal
- OLED
- Serial LCD
-
Air Quality BME680
- About Board Types
- About Naming Things
- About Multicore
- About BlocklyProp Updates
- BlocklyProp Bulk Project Download
- Control
- Operators
- Values
- Arrays
- Variables
- Functions
- Pin states
- Communicate
- Sensor
- Memory
- Analog / Pulses
- Sound Impact Wiring & Example Code
- Audio
- ColorPal Wiring & Code Example
- Servo
- Badge Lock
- Robot
- Badge LEDs
- PIR Wiring & Example Code
- System
- Temp & Humidity
- Temperature & Humidity Sensor Wiring & Example Code
- Badge Buttons
- Memsic 2125 Wiring & Example Code
- GPS
- Fingerprint Scanner Wiring & Example Code
- Graph
- Joystick Wiring & Example Code
- RFID Wiring & Example Code
- PING))) Wiring & Example Code
- 4×4 Keypad Wiring & Example Code
- Air Quality BME680
- Badge Display
- LIS3DH Accelerometer
- 4 x 4 Keypad
- ePaper
- GPS Wiring & Example Code
- IR Remote Wiring & Example Code
- Fingerprint Scanner
- Advanced WX
- Simple WX
- WX WiFi
- RGB LEDs
- LSM9DS1 9-axis IMU
- PWM
- Pulse in / out
- Voltage
- RC time
- ColorPal
- Sound Impact Sensor
- Sony Remote
- RFID
- PIR
- Ping))) Distance
- MMA7455
- Memsic 2-axis
- 2-Axis Joystick
- HMC5883L
- XBee
- Protocols
- Terminal
- OLED
- Serial LCD
-
Badge Display
- About Board Types
- About Naming Things
- About Multicore
- About BlocklyProp Updates
- BlocklyProp Bulk Project Download
- Control
- Operators
- Values
- Arrays
- Variables
- Functions
- Pin states
- Communicate
- Sensor
- Memory
- Analog / Pulses
- Sound Impact Wiring & Example Code
- Audio
- ColorPal Wiring & Code Example
- Servo
- Badge Lock
- Robot
- Badge LEDs
- PIR Wiring & Example Code
- System
- Temp & Humidity
- Temperature & Humidity Sensor Wiring & Example Code
- Badge Buttons
- Memsic 2125 Wiring & Example Code
- GPS
- Fingerprint Scanner Wiring & Example Code
- Graph
- Joystick Wiring & Example Code
- RFID Wiring & Example Code
- PING))) Wiring & Example Code
- 4×4 Keypad Wiring & Example Code
- Air Quality BME680
- Badge Display
- LIS3DH Accelerometer
- 4 x 4 Keypad
- ePaper
- GPS Wiring & Example Code
- IR Remote Wiring & Example Code
- Fingerprint Scanner
- Advanced WX
- Simple WX
- WX WiFi
- RGB LEDs
- LSM9DS1 9-axis IMU
- PWM
- Pulse in / out
- Voltage
- RC time
- ColorPal
- Sound Impact Sensor
- Sony Remote
- RFID
- PIR
- Ping))) Distance
- MMA7455
- Memsic 2-axis
- 2-Axis Joystick
- HMC5883L
- XBee
- Protocols
- Terminal
- OLED
- Serial LCD
-
LIS3DH Accelerometer
- About Board Types
- About Naming Things
- About Multicore
- About BlocklyProp Updates
- BlocklyProp Bulk Project Download
- Control
- Operators
- Values
- Arrays
- Variables
- Functions
- Pin states
- Communicate
- Sensor
- Memory
- Analog / Pulses
- Sound Impact Wiring & Example Code
- Audio
- ColorPal Wiring & Code Example
- Servo
- Badge Lock
- Robot
- Badge LEDs
- PIR Wiring & Example Code
- System
- Temp & Humidity
- Temperature & Humidity Sensor Wiring & Example Code
- Badge Buttons
- Memsic 2125 Wiring & Example Code
- GPS
- Fingerprint Scanner Wiring & Example Code
- Graph
- Joystick Wiring & Example Code
- RFID Wiring & Example Code
- PING))) Wiring & Example Code
- 4×4 Keypad Wiring & Example Code
- Air Quality BME680
- Badge Display
- LIS3DH Accelerometer
- 4 x 4 Keypad
- ePaper
- GPS Wiring & Example Code
- IR Remote Wiring & Example Code
- Fingerprint Scanner
- Advanced WX
- Simple WX
- WX WiFi
- RGB LEDs
- LSM9DS1 9-axis IMU
- PWM
- Pulse in / out
- Voltage
- RC time
- ColorPal
- Sound Impact Sensor
- Sony Remote
- RFID
- PIR
- Ping))) Distance
- MMA7455
- Memsic 2-axis
- 2-Axis Joystick
- HMC5883L
- XBee
- Protocols
- Terminal
- OLED
- Serial LCD
-
4 x 4 Keypad
- About Board Types
- About Naming Things
- About Multicore
- About BlocklyProp Updates
- BlocklyProp Bulk Project Download
- Control
- Operators
- Values
- Arrays
- Variables
- Functions
- Pin states
- Communicate
- Sensor
- Memory
- Analog / Pulses
- Sound Impact Wiring & Example Code
- Audio
- ColorPal Wiring & Code Example
- Servo
- Badge Lock
- Robot
- Badge LEDs
- PIR Wiring & Example Code
- System
- Temp & Humidity
- Temperature & Humidity Sensor Wiring & Example Code
- Badge Buttons
- Memsic 2125 Wiring & Example Code
- GPS
- Fingerprint Scanner Wiring & Example Code
- Graph
- Joystick Wiring & Example Code
- RFID Wiring & Example Code
- PING))) Wiring & Example Code
- 4×4 Keypad Wiring & Example Code
- Air Quality BME680
- Badge Display
- LIS3DH Accelerometer
- 4 x 4 Keypad
- ePaper
- GPS Wiring & Example Code
- IR Remote Wiring & Example Code
- Fingerprint Scanner
- Advanced WX
- Simple WX
- WX WiFi
- RGB LEDs
- LSM9DS1 9-axis IMU
- PWM
- Pulse in / out
- Voltage
- RC time
- ColorPal
- Sound Impact Sensor
- Sony Remote
- RFID
- PIR
- Ping))) Distance
- MMA7455
- Memsic 2-axis
- 2-Axis Joystick
- HMC5883L
- XBee
- Protocols
- Terminal
- OLED
- Serial LCD
-
ePaper
- About Board Types
- About Naming Things
- About Multicore
- About BlocklyProp Updates
- BlocklyProp Bulk Project Download
- Control
- Operators
- Values
- Arrays
- Variables
- Functions
- Pin states
- Communicate
- Sensor
- Memory
- Analog / Pulses
- Sound Impact Wiring & Example Code
- Audio
- ColorPal Wiring & Code Example
- Servo
- Badge Lock
- Robot
- Badge LEDs
- PIR Wiring & Example Code
- System
- Temp & Humidity
- Temperature & Humidity Sensor Wiring & Example Code
- Badge Buttons
- Memsic 2125 Wiring & Example Code
- GPS
- Fingerprint Scanner Wiring & Example Code
- Graph
- Joystick Wiring & Example Code
- RFID Wiring & Example Code
- PING))) Wiring & Example Code
- 4×4 Keypad Wiring & Example Code
- Air Quality BME680
- Badge Display
- LIS3DH Accelerometer
- 4 x 4 Keypad
- ePaper
- GPS Wiring & Example Code
- IR Remote Wiring & Example Code
- Fingerprint Scanner
- Advanced WX
- Simple WX
- WX WiFi
- RGB LEDs
- LSM9DS1 9-axis IMU
- PWM
- Pulse in / out
- Voltage
- RC time
- ColorPal
- Sound Impact Sensor
- Sony Remote
- RFID
- PIR
- Ping))) Distance
- MMA7455
- Memsic 2-axis
- 2-Axis Joystick
- HMC5883L
- XBee
- Protocols
- Terminal
- OLED
- Serial LCD
-
GPS Wiring & Example Code
- About Board Types
- About Naming Things
- About Multicore
- About BlocklyProp Updates
- BlocklyProp Bulk Project Download
- Control
- Operators
- Values
- Arrays
- Variables
- Functions
- Pin states
- Communicate
- Sensor
- Memory
- Analog / Pulses
- Sound Impact Wiring & Example Code
- Audio
- ColorPal Wiring & Code Example
- Servo
- Badge Lock
- Robot
- Badge LEDs
- PIR Wiring & Example Code
- System
- Temp & Humidity
- Temperature & Humidity Sensor Wiring & Example Code
- Badge Buttons
- Memsic 2125 Wiring & Example Code
- GPS
- Fingerprint Scanner Wiring & Example Code
- Graph
- Joystick Wiring & Example Code
- RFID Wiring & Example Code
- PING))) Wiring & Example Code
- 4×4 Keypad Wiring & Example Code
- Air Quality BME680
- Badge Display
- LIS3DH Accelerometer
- 4 x 4 Keypad
- ePaper
- GPS Wiring & Example Code
- IR Remote Wiring & Example Code
- Fingerprint Scanner
- Advanced WX
- Simple WX
- WX WiFi
- RGB LEDs
- LSM9DS1 9-axis IMU
- PWM
- Pulse in / out
- Voltage
- RC time
- ColorPal
- Sound Impact Sensor
- Sony Remote
- RFID
- PIR
- Ping))) Distance
- MMA7455
- Memsic 2-axis
- 2-Axis Joystick
- HMC5883L
- XBee
- Protocols
- Terminal
- OLED
- Serial LCD
-
IR Remote Wiring & Example Code
- About Board Types
- About Naming Things
- About Multicore
- About BlocklyProp Updates
- BlocklyProp Bulk Project Download
- Control
- Operators
- Values
- Arrays
- Variables
- Functions
- Pin states
- Communicate
- Sensor
- Memory
- Analog / Pulses
- Sound Impact Wiring & Example Code
- Audio
- ColorPal Wiring & Code Example
- Servo
- Badge Lock
- Robot
- Badge LEDs
- PIR Wiring & Example Code
- System
- Temp & Humidity
- Temperature & Humidity Sensor Wiring & Example Code
- Badge Buttons
- Memsic 2125 Wiring & Example Code
- GPS
- Fingerprint Scanner Wiring & Example Code
- Graph
- Joystick Wiring & Example Code
- RFID Wiring & Example Code
- PING))) Wiring & Example Code
- 4×4 Keypad Wiring & Example Code
- Air Quality BME680
- Badge Display
- LIS3DH Accelerometer
- 4 x 4 Keypad
- ePaper
- GPS Wiring & Example Code
- IR Remote Wiring & Example Code
- Fingerprint Scanner
- Advanced WX
- Simple WX
- WX WiFi
- RGB LEDs
- LSM9DS1 9-axis IMU
- PWM
- Pulse in / out
- Voltage
- RC time
- ColorPal
- Sound Impact Sensor
- Sony Remote
- RFID
- PIR
- Ping))) Distance
- MMA7455
- Memsic 2-axis
- 2-Axis Joystick
- HMC5883L
- XBee
- Protocols
- Terminal
- OLED
- Serial LCD
-
Fingerprint Scanner
- About Board Types
- About Naming Things
- About Multicore
- About BlocklyProp Updates
- BlocklyProp Bulk Project Download
- Control
- Operators
- Values
- Arrays
- Variables
- Functions
- Pin states
- Communicate
- Sensor
- Memory
- Analog / Pulses
- Sound Impact Wiring & Example Code
- Audio
- ColorPal Wiring & Code Example
- Servo
- Badge Lock
- Robot
- Badge LEDs
- PIR Wiring & Example Code
- System
- Temp & Humidity
- Temperature & Humidity Sensor Wiring & Example Code
- Badge Buttons
- Memsic 2125 Wiring & Example Code
- GPS
- Fingerprint Scanner Wiring & Example Code
- Graph
- Joystick Wiring & Example Code
- RFID Wiring & Example Code
- PING))) Wiring & Example Code
- 4×4 Keypad Wiring & Example Code
- Air Quality BME680
- Badge Display
- LIS3DH Accelerometer
- 4 x 4 Keypad
- ePaper
- GPS Wiring & Example Code
- IR Remote Wiring & Example Code
- Fingerprint Scanner
- Advanced WX
- Simple WX
- WX WiFi
- RGB LEDs
- LSM9DS1 9-axis IMU
- PWM
- Pulse in / out
- Voltage
- RC time
- ColorPal
- Sound Impact Sensor
- Sony Remote
- RFID
- PIR
- Ping))) Distance
- MMA7455
- Memsic 2-axis
- 2-Axis Joystick
- HMC5883L
- XBee
- Protocols
- Terminal
- OLED
- Serial LCD
-
Advanced WX
- About Board Types
- About Naming Things
- About Multicore
- About BlocklyProp Updates
- BlocklyProp Bulk Project Download
- Control
- Operators
- Values
- Arrays
- Variables
- Functions
- Pin states
- Communicate
- Sensor
- Memory
- Analog / Pulses
- Sound Impact Wiring & Example Code
- Audio
- ColorPal Wiring & Code Example
- Servo
- Badge Lock
- Robot
- Badge LEDs
- PIR Wiring & Example Code
- System
- Temp & Humidity
- Temperature & Humidity Sensor Wiring & Example Code
- Badge Buttons
- Memsic 2125 Wiring & Example Code
- GPS
- Fingerprint Scanner Wiring & Example Code
- Graph
- Joystick Wiring & Example Code
- RFID Wiring & Example Code
- PING))) Wiring & Example Code
- 4×4 Keypad Wiring & Example Code
- Air Quality BME680
- Badge Display
- LIS3DH Accelerometer
- 4 x 4 Keypad
- ePaper
- GPS Wiring & Example Code
- IR Remote Wiring & Example Code
- Fingerprint Scanner
- Advanced WX
- Simple WX
- WX WiFi
- RGB LEDs
- LSM9DS1 9-axis IMU
- PWM
- Pulse in / out
- Voltage
- RC time
- ColorPal
- Sound Impact Sensor
- Sony Remote
- RFID
- PIR
- Ping))) Distance
- MMA7455
- Memsic 2-axis
- 2-Axis Joystick
- HMC5883L
- XBee
- Protocols
- Terminal
- OLED
- Serial LCD
-
Simple WX
- About Board Types
- About Naming Things
- About Multicore
- About BlocklyProp Updates
- BlocklyProp Bulk Project Download
- Control
- Operators
- Values
- Arrays
- Variables
- Functions
- Pin states
- Communicate
- Sensor
- Memory
- Analog / Pulses
- Sound Impact Wiring & Example Code
- Audio
- ColorPal Wiring & Code Example
- Servo
- Badge Lock
- Robot
- Badge LEDs
- PIR Wiring & Example Code
- System
- Temp & Humidity
- Temperature & Humidity Sensor Wiring & Example Code
- Badge Buttons
- Memsic 2125 Wiring & Example Code
- GPS
- Fingerprint Scanner Wiring & Example Code
- Graph
- Joystick Wiring & Example Code
- RFID Wiring & Example Code
- PING))) Wiring & Example Code
- 4×4 Keypad Wiring & Example Code
- Air Quality BME680
- Badge Display
- LIS3DH Accelerometer
- 4 x 4 Keypad
- ePaper
- GPS Wiring & Example Code
- IR Remote Wiring & Example Code
- Fingerprint Scanner
- Advanced WX
- Simple WX
- WX WiFi
- RGB LEDs
- LSM9DS1 9-axis IMU
- PWM
- Pulse in / out
- Voltage
- RC time
- ColorPal
- Sound Impact Sensor
- Sony Remote
- RFID
- PIR
- Ping))) Distance
- MMA7455
- Memsic 2-axis
- 2-Axis Joystick
- HMC5883L
- XBee
- Protocols
- Terminal
- OLED
- Serial LCD
-
WX WiFi
- About Board Types
- About Naming Things
- About Multicore
- About BlocklyProp Updates
- BlocklyProp Bulk Project Download
- Control
- Operators
- Values
- Arrays
- Variables
- Functions
- Pin states
- Communicate
- Sensor
- Memory
- Analog / Pulses
- Sound Impact Wiring & Example Code
- Audio
- ColorPal Wiring & Code Example
- Servo
- Badge Lock
- Robot
- Badge LEDs
- PIR Wiring & Example Code
- System
- Temp & Humidity
- Temperature & Humidity Sensor Wiring & Example Code
- Badge Buttons
- Memsic 2125 Wiring & Example Code
- GPS
- Fingerprint Scanner Wiring & Example Code
- Graph
- Joystick Wiring & Example Code
- RFID Wiring & Example Code
- PING))) Wiring & Example Code
- 4×4 Keypad Wiring & Example Code
- Air Quality BME680
- Badge Display
- LIS3DH Accelerometer
- 4 x 4 Keypad
- ePaper
- GPS Wiring & Example Code
- IR Remote Wiring & Example Code
- Fingerprint Scanner
- Advanced WX
- Simple WX
- WX WiFi
- RGB LEDs
- LSM9DS1 9-axis IMU
- PWM
- Pulse in / out
- Voltage
- RC time
- ColorPal
- Sound Impact Sensor
- Sony Remote
- RFID
- PIR
- Ping))) Distance
- MMA7455
- Memsic 2-axis
- 2-Axis Joystick
- HMC5883L
- XBee
- Protocols
- Terminal
- OLED
- Serial LCD
-
RGB LEDs
- About Board Types
- About Naming Things
- About Multicore
- About BlocklyProp Updates
- BlocklyProp Bulk Project Download
- Control
- Operators
- Values
- Arrays
- Variables
- Functions
- Pin states
- Communicate
- Sensor
- Memory
- Analog / Pulses
- Sound Impact Wiring & Example Code
- Audio
- ColorPal Wiring & Code Example
- Servo
- Badge Lock
- Robot
- Badge LEDs
- PIR Wiring & Example Code
- System
- Temp & Humidity
- Temperature & Humidity Sensor Wiring & Example Code
- Badge Buttons
- Memsic 2125 Wiring & Example Code
- GPS
- Fingerprint Scanner Wiring & Example Code
- Graph
- Joystick Wiring & Example Code
- RFID Wiring & Example Code
- PING))) Wiring & Example Code
- 4×4 Keypad Wiring & Example Code
- Air Quality BME680
- Badge Display
- LIS3DH Accelerometer
- 4 x 4 Keypad
- ePaper
- GPS Wiring & Example Code
- IR Remote Wiring & Example Code
- Fingerprint Scanner
- Advanced WX
- Simple WX
- WX WiFi
- RGB LEDs
- LSM9DS1 9-axis IMU
- PWM
- Pulse in / out
- Voltage
- RC time
- ColorPal
- Sound Impact Sensor
- Sony Remote
- RFID
- PIR
- Ping))) Distance
- MMA7455
- Memsic 2-axis
- 2-Axis Joystick
- HMC5883L
- XBee
- Protocols
- Terminal
- OLED
- Serial LCD
-
LSM9DS1 9-axis IMU
- About Board Types
- About Naming Things
- About Multicore
- About BlocklyProp Updates
- BlocklyProp Bulk Project Download
- Control
- Operators
- Values
- Arrays
- Variables
- Functions
- Pin states
- Communicate
- Sensor
- Memory
- Analog / Pulses
- Sound Impact Wiring & Example Code
- Audio
- ColorPal Wiring & Code Example
- Servo
- Badge Lock
- Robot
- Badge LEDs
- PIR Wiring & Example Code
- System
- Temp & Humidity
- Temperature & Humidity Sensor Wiring & Example Code
- Badge Buttons
- Memsic 2125 Wiring & Example Code
- GPS
- Fingerprint Scanner Wiring & Example Code
- Graph
- Joystick Wiring & Example Code
- RFID Wiring & Example Code
- PING))) Wiring & Example Code
- 4×4 Keypad Wiring & Example Code
- Air Quality BME680
- Badge Display
- LIS3DH Accelerometer
- 4 x 4 Keypad
- ePaper
- GPS Wiring & Example Code
- IR Remote Wiring & Example Code
- Fingerprint Scanner
- Advanced WX
- Simple WX
- WX WiFi
- RGB LEDs
- LSM9DS1 9-axis IMU
- PWM
- Pulse in / out
- Voltage
- RC time
- ColorPal
- Sound Impact Sensor
- Sony Remote
- RFID
- PIR
- Ping))) Distance
- MMA7455
- Memsic 2-axis
- 2-Axis Joystick
- HMC5883L
- XBee
- Protocols
- Terminal
- OLED
- Serial LCD
-
PWM
- About Board Types
- About Naming Things
- About Multicore
- About BlocklyProp Updates
- BlocklyProp Bulk Project Download
- Control
- Operators
- Values
- Arrays
- Variables
- Functions
- Pin states
- Communicate
- Sensor
- Memory
- Analog / Pulses
- Sound Impact Wiring & Example Code
- Audio
- ColorPal Wiring & Code Example
- Servo
- Badge Lock
- Robot
- Badge LEDs
- PIR Wiring & Example Code
- System
- Temp & Humidity
- Temperature & Humidity Sensor Wiring & Example Code
- Badge Buttons
- Memsic 2125 Wiring & Example Code
- GPS
- Fingerprint Scanner Wiring & Example Code
- Graph
- Joystick Wiring & Example Code
- RFID Wiring & Example Code
- PING))) Wiring & Example Code
- 4×4 Keypad Wiring & Example Code
- Air Quality BME680
- Badge Display
- LIS3DH Accelerometer
- 4 x 4 Keypad
- ePaper
- GPS Wiring & Example Code
- IR Remote Wiring & Example Code
- Fingerprint Scanner
- Advanced WX
- Simple WX
- WX WiFi
- RGB LEDs
- LSM9DS1 9-axis IMU
- PWM
- Pulse in / out
- Voltage
- RC time
- ColorPal
- Sound Impact Sensor
- Sony Remote
- RFID
- PIR
- Ping))) Distance
- MMA7455
- Memsic 2-axis
- 2-Axis Joystick
- HMC5883L
- XBee
- Protocols
- Terminal
- OLED
- Serial LCD
-
Pulse in / out
- About Board Types
- About Naming Things
- About Multicore
- About BlocklyProp Updates
- BlocklyProp Bulk Project Download
- Control
- Operators
- Values
- Arrays
- Variables
- Functions
- Pin states
- Communicate
- Sensor
- Memory
- Analog / Pulses
- Sound Impact Wiring & Example Code
- Audio
- ColorPal Wiring & Code Example
- Servo
- Badge Lock
- Robot
- Badge LEDs
- PIR Wiring & Example Code
- System
- Temp & Humidity
- Temperature & Humidity Sensor Wiring & Example Code
- Badge Buttons
- Memsic 2125 Wiring & Example Code
- GPS
- Fingerprint Scanner Wiring & Example Code
- Graph
- Joystick Wiring & Example Code
- RFID Wiring & Example Code
- PING))) Wiring & Example Code
- 4×4 Keypad Wiring & Example Code
- Air Quality BME680
- Badge Display
- LIS3DH Accelerometer
- 4 x 4 Keypad
- ePaper
- GPS Wiring & Example Code
- IR Remote Wiring & Example Code
- Fingerprint Scanner
- Advanced WX
- Simple WX
- WX WiFi
- RGB LEDs
- LSM9DS1 9-axis IMU
- PWM
- Pulse in / out
- Voltage
- RC time
- ColorPal
- Sound Impact Sensor
- Sony Remote
- RFID
- PIR
- Ping))) Distance
- MMA7455
- Memsic 2-axis
- 2-Axis Joystick
- HMC5883L
- XBee
- Protocols
- Terminal
- OLED
- Serial LCD
-
Voltage
- About Board Types
- About Naming Things
- About Multicore
- About BlocklyProp Updates
- BlocklyProp Bulk Project Download
- Control
- Operators
- Values
- Arrays
- Variables
- Functions
- Pin states
- Communicate
- Sensor
- Memory
- Analog / Pulses
- Sound Impact Wiring & Example Code
- Audio
- ColorPal Wiring & Code Example
- Servo
- Badge Lock
- Robot
- Badge LEDs
- PIR Wiring & Example Code
- System
- Temp & Humidity
- Temperature & Humidity Sensor Wiring & Example Code
- Badge Buttons
- Memsic 2125 Wiring & Example Code
- GPS
- Fingerprint Scanner Wiring & Example Code
- Graph
- Joystick Wiring & Example Code
- RFID Wiring & Example Code
- PING))) Wiring & Example Code
- 4×4 Keypad Wiring & Example Code
- Air Quality BME680
- Badge Display
- LIS3DH Accelerometer
- 4 x 4 Keypad
- ePaper
- GPS Wiring & Example Code
- IR Remote Wiring & Example Code
- Fingerprint Scanner
- Advanced WX
- Simple WX
- WX WiFi
- RGB LEDs
- LSM9DS1 9-axis IMU
- PWM
- Pulse in / out
- Voltage
- RC time
- ColorPal
- Sound Impact Sensor
- Sony Remote
- RFID
- PIR
- Ping))) Distance
- MMA7455
- Memsic 2-axis
- 2-Axis Joystick
- HMC5883L
- XBee
- Protocols
- Terminal
- OLED
- Serial LCD
-
RC time
- About Board Types
- About Naming Things
- About Multicore
- About BlocklyProp Updates
- BlocklyProp Bulk Project Download
- Control
- Operators
- Values
- Arrays
- Variables
- Functions
- Pin states
- Communicate
- Sensor
- Memory
- Analog / Pulses
- Sound Impact Wiring & Example Code
- Audio
- ColorPal Wiring & Code Example
- Servo
- Badge Lock
- Robot
- Badge LEDs
- PIR Wiring & Example Code
- System
- Temp & Humidity
- Temperature & Humidity Sensor Wiring & Example Code
- Badge Buttons
- Memsic 2125 Wiring & Example Code
- GPS
- Fingerprint Scanner Wiring & Example Code
- Graph
- Joystick Wiring & Example Code
- RFID Wiring & Example Code
- PING))) Wiring & Example Code
- 4×4 Keypad Wiring & Example Code
- Air Quality BME680
- Badge Display
- LIS3DH Accelerometer
- 4 x 4 Keypad
- ePaper
- GPS Wiring & Example Code
- IR Remote Wiring & Example Code
- Fingerprint Scanner
- Advanced WX
- Simple WX
- WX WiFi
- RGB LEDs
- LSM9DS1 9-axis IMU
- PWM
- Pulse in / out
- Voltage
- RC time
- ColorPal
- Sound Impact Sensor
- Sony Remote
- RFID
- PIR
- Ping))) Distance
- MMA7455
- Memsic 2-axis
- 2-Axis Joystick
- HMC5883L
- XBee
- Protocols
- Terminal
- OLED
- Serial LCD
-
ColorPal
- About Board Types
- About Naming Things
- About Multicore
- About BlocklyProp Updates
- BlocklyProp Bulk Project Download
- Control
- Operators
- Values
- Arrays
- Variables
- Functions
- Pin states
- Communicate
- Sensor
- Memory
- Analog / Pulses
- Sound Impact Wiring & Example Code
- Audio
- ColorPal Wiring & Code Example
- Servo
- Badge Lock
- Robot
- Badge LEDs
- PIR Wiring & Example Code
- System
- Temp & Humidity
- Temperature & Humidity Sensor Wiring & Example Code
- Badge Buttons
- Memsic 2125 Wiring & Example Code
- GPS
- Fingerprint Scanner Wiring & Example Code
- Graph
- Joystick Wiring & Example Code
- RFID Wiring & Example Code
- PING))) Wiring & Example Code
- 4×4 Keypad Wiring & Example Code
- Air Quality BME680
- Badge Display
- LIS3DH Accelerometer
- 4 x 4 Keypad
- ePaper
- GPS Wiring & Example Code
- IR Remote Wiring & Example Code
- Fingerprint Scanner
- Advanced WX
- Simple WX
- WX WiFi
- RGB LEDs
- LSM9DS1 9-axis IMU
- PWM
- Pulse in / out
- Voltage
- RC time
- ColorPal
- Sound Impact Sensor
- Sony Remote
- RFID
- PIR
- Ping))) Distance
- MMA7455
- Memsic 2-axis
- 2-Axis Joystick
- HMC5883L
- XBee
- Protocols
- Terminal
- OLED
- Serial LCD
-
Sound Impact Sensor
- About Board Types
- About Naming Things
- About Multicore
- About BlocklyProp Updates
- BlocklyProp Bulk Project Download
- Control
- Operators
- Values
- Arrays
- Variables
- Functions
- Pin states
- Communicate
- Sensor
- Memory
- Analog / Pulses
- Sound Impact Wiring & Example Code
- Audio
- ColorPal Wiring & Code Example
- Servo
- Badge Lock
- Robot
- Badge LEDs
- PIR Wiring & Example Code
- System
- Temp & Humidity
- Temperature & Humidity Sensor Wiring & Example Code
- Badge Buttons
- Memsic 2125 Wiring & Example Code
- GPS
- Fingerprint Scanner Wiring & Example Code
- Graph
- Joystick Wiring & Example Code
- RFID Wiring & Example Code
- PING))) Wiring & Example Code
- 4×4 Keypad Wiring & Example Code
- Air Quality BME680
- Badge Display
- LIS3DH Accelerometer
- 4 x 4 Keypad
- ePaper
- GPS Wiring & Example Code
- IR Remote Wiring & Example Code
- Fingerprint Scanner
- Advanced WX
- Simple WX
- WX WiFi
- RGB LEDs
- LSM9DS1 9-axis IMU
- PWM
- Pulse in / out
- Voltage
- RC time
- ColorPal
- Sound Impact Sensor
- Sony Remote
- RFID
- PIR
- Ping))) Distance
- MMA7455
- Memsic 2-axis
- 2-Axis Joystick
- HMC5883L
- XBee
- Protocols
- Terminal
- OLED
- Serial LCD
-
Sony Remote
- About Board Types
- About Naming Things
- About Multicore
- About BlocklyProp Updates
- BlocklyProp Bulk Project Download
- Control
- Operators
- Values
- Arrays
- Variables
- Functions
- Pin states
- Communicate
- Sensor
- Memory
- Analog / Pulses
- Sound Impact Wiring & Example Code
- Audio
- ColorPal Wiring & Code Example
- Servo
- Badge Lock
- Robot
- Badge LEDs
- PIR Wiring & Example Code
- System
- Temp & Humidity
- Temperature & Humidity Sensor Wiring & Example Code
- Badge Buttons
- Memsic 2125 Wiring & Example Code
- GPS
- Fingerprint Scanner Wiring & Example Code
- Graph
- Joystick Wiring & Example Code
- RFID Wiring & Example Code
- PING))) Wiring & Example Code
- 4×4 Keypad Wiring & Example Code
- Air Quality BME680
- Badge Display
- LIS3DH Accelerometer
- 4 x 4 Keypad
- ePaper
- GPS Wiring & Example Code
- IR Remote Wiring & Example Code
- Fingerprint Scanner
- Advanced WX
- Simple WX
- WX WiFi
- RGB LEDs
- LSM9DS1 9-axis IMU
- PWM
- Pulse in / out
- Voltage
- RC time
- ColorPal
- Sound Impact Sensor
- Sony Remote
- RFID
- PIR
- Ping))) Distance
- MMA7455
- Memsic 2-axis
- 2-Axis Joystick
- HMC5883L
- XBee
- Protocols
- Terminal
- OLED
- Serial LCD
-
RFID
- About Board Types
- About Naming Things
- About Multicore
- About BlocklyProp Updates
- BlocklyProp Bulk Project Download
- Control
- Operators
- Values
- Arrays
- Variables
- Functions
- Pin states
- Communicate
- Sensor
- Memory
- Analog / Pulses
- Sound Impact Wiring & Example Code
- Audio
- ColorPal Wiring & Code Example
- Servo
- Badge Lock
- Robot
- Badge LEDs
- PIR Wiring & Example Code
- System
- Temp & Humidity
- Temperature & Humidity Sensor Wiring & Example Code
- Badge Buttons
- Memsic 2125 Wiring & Example Code
- GPS
- Fingerprint Scanner Wiring & Example Code
- Graph
- Joystick Wiring & Example Code
- RFID Wiring & Example Code
- PING))) Wiring & Example Code
- 4×4 Keypad Wiring & Example Code
- Air Quality BME680
- Badge Display
- LIS3DH Accelerometer
- 4 x 4 Keypad
- ePaper
- GPS Wiring & Example Code
- IR Remote Wiring & Example Code
- Fingerprint Scanner
- Advanced WX
- Simple WX
- WX WiFi
- RGB LEDs
- LSM9DS1 9-axis IMU
- PWM
- Pulse in / out
- Voltage
- RC time
- ColorPal
- Sound Impact Sensor
- Sony Remote
- RFID
- PIR
- Ping))) Distance
- MMA7455
- Memsic 2-axis
- 2-Axis Joystick
- HMC5883L
- XBee
- Protocols
- Terminal
- OLED
- Serial LCD
-
PIR
- About Board Types
- About Naming Things
- About Multicore
- About BlocklyProp Updates
- BlocklyProp Bulk Project Download
- Control
- Operators
- Values
- Arrays
- Variables
- Functions
- Pin states
- Communicate
- Sensor
- Memory
- Analog / Pulses
- Sound Impact Wiring & Example Code
- Audio
- ColorPal Wiring & Code Example
- Servo
- Badge Lock
- Robot
- Badge LEDs
- PIR Wiring & Example Code
- System
- Temp & Humidity
- Temperature & Humidity Sensor Wiring & Example Code
- Badge Buttons
- Memsic 2125 Wiring & Example Code
- GPS
- Fingerprint Scanner Wiring & Example Code
- Graph
- Joystick Wiring & Example Code
- RFID Wiring & Example Code
- PING))) Wiring & Example Code
- 4×4 Keypad Wiring & Example Code
- Air Quality BME680
- Badge Display
- LIS3DH Accelerometer
- 4 x 4 Keypad
- ePaper
- GPS Wiring & Example Code
- IR Remote Wiring & Example Code
- Fingerprint Scanner
- Advanced WX
- Simple WX
- WX WiFi
- RGB LEDs
- LSM9DS1 9-axis IMU
- PWM
- Pulse in / out
- Voltage
- RC time
- ColorPal
- Sound Impact Sensor
- Sony Remote
- RFID
- PIR
- Ping))) Distance
- MMA7455
- Memsic 2-axis
- 2-Axis Joystick
- HMC5883L
- XBee
- Protocols
- Terminal
- OLED
- Serial LCD
-
Ping))) Distance
- About Board Types
- About Naming Things
- About Multicore
- About BlocklyProp Updates
- BlocklyProp Bulk Project Download
- Control
- Operators
- Values
- Arrays
- Variables
- Functions
- Pin states
- Communicate
- Sensor
- Memory
- Analog / Pulses
- Sound Impact Wiring & Example Code
- Audio
- ColorPal Wiring & Code Example
- Servo
- Badge Lock
- Robot
- Badge LEDs
- PIR Wiring & Example Code
- System
- Temp & Humidity
- Temperature & Humidity Sensor Wiring & Example Code
- Badge Buttons
- Memsic 2125 Wiring & Example Code
- GPS
- Fingerprint Scanner Wiring & Example Code
- Graph
- Joystick Wiring & Example Code
- RFID Wiring & Example Code
- PING))) Wiring & Example Code
- 4×4 Keypad Wiring & Example Code
- Air Quality BME680
- Badge Display
- LIS3DH Accelerometer
- 4 x 4 Keypad
- ePaper
- GPS Wiring & Example Code
- IR Remote Wiring & Example Code
- Fingerprint Scanner
- Advanced WX
- Simple WX
- WX WiFi
- RGB LEDs
- LSM9DS1 9-axis IMU
- PWM
- Pulse in / out
- Voltage
- RC time
- ColorPal
- Sound Impact Sensor
- Sony Remote
- RFID
- PIR
- Ping))) Distance
- MMA7455
- Memsic 2-axis
- 2-Axis Joystick
- HMC5883L
- XBee
- Protocols
- Terminal
- OLED
- Serial LCD
-
MMA7455
- About Board Types
- About Naming Things
- About Multicore
- About BlocklyProp Updates
- BlocklyProp Bulk Project Download
- Control
- Operators
- Values
- Arrays
- Variables
- Functions
- Pin states
- Communicate
- Sensor
- Memory
- Analog / Pulses
- Sound Impact Wiring & Example Code
- Audio
- ColorPal Wiring & Code Example
- Servo
- Badge Lock
- Robot
- Badge LEDs
- PIR Wiring & Example Code
- System
- Temp & Humidity
- Temperature & Humidity Sensor Wiring & Example Code
- Badge Buttons
- Memsic 2125 Wiring & Example Code
- GPS
- Fingerprint Scanner Wiring & Example Code
- Graph
- Joystick Wiring & Example Code
- RFID Wiring & Example Code
- PING))) Wiring & Example Code
- 4×4 Keypad Wiring & Example Code
- Air Quality BME680
- Badge Display
- LIS3DH Accelerometer
- 4 x 4 Keypad
- ePaper
- GPS Wiring & Example Code
- IR Remote Wiring & Example Code
- Fingerprint Scanner
- Advanced WX
- Simple WX
- WX WiFi
- RGB LEDs
- LSM9DS1 9-axis IMU
- PWM
- Pulse in / out
- Voltage
- RC time
- ColorPal
- Sound Impact Sensor
- Sony Remote
- RFID
- PIR
- Ping))) Distance
- MMA7455
- Memsic 2-axis
- 2-Axis Joystick
- HMC5883L
- XBee
- Protocols
- Terminal
- OLED
- Serial LCD
-
Memsic 2-axis
- About Board Types
- About Naming Things
- About Multicore
- About BlocklyProp Updates
- BlocklyProp Bulk Project Download
- Control
- Operators
- Values
- Arrays
- Variables
- Functions
- Pin states
- Communicate
- Sensor
- Memory
- Analog / Pulses
- Sound Impact Wiring & Example Code
- Audio
- ColorPal Wiring & Code Example
- Servo
- Badge Lock
- Robot
- Badge LEDs
- PIR Wiring & Example Code
- System
- Temp & Humidity
- Temperature & Humidity Sensor Wiring & Example Code
- Badge Buttons
- Memsic 2125 Wiring & Example Code
- GPS
- Fingerprint Scanner Wiring & Example Code
- Graph
- Joystick Wiring & Example Code
- RFID Wiring & Example Code
- PING))) Wiring & Example Code
- 4×4 Keypad Wiring & Example Code
- Air Quality BME680
- Badge Display
- LIS3DH Accelerometer
- 4 x 4 Keypad
- ePaper
- GPS Wiring & Example Code
- IR Remote Wiring & Example Code
- Fingerprint Scanner
- Advanced WX
- Simple WX
- WX WiFi
- RGB LEDs
- LSM9DS1 9-axis IMU
- PWM
- Pulse in / out
- Voltage
- RC time
- ColorPal
- Sound Impact Sensor
- Sony Remote
- RFID
- PIR
- Ping))) Distance
- MMA7455
- Memsic 2-axis
- 2-Axis Joystick
- HMC5883L
- XBee
- Protocols
- Terminal
- OLED
- Serial LCD
-
2-Axis Joystick
- About Board Types
- About Naming Things
- About Multicore
- About BlocklyProp Updates
- BlocklyProp Bulk Project Download
- Control
- Operators
- Values
- Arrays
- Variables
- Functions
- Pin states
- Communicate
- Sensor
- Memory
- Analog / Pulses
- Sound Impact Wiring & Example Code
- Audio
- ColorPal Wiring & Code Example
- Servo
- Badge Lock
- Robot
- Badge LEDs
- PIR Wiring & Example Code
- System
- Temp & Humidity
- Temperature & Humidity Sensor Wiring & Example Code
- Badge Buttons
- Memsic 2125 Wiring & Example Code
- GPS
- Fingerprint Scanner Wiring & Example Code
- Graph
- Joystick Wiring & Example Code
- RFID Wiring & Example Code
- PING))) Wiring & Example Code
- 4×4 Keypad Wiring & Example Code
- Air Quality BME680
- Badge Display
- LIS3DH Accelerometer
- 4 x 4 Keypad
- ePaper
- GPS Wiring & Example Code
- IR Remote Wiring & Example Code
- Fingerprint Scanner
- Advanced WX
- Simple WX
- WX WiFi
- RGB LEDs
- LSM9DS1 9-axis IMU
- PWM
- Pulse in / out
- Voltage
- RC time
- ColorPal
- Sound Impact Sensor
- Sony Remote
- RFID
- PIR
- Ping))) Distance
- MMA7455
- Memsic 2-axis
- 2-Axis Joystick
- HMC5883L
- XBee
- Protocols
- Terminal
- OLED
- Serial LCD
-
HMC5883L
- About Board Types
- About Naming Things
- About Multicore
- About BlocklyProp Updates
- BlocklyProp Bulk Project Download
- Control
- Operators
- Values
- Arrays
- Variables
- Functions
- Pin states
- Communicate
- Sensor
- Memory
- Analog / Pulses
- Sound Impact Wiring & Example Code
- Audio
- ColorPal Wiring & Code Example
- Servo
- Badge Lock
- Robot
- Badge LEDs
- PIR Wiring & Example Code
- System
- Temp & Humidity
- Temperature & Humidity Sensor Wiring & Example Code
- Badge Buttons
- Memsic 2125 Wiring & Example Code
- GPS
- Fingerprint Scanner Wiring & Example Code
- Graph
- Joystick Wiring & Example Code
- RFID Wiring & Example Code
- PING))) Wiring & Example Code
- 4×4 Keypad Wiring & Example Code
- Air Quality BME680
- Badge Display
- LIS3DH Accelerometer
- 4 x 4 Keypad
- ePaper
- GPS Wiring & Example Code
- IR Remote Wiring & Example Code
- Fingerprint Scanner
- Advanced WX
- Simple WX
- WX WiFi
- RGB LEDs
- LSM9DS1 9-axis IMU
- PWM
- Pulse in / out
- Voltage
- RC time
- ColorPal
- Sound Impact Sensor
- Sony Remote
- RFID
- PIR
- Ping))) Distance
- MMA7455
- Memsic 2-axis
- 2-Axis Joystick
- HMC5883L
- XBee
- Protocols
- Terminal
- OLED
- Serial LCD
-
XBee
- About Board Types
- About Naming Things
- About Multicore
- About BlocklyProp Updates
- BlocklyProp Bulk Project Download
- Control
- Operators
- Values
- Arrays
- Variables
- Functions
- Pin states
- Communicate
- Sensor
- Memory
- Analog / Pulses
- Sound Impact Wiring & Example Code
- Audio
- ColorPal Wiring & Code Example
- Servo
- Badge Lock
- Robot
- Badge LEDs
- PIR Wiring & Example Code
- System
- Temp & Humidity
- Temperature & Humidity Sensor Wiring & Example Code
- Badge Buttons
- Memsic 2125 Wiring & Example Code
- GPS
- Fingerprint Scanner Wiring & Example Code
- Graph
- Joystick Wiring & Example Code
- RFID Wiring & Example Code
- PING))) Wiring & Example Code
- 4×4 Keypad Wiring & Example Code
- Air Quality BME680
- Badge Display
- LIS3DH Accelerometer
- 4 x 4 Keypad
- ePaper
- GPS Wiring & Example Code
- IR Remote Wiring & Example Code
- Fingerprint Scanner
- Advanced WX
- Simple WX
- WX WiFi
- RGB LEDs
- LSM9DS1 9-axis IMU
- PWM
- Pulse in / out
- Voltage
- RC time
- ColorPal
- Sound Impact Sensor
- Sony Remote
- RFID
- PIR
- Ping))) Distance
- MMA7455
- Memsic 2-axis
- 2-Axis Joystick
- HMC5883L
- XBee
- Protocols
- Terminal
- OLED
- Serial LCD
-
Protocols
- About Board Types
- About Naming Things
- About Multicore
- About BlocklyProp Updates
- BlocklyProp Bulk Project Download
- Control
- Operators
- Values
- Arrays
- Variables
- Functions
- Pin states
- Communicate
- Sensor
- Memory
- Analog / Pulses
- Sound Impact Wiring & Example Code
- Audio
- ColorPal Wiring & Code Example
- Servo
- Badge Lock
- Robot
- Badge LEDs
- PIR Wiring & Example Code
- System
- Temp & Humidity
- Temperature & Humidity Sensor Wiring & Example Code
- Badge Buttons
- Memsic 2125 Wiring & Example Code
- GPS
- Fingerprint Scanner Wiring & Example Code
- Graph
- Joystick Wiring & Example Code
- RFID Wiring & Example Code
- PING))) Wiring & Example Code
- 4×4 Keypad Wiring & Example Code
- Air Quality BME680
- Badge Display
- LIS3DH Accelerometer
- 4 x 4 Keypad
- ePaper
- GPS Wiring & Example Code
- IR Remote Wiring & Example Code
- Fingerprint Scanner
- Advanced WX
- Simple WX
- WX WiFi
- RGB LEDs
- LSM9DS1 9-axis IMU
- PWM
- Pulse in / out
- Voltage
- RC time
- ColorPal
- Sound Impact Sensor
- Sony Remote
- RFID
- PIR
- Ping))) Distance
- MMA7455
- Memsic 2-axis
- 2-Axis Joystick
- HMC5883L
- XBee
- Protocols
- Terminal
- OLED
- Serial LCD
-
Terminal
- About Board Types
- About Naming Things
- About Multicore
- About BlocklyProp Updates
- BlocklyProp Bulk Project Download
- Control
- Operators
- Values
- Arrays
- Variables
- Functions
- Pin states
- Communicate
- Sensor
- Memory
- Analog / Pulses
- Sound Impact Wiring & Example Code
- Audio
- ColorPal Wiring & Code Example
- Servo
- Badge Lock
- Robot
- Badge LEDs
- PIR Wiring & Example Code
- System
- Temp & Humidity
- Temperature & Humidity Sensor Wiring & Example Code
- Badge Buttons
- Memsic 2125 Wiring & Example Code
- GPS
- Fingerprint Scanner Wiring & Example Code
- Graph
- Joystick Wiring & Example Code
- RFID Wiring & Example Code
- PING))) Wiring & Example Code
- 4×4 Keypad Wiring & Example Code
- Air Quality BME680
- Badge Display
- LIS3DH Accelerometer
- 4 x 4 Keypad
- ePaper
- GPS Wiring & Example Code
- IR Remote Wiring & Example Code
- Fingerprint Scanner
- Advanced WX
- Simple WX
- WX WiFi
- RGB LEDs
- LSM9DS1 9-axis IMU
- PWM
- Pulse in / out
- Voltage
- RC time
- ColorPal
- Sound Impact Sensor
- Sony Remote
- RFID
- PIR
- Ping))) Distance
- MMA7455
- Memsic 2-axis
- 2-Axis Joystick
- HMC5883L
- XBee
- Protocols
- Terminal
- OLED
- Serial LCD
-
OLED
- About Board Types
- About Naming Things
- About Multicore
- About BlocklyProp Updates
- BlocklyProp Bulk Project Download
- Control
- Operators
- Values
- Arrays
- Variables
- Functions
- Pin states
- Communicate
- Sensor
- Memory
- Analog / Pulses
- Sound Impact Wiring & Example Code
- Audio
- ColorPal Wiring & Code Example
- Servo
- Badge Lock
- Robot
- Badge LEDs
- PIR Wiring & Example Code
- System
- Temp & Humidity
- Temperature & Humidity Sensor Wiring & Example Code
- Badge Buttons
- Memsic 2125 Wiring & Example Code
- GPS
- Fingerprint Scanner Wiring & Example Code
- Graph
- Joystick Wiring & Example Code
- RFID Wiring & Example Code
- PING))) Wiring & Example Code
- 4×4 Keypad Wiring & Example Code
- Air Quality BME680
- Badge Display
- LIS3DH Accelerometer
- 4 x 4 Keypad
- ePaper
- GPS Wiring & Example Code
- IR Remote Wiring & Example Code
- Fingerprint Scanner
- Advanced WX
- Simple WX
- WX WiFi
- RGB LEDs
- LSM9DS1 9-axis IMU
- PWM
- Pulse in / out
- Voltage
- RC time
- ColorPal
- Sound Impact Sensor
- Sony Remote
- RFID
- PIR
- Ping))) Distance
- MMA7455
- Memsic 2-axis
- 2-Axis Joystick
- HMC5883L
- XBee
- Protocols
- Terminal
- OLED
- Serial LCD
-
Serial LCD
- About Board Types
- About Naming Things
- About Multicore
- About BlocklyProp Updates
- BlocklyProp Bulk Project Download
- Control
- Operators
- Values
- Arrays
- Variables
- Functions
- Pin states
- Communicate
- Sensor
- Memory
- Analog / Pulses
- Sound Impact Wiring & Example Code
- Audio
- ColorPal Wiring & Code Example
- Servo
- Badge Lock
- Robot
- Badge LEDs
- PIR Wiring & Example Code
- System
- Temp & Humidity
- Temperature & Humidity Sensor Wiring & Example Code
- Badge Buttons
- Memsic 2125 Wiring & Example Code
- GPS
- Fingerprint Scanner Wiring & Example Code
- Graph
- Joystick Wiring & Example Code
- RFID Wiring & Example Code
- PING))) Wiring & Example Code
- 4×4 Keypad Wiring & Example Code
- Air Quality BME680
- Badge Display
- LIS3DH Accelerometer
- 4 x 4 Keypad
- ePaper
- GPS Wiring & Example Code
- IR Remote Wiring & Example Code
- Fingerprint Scanner
- Advanced WX
- Simple WX
- WX WiFi
- RGB LEDs
- LSM9DS1 9-axis IMU
- PWM
- Pulse in / out
- Voltage
- RC time
- ColorPal
- Sound Impact Sensor
- Sony Remote
- RFID
- PIR
- Ping))) Distance
- MMA7455
- Memsic 2-axis
- 2-Axis Joystick
- HMC5883L
- XBee
- Protocols
- Terminal
- OLED
- Serial LCD
System
BlocklyProp reference for SYSTEM blocks
Block availability varies by board type.
Using most of the System blocks requires a good understanding of the Propeller chip’s 8-core architecture. See the P8X32A Propeller Datasheet or the Propeller Manual for detailed information. The User Defined Code block requires some understanding of Propeller C programming. See the Propeller C Tutorials as a resource.
Wait until counter
 Only available for the Other board type.

The Wait until counter block pauses program execution until a timing event is reached. Most of the time it is used with the system counter block and an inserted value. This technique can guarantee a specific number of system clock ticks elapse before code execution continues. It can also be used to coordinate code execution in separate cores, where both processes pause until the system counter reaches the same specified value.
cog set register
Only available for the Other board type.

The cog set register block allows you to set the value of the read/write Cog RAM register selected from the drop-down menu.
- pin output: I/O pin output states for P31-P0 (OUTA)
- pin direction: I/O pin directions for P31-P0 (DIRA)
- counter A: Counter A control (CTRA)
- counter B: Counter B control (CTRB)
- frequency A: Counter A frequency (FRQA)
- frequency B: Counter B frequency (FRQB)
- phase accumulator A: Counter A phase (PHSA)
- phase accumulator B: Counter B phase (PHSB)
Each Propeller core has its own set of registers; this block interacts with the core executing the block code. See the Cog RAM Special Purpose Registers in the P8X32A Propeller Datasheet or the Propeller Manual for detailed information on these registers.
cog get register
Only available for the Other board type.

The cog get register block retrieves the value from the read-only or read/write Cog RAM register selected from the drop-down menu:
- pin input: I/O pin input states for P31-P0 (INA, read-only)
- pin output: I/O pin output states for P31-P0 (OUTA)
- pin direction: I/O pin directions for P31-P0 (DIRA)
- counter A: Counter A control (CTRA)
- counter B: Counter B control (CTRB)
- frequency A: Counter A frequency (FRQA)
- frequency B: Counter B frequency (FRQB)
- phase accumulator A: Counter A phase (PHSA)
- phase accumulator B: Counter B phase (PHSB)
Each Propeller core has its own set of registers; this block interacts with the core executing the block code. See the Cog RAM Special Purpose Registers in the P8X32A Propeller Datasheet or the Propeller Manual for detailed information on these registers.
system
Only available for the Other board type.

The system block can provide one of two different values based on your drop-down menu choice.
- system counter provides the current system counter value at the moment it is asked for. When the system counter reaches 4,294,967,295, it resets back to zero. The Propeller chip’s system counter increases by 1 for every system clock “tick.” There are 80,000,000 ticks every second on the Propeller Activity Board, Propeller FLiP, Propeller Project Board USB, and any Propeller board using a 5 MHz oscillator running at PLL16x.
- system clock frequency provides the clock frequency in use by your Blockly project.
This block appears in the System menu for the Other board type. It appears in the Values menu for the Activity Board, FLiP, and Badge board types. It is not available for the S3. For a tutorial using this block, see the Precision Timing with the Propeller tutorial.
user defined code


 Compatible with all Propeller board types (except Scribbler Robot)
This block allows you to integrate your custom C code with your BlocklyProp code.
- It is helpful to have an understanding of Propeller C if you wish to use this block. Click here to learn more about Propeller C.
Using this block often requires you switch between the block and code views to ensure that the custom code you are entering into the fields of this block is placed into the parts of your program that you expect.
- Check the box to open this block’s menu system.
- In the label field, enter a name for your custom code block.
Checking the box of any one of the menu items in this block will open more options for your code.
The label field lets you change the text displayed on your new user defined block.
Block color lets you color-match your custom code block to the existing palette.
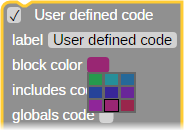
The includes code, globals code, setups code, main code, and functions code menu options open up a mini code editor for inserting C code.

- Code entered in the includes code field is placed at the very beginning of your program. It is meant for library inclusions and defined constants using #include and #define.
- Included libraries must be available in the BlocklyProp branch of SimpleLibraries, as those are the only libraries BlocklyProp can access.
- Code entered in the globals code field is placed before the main() function. Enter any global variables, structures, forward declarations, or objects here.
- Code entered in the setups code field is placed immediately after the main() function, but before inline code generated by most blocks.
- Some blocks generate setup code. The order of any blocks that generate setup code (top to bottom, then left to right) determines the order in which that generated setup code is placed.
- Code entered in the main code field is placed inside of the main() function at the position determined by the block in relation to other blocks in your program.
- In the main code pane, you may enter inline code, a numerical value, or a string value. If you choose numerical or string value, the block shape will transform (as shown below), allowing you to attach it to any blocks that accept the corresponding value type.
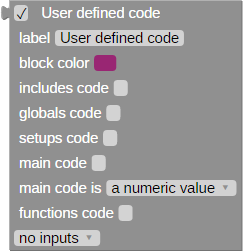
-
- If you choose for your main code to be a numeric or string value, do NOT end your statement with a semicolon. If you do, it will be treated as a value.
- If you choose for your code to return a numeric value, be sure that it is already an int type variable, or use (int), to cast it as an int.
- If you choose for your code to return a string value, be sure that your code is returning a *char or char[] value
- Code entered in the functions code field is placed after the main() function.
- Functions code should consist of full functions.
- Any functions you create must have a matching forward declaration entered into the globals code field.
The inputs drop-down allows you to add up to 9 inputs to your custom code block.

To access the values received in the inputs, add @1, @2, @3, etc. (corresponding to the input’s number) into any of the code fields in the block. The @1, @2, @3, etc. is replaced with the code generated by whatever block you place in that input.
- To add an @ into your code, type @@. The @@ will then be replaced with a single @.
When you uncheck the box at the top of the block, you will see the block as you designed it to appear. The shape, color, labels, and inputs you specified will be displayed:


The block’s inputs are external by default. Right-click your block and choose “inline inputs” to set the inputs inline.
- If the block’s inputs are set to “inline,” then the block will appear very strange when the block’s menu system is opened up. To prevent or correct this, right-click the block and reset the block’s inputs to external.