Using the Parallax Serial Terminal
The Parallax Serial Terminal provides a convenient way to exchange data between the Propeller and your PC. It’s most often used for displaying data from the Propeller – for example, the output of a sensor. You can use the Parallax Serial Terminal (PST) to verify that your program is working properly.
Parallax Serial Terminal is included with the Propeller Tool software download, but is a separate program.
To use the PST your Propeller must be plugged into your PC via its USB cable.
This guide assumes you are using version 1.3 or later of the Propeller Tool application. If you are using an earlier version of the Propeller Tool software, download the latest from here.
Terminal Setup
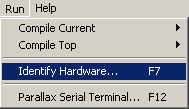
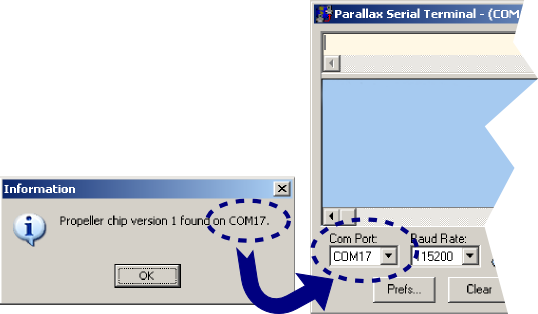
- In the Propeller Tool program choose Run>Identify Hardware (or press F7) to identify the Propeller board connected to your computer. The information displayed includes the COM port used for communications.
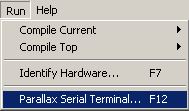
- In the Propeller Tool program choose Run>Parallax Serial Terminal (or press F12) to start the Parallax Serial Terminal.
- In the Parallax Serial Terminal program select the COM port to match that previously shown in the Identify Hardware Information window.
- Select the Baud rate to match the communications setting in the Propeller program you previously downloaded. Unless otherwise specified, all the KickStart examples use a baud rate of 115,200.
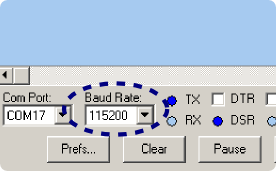
The Parallax Serial Terminal is now ready for use.
Displaying Data from the Propeller
- Click the Enable button (lower right corner) if the Parallax Serial Terminal is currently disabled.
- Momentarily depress the reset button on the Propeller board. This restarts the running application.
Data from the Propeller appears in the PST window.
Sending Data to the Propeller
- Enable the Parallax Serial Terminal if it’s not already.
- Click inside the text box at the top, and type text.
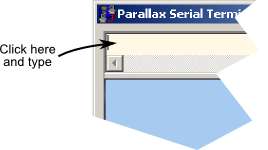
Text you enter is sent to the Propeller.
For More Information
- See the Propeller Education Kit Labs page for more information on using the Parallax Serial Terminal.
