Silly String Sprayer
To create the silly string spray device you will need to either:
- Use the Silly String Laser Cutter Files (DXF) with a laser cutter, or
- cut the proper shapes out of rigid material (such as wood or hard plastic) using the file download and provided scale as a guide.
Download the Silly String Parts File (DXF)
You will need a program capable of opening a .dxf document to open the parts file.
Hardware Required:
- (10) – 1” Standoffs #700-00060
- (5) – ½” Spacers #713-00007
- (5) – L brackets #720-00011
- (1) – 1.75” 4-40 screw #700-00041
- (3) – ⅞” 4-40 screws #710-00007
- (1) – 1.25” 4-40 screw #710-00042
- (5) – 4-40 lock nuts #700-00024
- (19) – ⅜” 4-40 screws #700-00002
- (7) – ⅛” Nylon spacers #700-00015
- (1) – 4-cell battery pack #700-00038
- (4) – pcb feet #700-00037
- (1) – ⅝” 4-40 screw #710-00029
- (1) – Standard Servo #900-00005
Project Scale:
4.5×4.5 Inches
Assembly Instructions:
CAUTION: Always wear safety glasses when working with drills, hot glue, laser cutters or other tools!
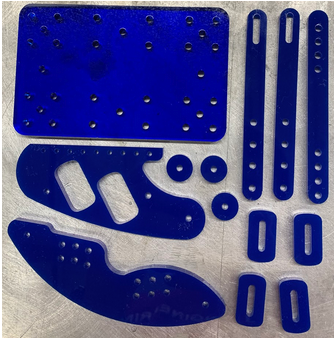
- Cut out all of the pieces and lay them out, like this:
- Attach rubber feet to each corner of the base plate:

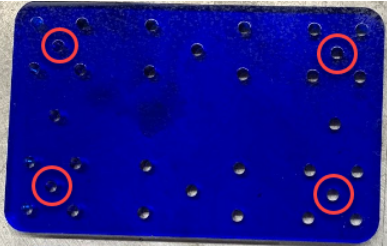
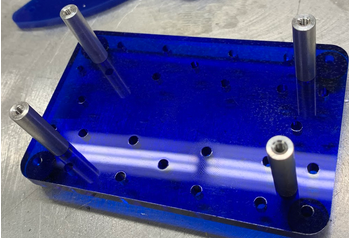
- Attach 4 1” Standoffs in each corner, using ⅜” screws and these holes:
- Make sure to screw them in from the bottom, on the side with the feet.It should now look like this:
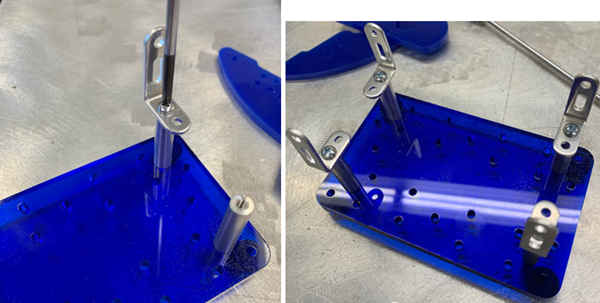
- Attach L brackets to the top of each standoff with ⅜” screws, with the taller side of the Bracket facing up, and attaching the screws through the second hole of each bracket:
- Attach a cross piece to the top of a bracket using a ⅜” screw and a 1” stand off. Include a nylon spacer between the cross piece and the standoff. Make sure that the cross piece is one of the two that have a slit on one end. Add another screw to the next hole on the cross piece,with another spacer and standoff attached.
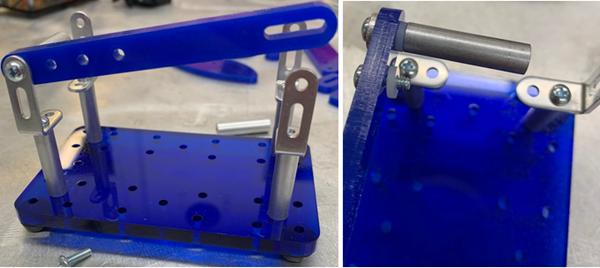
- Attach the far left standoff to the bracket across from it with a ⅝” screw, ½” spacer, and a nylon spacer in between the bracket and the ½” spacer, leaving a gap for the servo between the 1” standoff and spacer.
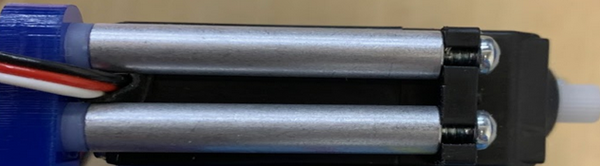
- Place the servo in the gap that was left in the previous step, and tighten the screw.
- Attach the servo to the other standoff with a ⅜” screw.
- Attach the cross piece to the top of the other bracket using a ⅜” screw and a 1” stand off. Do not include a nylon spacer between the cross piece and the standoff. Make sure you are connecting the slit end of the cross piece.
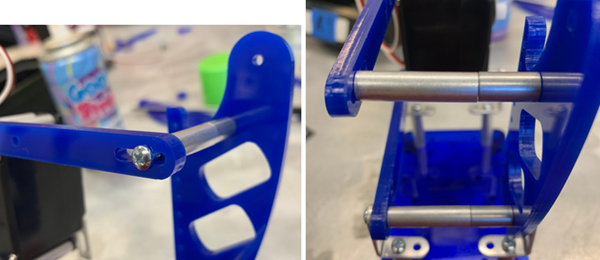
- Attach the vertical piece to the bracket and the standoff using a ⅞” screw, with a nylon spacer between the bracket and the vertical piece.
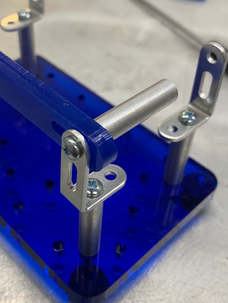
- Attach the other cross piece with a slit to (2) 1” standoffs in the same manner as the lower cross piece, and attach the servo to the other side of the standoffs:
- Attach the vertical piece to the other side of the cross piece, using a ⅜” and ⅞” screw, with a 1” standoff and ½” spacer in between.
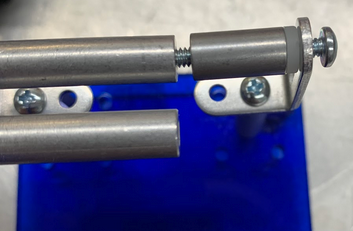
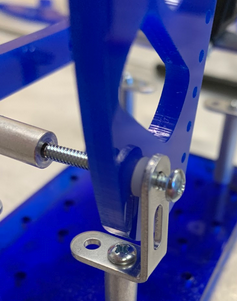
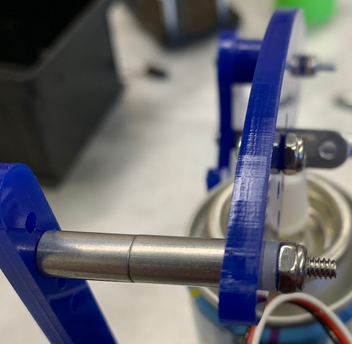
- Attach the swing piece to the vertical piece with a 1.25” screw and the 3 round spacers in between. Use a lock nut to fasten the screw.
- Attach an L bracket to the Swing piece so that it hits squarely on the top of the silly string sprayer.
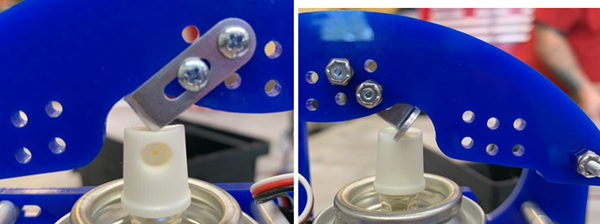
- Attach the servo piece (looks like a cross piece without the slit) to the opposite side of the swing piece.
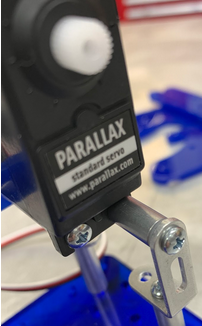
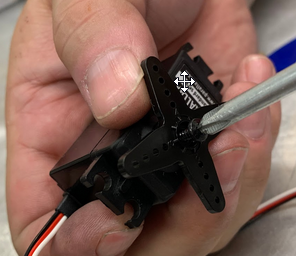
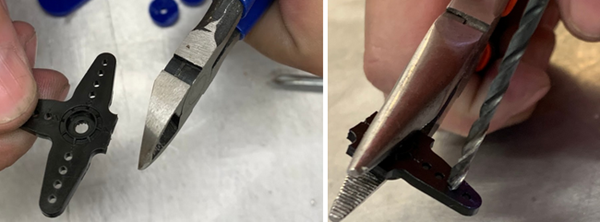
- Remove the servo head, cut off 3 of the horns carefully, and drill out one of the holes with a #36 drill bit.
- Attach the servo piece to the servo horn with a ⅝” Screw, 2 nylon spacers, and a lock nut.
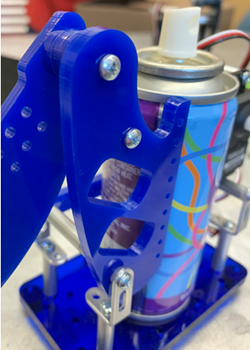
- Place the spray bottle in the open area, and attach the servo horn to the servo
You’re finished! Have fun spraying your friends!