Power & Connect Circuits
The 3-Position Power Switch
- Find the 3-position power switch on your board. Read below for when to use each position.
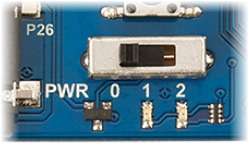
- Position 0 — for building and modifying circuits. Turns off power to all the circuits on the board. (If plugged into USB , you might see little lights near the USB connector).
- Position 1 — for programming and breadboard circuits. Powers most of the board, including the black sockets around the white breadboard. It does NOT power the servo headers.
- Position 2 — for making the ActivityBot move. Powers all the circuits on the board, including the servo headers.
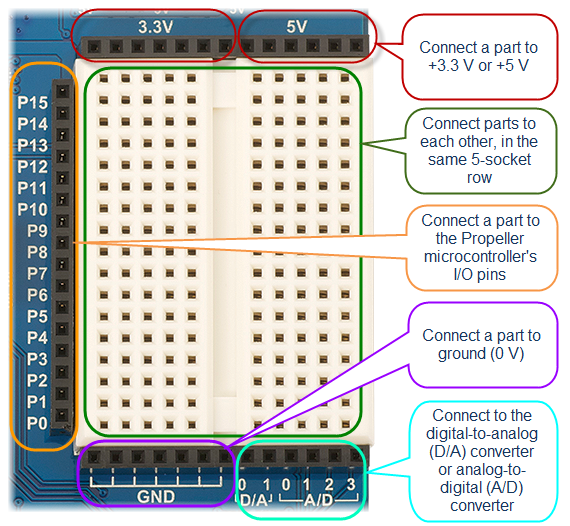
The Breadboard
The breadboard lets you build your own circuits with common electronic components. It’s a great way to learn about electricity, and to experiment with making your own inventions. Building experimental circuits to design your own projects is called prototyping, and it is a real-world engineering skill.
The breadboard is surrounded on three sides by black sockets. These make it convenient to connect circuits on the breadboard to power, ground, and the Propeller I/O pins. There are also sockets to connect to a digital-to-analog converter and an analog-to-digital converter.
If you have never built circuits on a breadboard before, watch this video about breadboards and how to build circuits on them. History can be pretty interesting!
]