Measuring Phototransistor Voltage
In the circuit you just built, a wire connects A/D2 to the row where the phototransistor’s emitter and resistor meet. The voltage at this part of the circuit will change as the light level sensed by the phototransistor changes. The phototransistor_voltage script measures the voltage at A/D2— one of the micro:bit module ’s three analog to digital input channels—and scrolls that value on the micro:bit module’s display. You will use this sketch to take and write down voltage readings of the ambient light, shade cast by your hand, and optionally of bright light from a flashlight if you have one handy.
Hardware Setup
- Set the cyber:bot board’s power (PWR) switch to Position 0.
- Make sure the battery holder is loaded with 5 AA batteries.
- Make sure the battery holder’s barrel plug is firmly plugged into the cyber:bot board’s barrel jack.
- Connect your micro:bit module to your computer with a USB cable.
Software Setup
- In a Google Chrome or Microsoft Edge browser, go to python.microbit.org to open the micro:bit Python Editor.
- Make sure the cyberbot.py module is added to the Project Files.
(See Add modules to your micro:bit).
Example script: phototransistor_voltage
- Set the project’s name to phototransistor_voltage, enter the script below, and then click Save.
(See Save & Edit Scripts and Flash Scripts with Python Editor.) - Click Send to micro:bit.
(See Flash Scripts with Python Editor.) - Set the cyber:bot board’s PWR switch to 1.
# phototransistor_voltage

from cyberbot import *

while True:
    ad2 = pin2.read_analog()
    volts = ad2 * (3.3/1024)
    out = "volts = " + str(volts) + "V"
    display.scroll(out, 80)
    sleep(500)
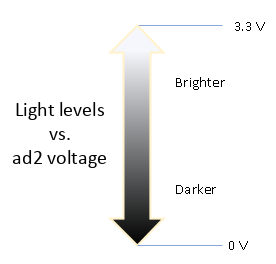
Measurements will vary with ambient light levels, but in general, brighter measurements will tend toward 3.3, and darker ones will tend toward 0 V. If you point the phototransistor at the sun or a bright flashlight, the measurements should be close to 3.3 V. As you block the light and cast darker shade, the measurements should decrease.
- Look at the display, and record the value you see for the ambient light in the room.
- Use your hand to cast shade on the phototransistor, and watch the display change. Brighter light should cause larger voltage values and dimmer light should cause smaller voltages. Record the value for the room’s ambient light.
- If you have a flashlight, shine it at the phototransistor and watch the display change again, and record the value.
- If the ambient light is bright, you may need to replace the 2 kΩ resistor with a smaller value. Try 1 kΩ, 470 Ω, or even 220 Ω, and be sure to record your values.
- If the ambient light is low, you may need to change the 2 kΩ resistor to 4.7 kΩ, or even 10 kΩ, and be sure to record your values.
Once you have a resistor value in place that works well for differentiating ambient light and shade in your area, you are ready for the next step.
Setting PWR switch to 0 vs. Unplugging Battery Holder
Taking a break, building a circuit, or writing a script?
- Just set the cyber:bot board’s PWR switch to 0 until it’s time to test the next script.
If you are done for the day, always follow these steps.
- Set PWR to 0.
- Unplug the battery holder’s barrel plug from the cyber:bot board’s barrel jack.