Pushbuttons
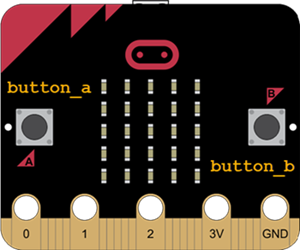
The micro:bit module has two pushbuttons labeled A and B, to the left and right side of the LED display. This kind of button is sometimes called a tactile switch, or tact switch for short. The micro:bit module can be programmed to respond to these buttons being pressed. In your scripts, each button already exists as an object, and they can be referred to as button_a and button_b.
For example, if you want to know how many times button A gets pressed since the micro:bit module has turned on (or since the last time you asked how many times button A was pressed, whichever is most recent), you can use button_a.get_presses. The same can be done for button B.
Example script: get_presses
Note the sleep(5000) at the beginning of the next example script. When you flash the script, use these 5 seconds (5000 milliseconds) to press button A as many times as possible.
After 5 seconds, the script then stores the number of times button A got pressed since startup into the variable called numberOfPresses. The last line of the script uses the display to scroll the value stored in numberOfPresses.
- Enter, nam, save, and flash the script get_presses to your micro:bit
- Immediately press button A as many times as possible in 5 seconds.
- Watch the display to see how many times you pressed the button.
#get_presses

from microbit import *

sleep(5000)

numberOfPresses = button_a.get_presses()
display.scroll(numberOfPresses)
Try This
- Using the previous example as a model, write a program that displays the number of times button B gets pressed after 10 seconds pass from startup.
- Write a program that displays the number of times both button A and button B get pressed after 10 seconds from startup.
Example: is_pressed
You can write a statement for each button to tell if it is pressed. The button_a.is_pressed method will return either True or False depending on whether or not button A is currently pressed. These methods often work well with conditionals. For example, the following program displays a check mark if button A is pressed. Otherwise, it will display an X.
- Enter, name, save, and flash the script is_pressed to your micro:bit.
- Press button A to see the display change.
#is_pressed

from microbit import *

while True:
    if button_a.is_pressed():
        display.show(Image.YES)
    else:
        display.show(Image.NO)
Not pressed: 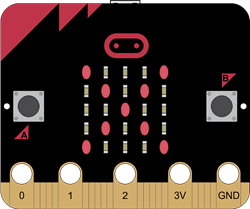 Pressed:
Try This
- Use the display to show the letter A when the A button is pressed.
- Use the display to show the letter B when the B button is pressed.
Example script: was_pressed
Another commonly used method of the buttons is to be able to tell if the button was pressed since the micro:bit module turned on, or since the last time the code checked to see if it was pressed, whichever is most recent. The button_a.was_pressed method returns True or False depending on whether or not button A was pressed.
For example, the script was_pressed will display a check mark if button A was pressed in each 5 second interval. If was not pressed in a five second interval, then it will display an X.
- Enter, name, save, and flash the script was_pressed to your micro:bit.
#was_pressed

from microbit import *

while True:
    sleep(5000)
    if button_a.was_pressed():
        display.show(Image.YES)
    else:
        display.show(Image.NO)
Your Turn
- Write a script to check if button A was pressed every 10 seconds instead of every 5.
- Write a script to check if button B was pressed every 10 seconds instead of button A.