These instructions are for ROBOTC 3.13 for Arduino (Windows), released May 11 2012
This first release of ROBOTC for Arduino includes sample programs for continuous rotation servos, which the are the motors on the BOE Shield-Bot. However, the Arduino Uno and Duemilanove examples use digital pins 9 and 10. The instructions for building the BOE Shield-Bot use digital pins 12 and 13.
Fortunately, both the robot and the software are adjustable! Here's what to do:
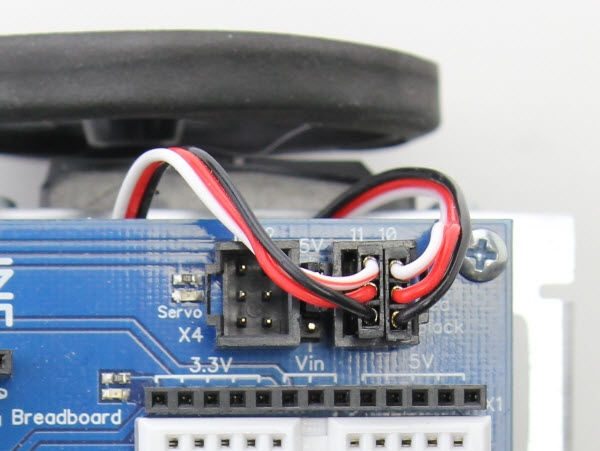
- With power and programming cable disconnected from your BOE Shield-Bot, move the servo plugs from the pin 13 and 12 servo ports to the pin 11 and 10 servo ports.
- Reconnect power and programming cable.
- Follow ROBOTC's Getting Started instructions for your Arduino board: http://www.robotc.net/wiki/Tutorials/Getting_Started/Getting_Started_with_Arduino
- When you get to the Opening Sample Programs part, choose Servos > Continuous Rotation Servos.c
As you can see, the default configuration uses digital I/O pins 9 and 10:

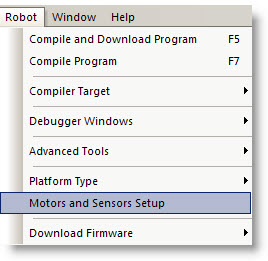
- From the menu bar, choose Robot > Motors and Sensors Setup:
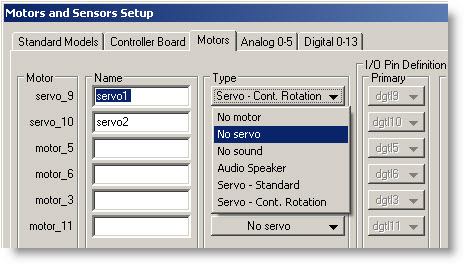
- Under the Motors tab, you will see servo_9 in the Motor column, with Name set to servo1 and Type set to Servo-Cont. Rotation.
- For servo_9, delete the name servo1 and leave that field blank.
- From the servo_9 Type menu, select No servo.
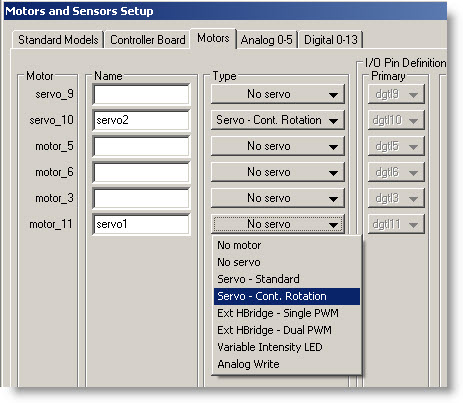
- Now, find motor_11 at the bottom of the Motor column.
- Enter servo1 in its Name field, and set its Type field to Servo - Cont. Rotation.
- Click Apply to make the settings take effect, and then OK to close the dialog.
Now, back in the program, you will see the the updated configuration.

- Put the BOE Shield's power switch in Position 0
- From the menu bar choose Robot > Compile and Download Program
- Now you can put your Shield-Bot on the ground, move the switch to position 2, and watch it roll!