In this activity, you will connect the LED circuit to a micro:bit I/O pin and use a script to turn the light on and off. You will also use the script to adjust the on/off rate and number of times it blinks. Last, but not least, you will calculate the timing of the lights. The three most common ways to quantify timing are called period, frequency, and duty cycle.
Parts
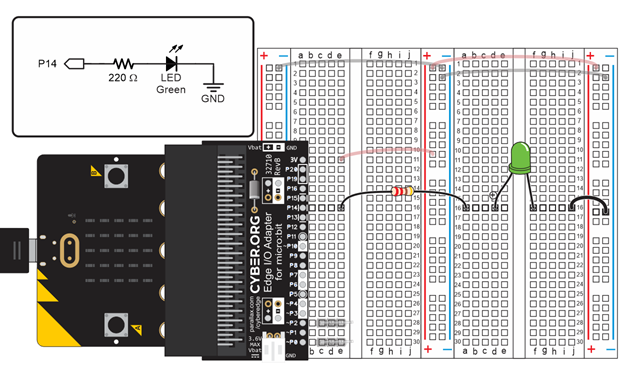
Let's begin by re-using the familiar LED circuit, first built in the Breadboard Setup and Testing for micro:bit tutorial. In addition to the basic micro:bit adapter, power rail, and test post setup, it uses the following parts:
(1) LED - green
(1) resistor 220 Ω (red-red-brown-gold)
(1) jumper wire, black
- Restore your setup to the way it was in the First Breadboard Circuit chapter’s Build the LED Circuit activity.
- Remove the alligator clips for now, but leave behind the 3-pin headers.
- If you just completed the Electrical Measurements chapter, you can leave the voltmeter and ohmmeter circuits, but make sure to remove the ammeter circuit’s 20 Ω resistor.
- Compare your setup to the picture below, and verify that the circuit, power, and voltmeter connections all match.

Circuit
Instead of connecting the LED to the 3V supply rail on the breadboard, this activity requires a connection with a micro:bit I/O pin.
- Disconnect the USB cable from the micro:bit.
- Disconnect the LED circuit’s 220 Ω resistor lead from the bus strip’s 3V (+) column and connect it to P14. In the picture, it’s connected to the left terminal strip’s (e, 16) socket.
- Reconnect USB. Don’t worry if the light doesn't turn on, you haven’t loaded a script to make it do that yet.