Skip to content
Parallax Learn

Parallax Learn

  • Welcome
  • Tutorials
        • Tutorial Series head tag

          Tutorial Series
        • Tutorial Series

          The special, classroom-ready series pages are organized collections of tutorials for our most popular hardware and/or languages. The tutorials for each topic are conveniently accessible from a single page, shown in the order it is recommended that they be completed.
        • Robotics Series Head tag

          Robotics Series
        • Robotics Series

          • Artificial Intelligence
          • Cybersecurity: Radio Data tutorialCybersecurity
          • cyber:bot + Python
          • cyber:bot + MakeCode
          • Boe-Bot Tutorial SeriesBoe-Bot
          • Arduino Shield-Bot
          • ActivityBot with C TutorialsActivityBot + C
          • ActivityBot with BlocklyProp Tutorial SeriesActivityBot + BlocklyProp
          • Scribbler 3 Tutorial SeriesScribbler 3
        • Electronics & Programming Series Head tag

          Electronics & Programming Series
          • BS2 Board of Education Tutorial SeriesBS2 Board of Education
          • Propeller C-Language BasicsPropeller C Basics
          • FLiP Try-It Kit C Tutorial SeriesFLiP Try-It Kit + C
          • FLiP Try-It Kit BlocklyProp TutorialsFLiP Try-It Kit + BlocklyProp
          • Badge WX Tutorial SeriesBadge WX
          • Propeller BlocklyProp Basics and ProjectsPropeller BlocklyProp Basics
          • View All Tutorial Series »
        • Browse Tutorials
        • Browse Tutorials

          Individual tutorials sorted by robot or kit, and language.
        • By Robot or Kit
          • ActivityBot
          • SumoBot WX
          • Boe-Bot
          • Shield-Bot
          • cyber:bot
          • Badge WX
          • ELEV-8
          • ARLO
        • By Language
        • By Language

          • Propeller C
          • Arduino
          • BlocklyProp
          • PBASIC
          • Python
          • MakeCode
          • View All Tutorials »
  • Educators
  • Reference
  • Downloads
  • Home
  • All Courses

Add Servos to the ELEV-8 v3

Curriculum

  • 1 Section
  • 7 Lessons
  • Lifetime
Expand all sectionsCollapse all sections
  • Add Servos to the ELEV-8 v3
    7
    • 1.0
      Drive a Servo with the RC Receiver
    • 1.1
      Parts and Prep
    • 1.2
      Edit the Firmware for Servos
    • 1.3
      Connect a Servo to the Flight Controller
    • 1.4
      Build a Servo Power Supply
    • 1.5
      Use Pitch and Roll from the IMU
    • 1.6
      Safety Test after Hacking

Drive a Servo with the RC Receiver

A Beginner Hardware Hack

The easiest way to add a servo to your ELEV-8 v3 quadcopter is to drive it with a spare channel on the ELEV-8 v3’s receiver.

R/C receivers, such as the Spektrum AR610 6-Channel or the Spektrum AR8000 8-Channel receivers output a PWM (pulse-width modulated) signal that tell standard servos what position they should turn to and hold:

R/C servos are made to turn in a limited arc, no more than about 180°. You set the precise position of the output shaft of the servo motor by using the timing signal; this signal is provided by a microcontroller. Once the signal is applied, the motor moves to that position and stays there.

The control signal for a servo is a stream of pulses. The exact duration of these pulses, in fractions of a second, is what determines the position of the servo. Each pulse is nominally from 1000 to 2000 microseconds (μs) in duration — one microsecond is one millionth of a second. The pulses repeat about 50 times each second.

Your ELEV-8 v3 quadcopter needs 5 channels to fly: throttle, rudder, elevators, ailerons and gear/mode.  If your transmitter and receiver have additional channels available, you can use a spare channel to drive a servo.

Your Turn

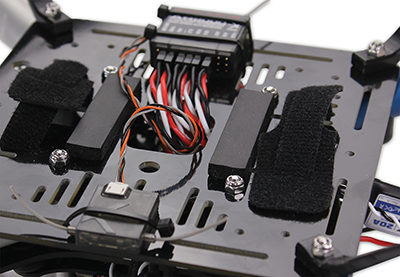
  • Locate the receiver on your ELEV-8 v3 quadcopter.  If you are using a Spektrum Receiver, it sould look like this:

or this:

If a cable is already connecting the channel labeled Aux 1 on your receiver to your flight controller, it is safe to remove it – it is not critical for flight using the standard firmware.

  • Next, make sure that one of the switches or knobs on your transmitter is mapped to the Aux 1 channel.  You may need to read the user manual for your transmitter for specific instructions.  (Spektrum transmitter manuals can be found online here.)

STOP!
REMOVE THE PROPELLERS FROM YOUR QUADCOPTER BEFORE PROCEEDING!

  • Remove all of the propellers from your quadcopter.
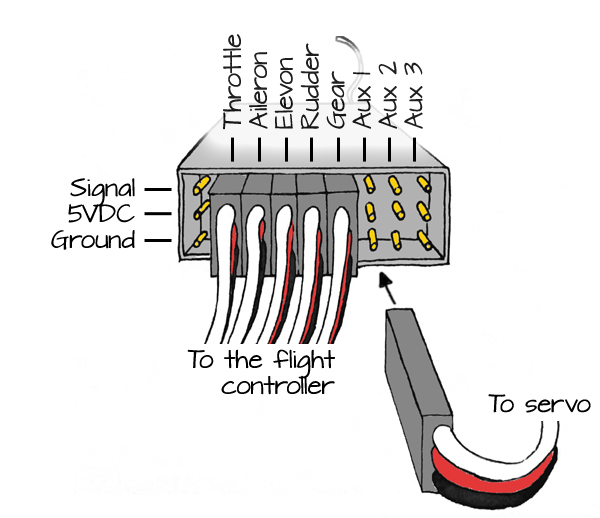
  • Plug a servo into the Aux 1 channel on your receiver, as shown below. Be sure to align the black wire with ground:


  • Turn on your transmitter and connect the battery to power up your ELEV-8 v3.  Flip the switch or turn the knob on your transmitter that you mapped to the Aux 1 channel.  Your servo should move when you flip the switch or turn the knob

Although this works well if your transmitter has knob, not all transmitters do.  If you had to use a switch, you have noticed that you can only move the servo to 2 or 3 different positions.

By connecting that spare channel back up to the flight controller, you can modify the firmware on the flight controller to drive the servo in nearly any manner you choose.


Printer-friendly version
Parts and Prep
Next

DISCUSSION FORUMS | PARALLAX INC. STORE

About | Terms of Use | Feedback: learn@parallax.com | Copyright©Parallax Inc. 2024

© 2026 Parallax Learn • Built with GeneratePress