How the Example Projects Work
How it Works: pin_pad_transmitter
If you need any refreshers on the first few statements, check the Cybersecurity: Radio Basics tutorial’s Send Radio Messages activity.

Before entering the on start block, the project starts by creating an empty string variable named pin, and an int variable named n (for number). The n variable will store the number you are currently entering with the micro:bit PIN pad’s A/B buttons. That number will either be 0 or 1.

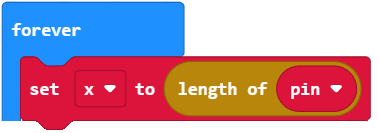
Setting x equal to the length of the pin string is a way of keeping track of how many digits you have entered with the micro:bit module’s A and B buttons. As you enter digits, they will be added to the pin string as ‘0’ and ‘1’ characters. With each extra character in the pin string, it increases the number of characters length of (pin) returns by 1. The project will use this information to keep track of which column it’s displaying 0s and 1s in, and also to decide when to radio-transmit the pin string to the Vault micro:bit. For example, after you have pressed B a second time to enter the second digit, length of (pin) will return 2 since the string now contains two digits.
At this point, n is either 0 or 1. The set b to (n * 255) statement sets the b int variable to 0 when n is 0, or 255 when n is 1. This is a way of setting LED brightness without relying on if (n = 1) … else …

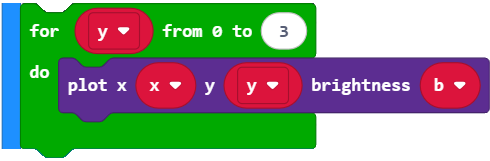
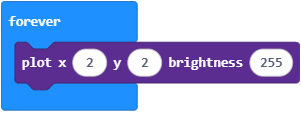
The plot x (x) y (y) brightness (b) method call sets the brightness of an individual micro:bit LED. The column is selected with x (0 to 4), the row with y (0 to 4), and the brightness with b (0 to 255). Here the project uses x (the number of digits in the pin string) to pick the column of LEDs to turn on and off. The LED in row 4 will be on regardless of whether the n is 0 or 1, and the brightness will be the maximum value 255.

The other four LEDs in the x column can be turned on or off in a loop that counts y from 0 through 3. As the loop goes through those 4 LED y positions, it will turn them all off if b is 0, or all on to full brightness if b is 255.
Next, when the A button is pressed, which is constantly being checked, the on button (A) pressed block first adds 1 to n with change n by (1). After that, set n to (remainder n / 2) uses the modulus operator to change n to 0 each time it reaches 2.
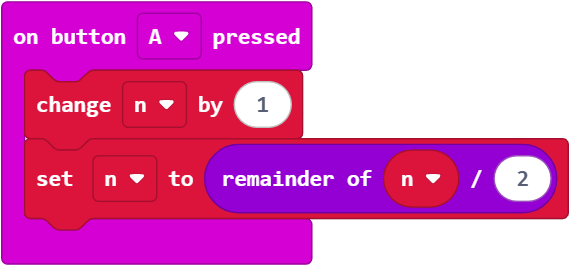
You have seen the modulus % operator used to wrap values back around to the beginning in the How Caesar Letter Encryption Works section of Cybersecurity: Encryption Intro. In the Caesar cipher, it made a character index variable wrap from 25 to 0 instead of reaching 26. Here, it makes the n variable wrap from 1 to 0 instead of reaching 2.
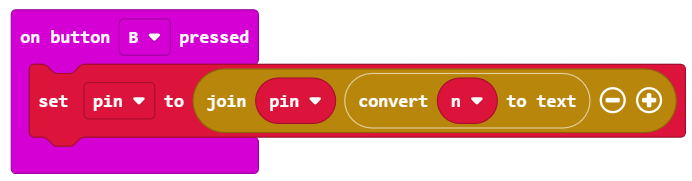
Pressing the B button is for entering the current digit and moving on to the next. But first, the project has to remember the current digit. It does so by converting that digit to a single character string with convert (n) to text. Since the result will either be ‘0’ or ‘1’, that’s the character that’ll be appended to the pin string with set pin to (join (pin)(convert (n) to text)).
Next time the forever loop repeats, set x to (length of (pin)) will have increased by 1 since the string just got longer by one character. Since the x value increased by 1, it advances the digit setting to the next column on the LED display.
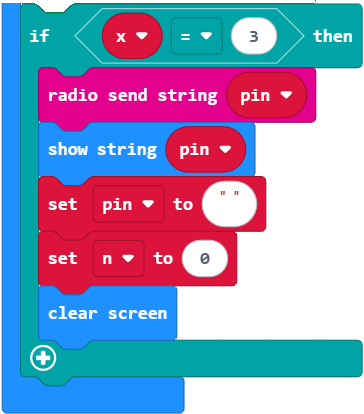
After the 3rd digit has been appended to the pin string and it contains something like ‘011’, set x to (length of (pin)) will set x to 3 causing the if (x = 3) block of the project to be executed. This is where it sends that pin string to the Vault micro:bit via radio. It also resets pin to an empty string, n to 0, and clears the display.
How It Works: bank_vault_receiver
Aside from the comment with the project name, these statements match the pin_pad_transmitter project.

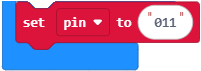
Before entering the forever loop, the receiver has a hard-coded pin string of ‘011’. If the PIN Pad Transmitter micro:bit sends that value, it will grant access and display a checkmark. If not, it will deny access and display an X.
The forever loop rapidly cycles through three statements. First, it turns on the LED display’s middle LED pixel by setting column to 2 from left, row to 2 from top, and brightness to the maximum of 255 with plot x (2) y (2) brightness (255). Next, it constantly checks for a signal being received and once it is it stores whatever the radio might have received since the last loop repetition with set message to (receivedString). Most of the time, the result will be None, so everything below and indented from if message will be skipped.

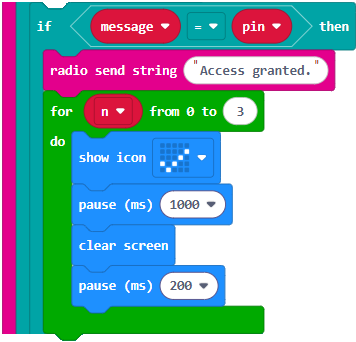
The project assumes that if on radio received returns something other than None to message, it’ll be the string containing 3 digits. So, it compares message to pin with if (message = pin). If message stores ‘011’, it will match pin. In that case, radio send string(“Access granted.”) sends a confirmation string and displays the checkmark with show icon. It flashes that on for 1 second, then off for 0.2 seconds, repeated four times.
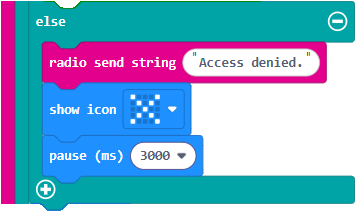
If the PIN is incorrect, the project sends an “Access denied.” string through the radio, then it displays the X with show icon, and waits for 3 seconds. Note that the PIN pad does not currently pay attention to that wireless message, but other programs will.
Before returning to the forever loop and checking for more radio messages, the project clears the LED display.