Send Radio Messages
The best way to get started with testing the radio connection is to make one micro:bit module repeatedly broadcast messages. Once this project is running, the next section will have you load a project that receives radio messages and prints messages into a different micro:bit.
IMPORTANT! If you are doing this in a classroom, start with ONLY ONE micro:bit transmitting messages by running the project in this section. All the rest of the micro:bit modules should be running the project in the next section that receives and displays the messages.
- Connect your micro:bit module to your computer with a USB cable.
- Open a browser and go to makecode.microbit.org to match this tutorial’s screen captures.
Hardware Setup
- Connect your micro:bit module to your computer with a USB cable.
- Repeat with the second micro:bit module, either connecting it to a second computer, or to a second USB port on the same computer.
Software Setup
- In a browser, go to makecode.microbit.org to open the micro:bit Makecode Editor.
Example project: send_radio_test_message
- Set the name to send_radio_test_message and enter the project below.
(See Save & Edit Projects and Flash Projects with MakeCode Editor.) - Click Download.
(See Flash Projects with MakeCode Editor.)
- Open another tab and go to Google Chrome Labs Serial Terminal.
- Click connect at the top of the screen and choose the connected device which is the micro:bit.
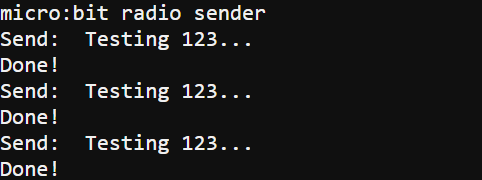
- Verify that the terminal repeatedly displays Send: Testing 123… followed by Done! on the next line.
- You may notice that some of the messages have random letters missing in the middle. Don’t worry about it, it’s an error on the terminals side not your code.
- Either leave this project running, or be ready to power that micro:bit back up after you start running the receiver project in another micro:bit.
How send_radio_test_message Works
Let’s take a closer look at statements you probably haven’t seen in earlier activities.
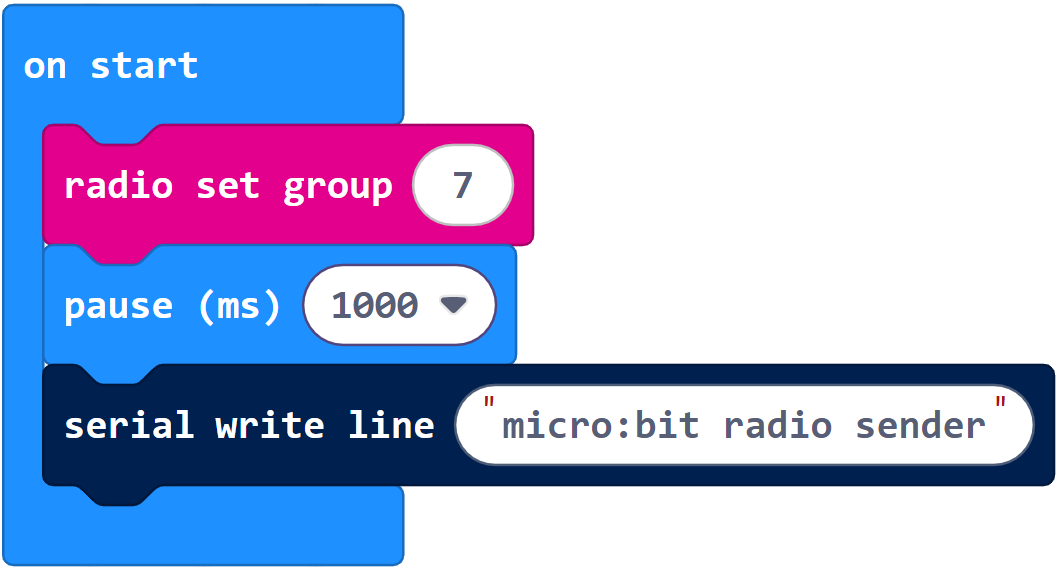
In this activity, we are just using the channel setting, which can be set from 0 to 255. Keep in mind that micro:bit modules can only radio-communicate when they are set to the same channel. Let’s say that one pair of micro:bit modules is running projects with channel = 10, and a second pair is using channel = 20. The channel = 10 micro:bit modules will not receive any messages sent by the channel = 20 micro:bit modules, and vice-versa. The Did You Know section later in this tutorial has more info about channels.

(In later activities, you will use the group and address settings to set up wireless networks. They will allow micro:bit modules to communicate in pairs or groups, even when they are sharing the same channel.)
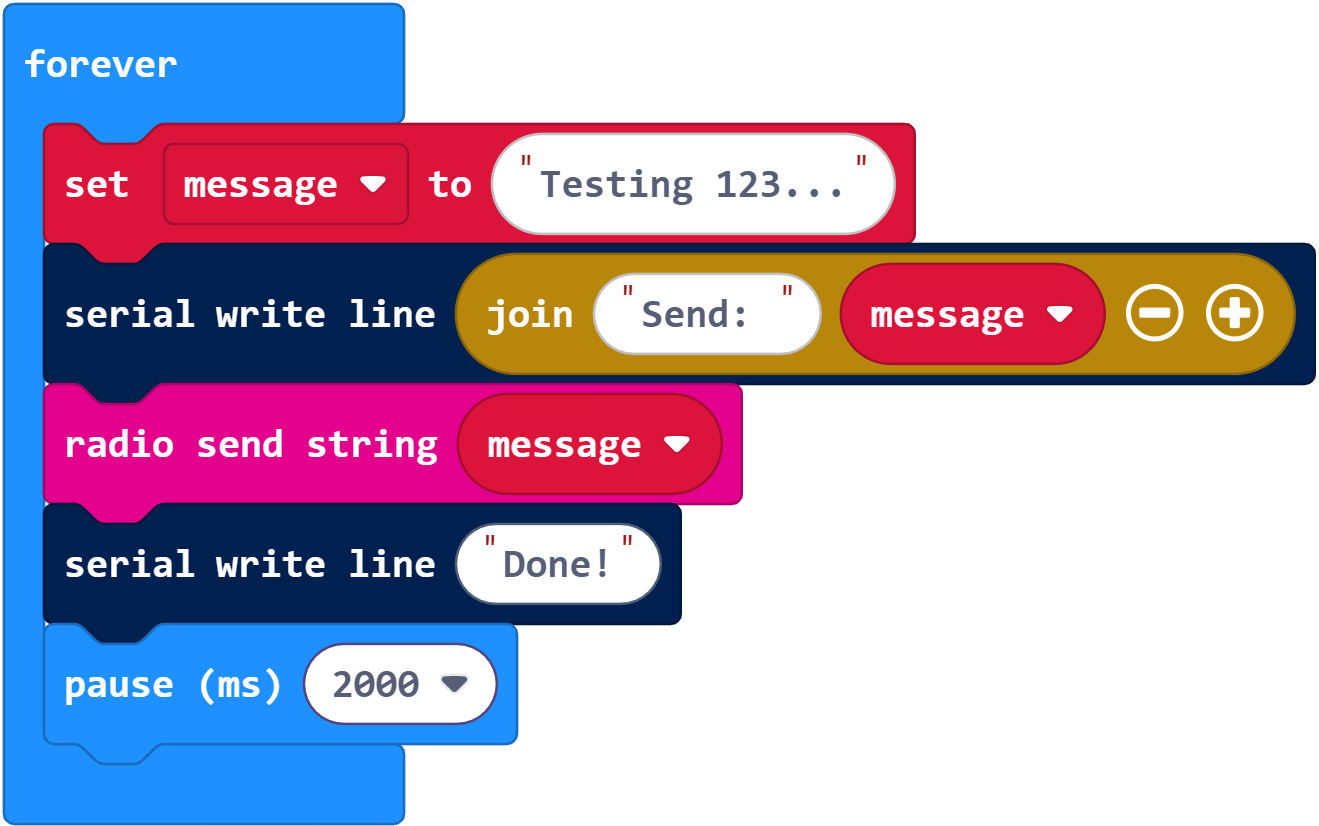
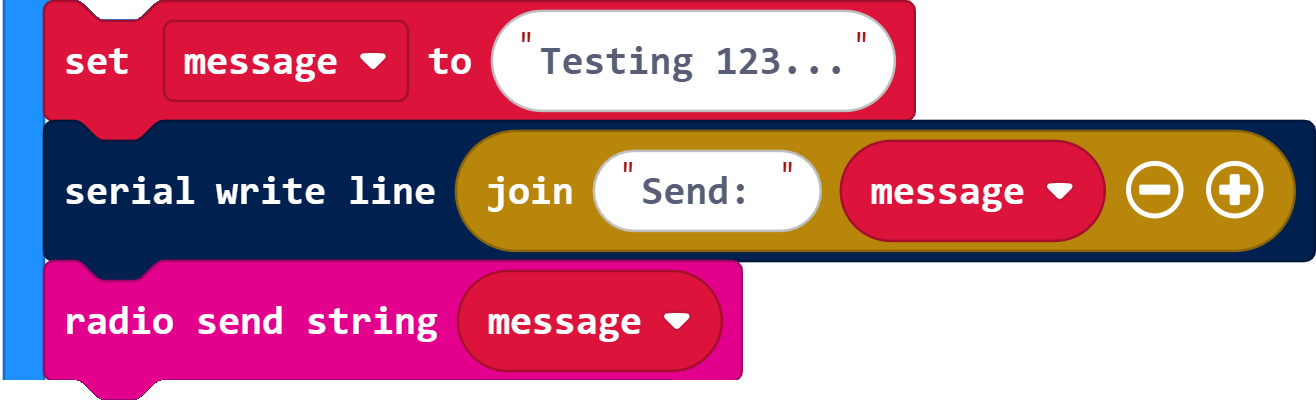
The set message to (“Testing 123…”) statement creates a variable that stores a string with the “Testing 123…” characters. Next, serial write line (join (“Send: “)(message)) displays Send: Testing 123… in the terminal. Then, radio send string (message) uses the micro:bit radio to broadcast that “Testing 123…” text in the message variable.
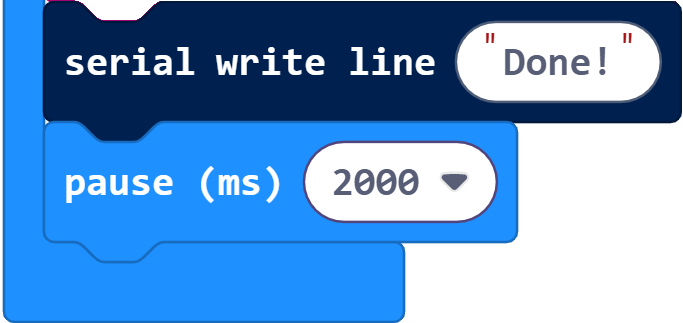
What do you think would happen if you replaced the three blocks above with this?

Although it would transmit the same message, you’d also have to update the serial write line statement. When it came time to change the message, you’d also have to do it by hand in two places.
Before repeating the loop, serial write line (“Done!”) makes the terminal tell you that the project has reached the block that follows radio send string. It’s a way to verify that the message was sent by the radio. The pause(2000) makes it so messages are only broadcasted every 2 seconds.