Skip to content
Parallax Learn

Parallax Learn

  • Welcome
  • Tutorials
        • Tutorial Series head tag

          Tutorial Series
        • Tutorial Series

          The special, classroom-ready series pages are organized collections of tutorials for our most popular hardware and/or languages. The tutorials for each topic are conveniently accessible from a single page, shown in the order it is recommended that they be completed.
        • Robotics Series Head tag

          Robotics Series
        • Robotics Series

          • Artificial Intelligence
          • Cybersecurity: Radio Data tutorialCybersecurity
          • cyber:bot + Python
          • cyber:bot + MakeCode
          • Boe-Bot Tutorial SeriesBoe-Bot
          • Arduino Shield-Bot
          • ActivityBot with C TutorialsActivityBot + C
          • ActivityBot with BlocklyProp Tutorial SeriesActivityBot + BlocklyProp
          • Scribbler 3 Tutorial SeriesScribbler 3
        • Electronics & Programming Series Head tag

          Electronics & Programming Series
          • BS2 Board of Education Tutorial SeriesBS2 Board of Education
          • Propeller C-Language BasicsPropeller C Basics
          • FLiP Try-It Kit C Tutorial SeriesFLiP Try-It Kit + C
          • FLiP Try-It Kit BlocklyProp TutorialsFLiP Try-It Kit + BlocklyProp
          • Badge WX Tutorial SeriesBadge WX
          • Propeller BlocklyProp Basics and ProjectsPropeller BlocklyProp Basics
          • View All Tutorial Series »
        • Browse Tutorials
        • Browse Tutorials

          Individual tutorials sorted by robot or kit, and language.
        • By Robot or Kit
          • ActivityBot
          • SumoBot WX
          • Boe-Bot
          • Shield-Bot
          • cyber:bot
          • Badge WX
          • ELEV-8
          • ARLO
        • By Language
        • By Language

          • Propeller C
          • Arduino
          • BlocklyProp
          • PBASIC
          • Python
          • MakeCode
          • View All Tutorials »
  • Educators
  • Reference
  • Downloads
  • Home
  • All Courses

Cybersecurity: Radio Tilt Control

Curriculum

  • 1 Section
  • 37 Lessons
  • Lifetime
Expand all sectionsCollapse all sections
  • Cybersecurity: Radio Tilt Control
    37
    • 1.1
      Measure Accelerometer Tilt
    • 1.2
      Test Tilts
    • 1.3
      A Bit About Acceleration
    • 1.4
      Inside the micro:bit Accelerometer
    • 1.5
      How the Script Works
    • 1.6
      Try This: Take X and Y Rotation Samples
    • 1.7
      Your Turn: Combine Tilt and Rotation
    • 1.8
      Measure Rotation Angles
    • 1.9
      Measuring Rotation Angles
    • 1.10
      How Measuring Rotation Angles Works
    • 1.11
      Did You Know? Trigonometry and Rotation Angles
    • 1.12
      Measure How Far from Vertical or Level
    • 1.13
      How It Works
    • 1.14
      Z-Axis: Which Way Is Up?
    • 1.15
      How it Works: Z axis
    • 1.16
      Did You Know? This Way Up
    • 1.17
      Try This: Get Familiar Z-Axis Angle Measurements
    • 1.18
      Your Turn: All Together Now
    • 1.19
      Display Tilt Direction
    • 1.20
      Try This: Negative Hour Values
    • 1.21
      Your Turn: Display Tilt Direction
    • 1.22
      Tilt Radio Tests
    • 1.23
      Radio-Transmit Tilt
    • 1.24
      Radio-Receive Tilt
    • 1.25
      How the Tilt Radio Tests Work
    • 1.26
      Tilt Control Forward and Backward
    • 1.27
      Rapid Radio-Transmit Tilt Data
    • 1.28
      Rapid Radio-Receive Tilt Plus Forward/Backward Control
    • 1.29
      Adding a Stop Range
    • 1.30
      Transmitter Displays Stop Range
    • 1.31
      Receiver Full Tilt Control and Stop Range
    • 1.32
      Add Left/Right Tilt Control
    • 1.33
      Update the Receiver cyber:bot Script
    • 1.34
      How the Receiver Works
    • 1.35
      Radio Tilt Controlled cyber:bot App
    • 1.36
      Radio Tilt Controlled cyber:bot Code
    • 1.37
      Radio Tilt Controller Code

Display Tilt Direction

Micropython’s Image.ALL_CLOCKS[hour] list has 12 LED patterns that resemble an analog clock hand at each hour.  It can be used for more than timekeeping though.  It can also point in the direction you are tilting the micro:bit!  This visual feedback will be useful for tilt-controlling the cyber:bot. 

First, let’s train an example script that displays each hour hand at 12, 1, 2 and all the way through 11.

Example script: display_clock_positions

  • Enter, name, and save display_clock_positions.  
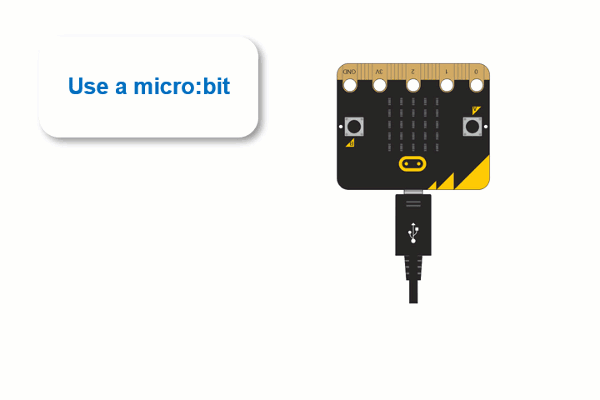
  • Click the Send to micro:bit button.
  • Verify that it displays all the clock hand positions.
# display_clock_positions

from microbit import *

sleep(1000)

while True:
    
    for hour in range(0, 12):
        print("hour =", hour)
        display.show(Image.ALL_CLOCKS[hour])
        sleep(1000)


Printer-friendly version
Your Turn: All Together Now
Prev
Try This: Negative Hour Values
Next

DISCUSSION FORUMS | PARALLAX INC. STORE

About | Terms of Use | Feedback: learn@parallax.com | Copyright©Parallax Inc. 2024

© 2026 Parallax Learn • Built with GeneratePress