Skip to content
Parallax Learn

Parallax Learn

  • Welcome
  • Tutorials
        • Tutorial Series head tag

          Tutorial Series
        • Tutorial Series

          The special, classroom-ready series pages are organized collections of tutorials for our most popular hardware and/or languages. The tutorials for each topic are conveniently accessible from a single page, shown in the order it is recommended that they be completed.
        • Robotics Series Head tag

          Robotics Series
        • Robotics Series

          • Artificial Intelligence
          • Cybersecurity: Radio Data tutorialCybersecurity
          • cyber:bot + Python
          • cyber:bot + MakeCode
          • Boe-Bot Tutorial SeriesBoe-Bot
          • Arduino Shield-Bot
          • ActivityBot with C TutorialsActivityBot + C
          • ActivityBot with BlocklyProp Tutorial SeriesActivityBot + BlocklyProp
          • Scribbler 3 Tutorial SeriesScribbler 3
        • Electronics & Programming Series Head tag

          Electronics & Programming Series
          • BS2 Board of Education Tutorial SeriesBS2 Board of Education
          • Propeller C-Language BasicsPropeller C Basics
          • FLiP Try-It Kit C Tutorial SeriesFLiP Try-It Kit + C
          • FLiP Try-It Kit BlocklyProp TutorialsFLiP Try-It Kit + BlocklyProp
          • Badge WX Tutorial SeriesBadge WX
          • Propeller BlocklyProp Basics and ProjectsPropeller BlocklyProp Basics
          • View All Tutorial Series »
        • Browse Tutorials
        • Browse Tutorials

          Individual tutorials sorted by robot or kit, and language.
        • By Robot or Kit
          • ActivityBot
          • SumoBot WX
          • Boe-Bot
          • Shield-Bot
          • cyber:bot
          • Badge WX
          • ELEV-8
          • ARLO
        • By Language
        • By Language

          • Propeller C
          • Arduino
          • BlocklyProp
          • PBASIC
          • Python
          • MakeCode
          • View All Tutorials »
  • Educators
  • Reference
  • Downloads
  • Home
  • All Courses
  • ELEV-8 v3 Quadcopter Assembly Guide

ELEV-8 v3 Quadcopter Assembly Guide

Step 19b: Spektrum AR610 and AR8000 Receivers

Note: If you’re using a Spektrum SPMAR620 receiver, please follow instructions in Step 19a.

Mounting Instructions:

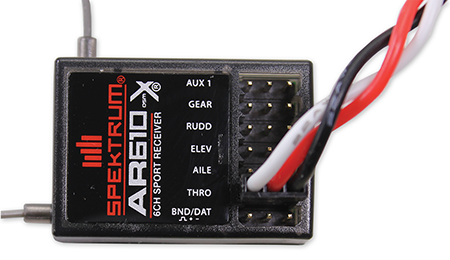
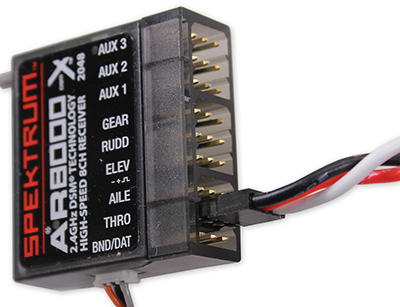
  1. Take your receiver and determine the correct orientation to plug the cables into the unit. Many receivers have some sort of symbol (such as, ^  + –) to indicate orientation, where ^ corresponds to the white signal wire, + corresponds to the red positive wire, and – corresponds to the black negative wire. (Spektrum AR610 and AR8000 receivers shown below.)
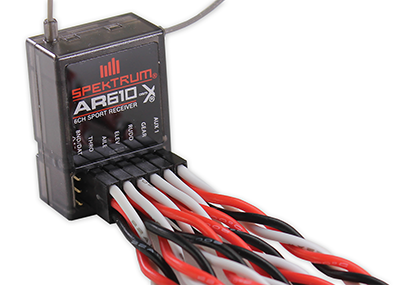
  1. Plug a servo extension cable into the Throttle, Aileron, Elevator, Rudder, Gear, and Auxiliary 1 Channels (often abbreviated as THRO, AILE, ELEV, RUDD, GEAR, and AUX 1, respectively), keeping the orientation you determined in Instruction 1. (Spektrum AR610 receiver shown below.)
  1. Now, locate the pins for the receiver signal cables on the left side of the flight controller (“Receiver Port” is written on the PCB).
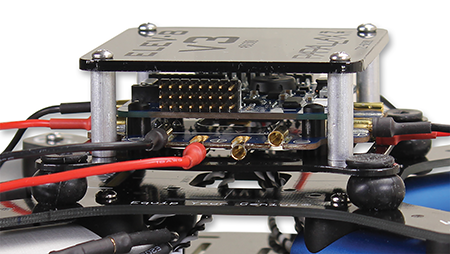
  1. Plug the throttle channel into the farthest left pins (labeled 1 on the flight controller PCB) oriented vertically so that the black wire is on the bottom and white wire is on the top.
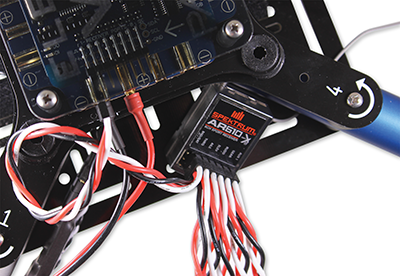
  1. Using the same orientation, plug in the remaining cables in the following order: THRO-AILE-ELEV-RUDD-GEAR-AUX 1.
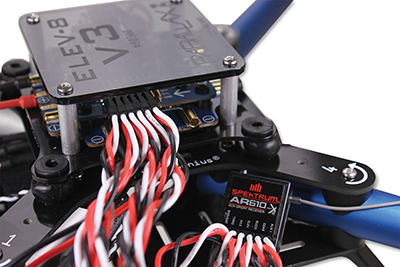
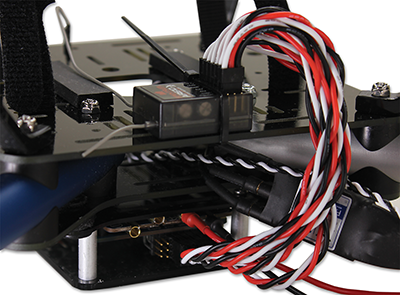
  1. Place the receiver on the underside of the bottom chassis plate, secure with at least one zip tie (pull tight with pliers), and cut off the “tail” of the zip tie (with diagonal cutters), as shown in the images below.
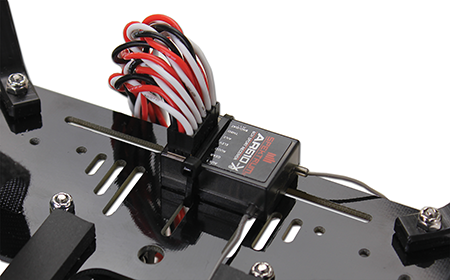
Alternate Mounting (Best for receivers w/ headers on their side, such as Spektrum AR8000):

  1. Feed the receiver cables down through the hole in the center of the chassis, and mount the receiver to the underside of the chassis as shown below.
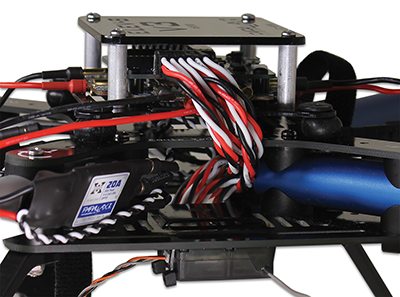
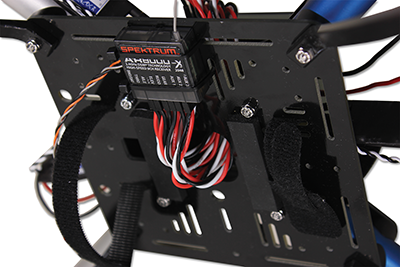
Instructions for Antenna / Satellite Module

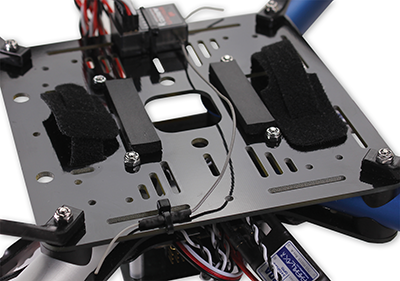
  1. If your receiver came with a long antenna, you can mount it as shown below:
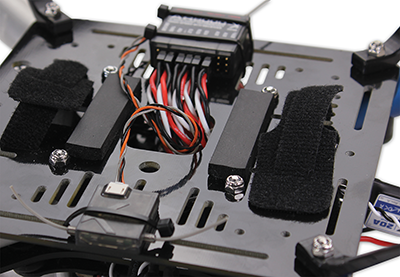
  1. If your receiver came with a satellite module, you can mount it as shown below:
  • Move on to Step 20.


Printer-friendly version
Section 8: Final Testing
Prev
Step 19a: Spektrum SPMAR620 Receiver
Next

DISCUSSION FORUMS | PARALLAX INC. STORE

About | Terms of Use | Feedback: learn@parallax.com | Copyright©Parallax Inc. 2024

© 2025 Parallax Learn • Built with GeneratePress