Skip to content
Parallax Learn

Parallax Learn

  • Welcome
  • Tutorials
        • Tutorial Series head tag

          Tutorial Series
        • Tutorial Series

          The special, classroom-ready series pages are organized collections of tutorials for our most popular hardware and/or languages. The tutorials for each topic are conveniently accessible from a single page, shown in the order it is recommended that they be completed.
        • Robotics Series Head tag

          Robotics Series
        • Robotics Series

          • Artificial Intelligence
          • Cybersecurity: Radio Data tutorialCybersecurity
          • cyber:bot + Python
          • cyber:bot + MakeCode
          • Boe-Bot Tutorial SeriesBoe-Bot
          • Arduino Shield-Bot
          • ActivityBot with C TutorialsActivityBot + C
          • ActivityBot with BlocklyProp Tutorial SeriesActivityBot + BlocklyProp
          • Scribbler 3 Tutorial SeriesScribbler 3
        • Electronics & Programming Series Head tag

          Electronics & Programming Series
          • BS2 Board of Education Tutorial SeriesBS2 Board of Education
          • Propeller C-Language BasicsPropeller C Basics
          • FLiP Try-It Kit C Tutorial SeriesFLiP Try-It Kit + C
          • FLiP Try-It Kit BlocklyProp TutorialsFLiP Try-It Kit + BlocklyProp
          • Badge WX Tutorial SeriesBadge WX
          • Propeller BlocklyProp Basics and ProjectsPropeller BlocklyProp Basics
          • View All Tutorial Series »
        • Browse Tutorials
        • Browse Tutorials

          Individual tutorials sorted by robot or kit, and language.
        • By Robot or Kit
          • ActivityBot
          • SumoBot WX
          • Boe-Bot
          • Shield-Bot
          • cyber:bot
          • Badge WX
          • ELEV-8
          • ARLO
        • By Language
        • By Language

          • Propeller C
          • Arduino
          • BlocklyProp
          • PBASIC
          • Python
          • MakeCode
          • View All Tutorials »
  • Educators
  • Reference
  • Downloads
  • Home
  • All Courses
  • ELEV-8 v3 Quadcopter Assembly Guide

ELEV-8 v3 Quadcopter Assembly Guide

Step 4: Bolt Motor Mount and Landing Gear to Booms

Now you will be fastening the motor mounts to the booms and attaching one side of the landing gear.

Tools Needed:

  • #1 Philips Head Screwdriver
  • Parallax Combination Wrench (#700-10025)

Parts Needed:

  • 4 – Motor/Mount/Boom Assemblies, prepared in Step 3
  • 4 – Landing Gear (#721-80007)
  • 8 – Saddle Washer, 3/4″ (#712-00010)
  • 8– Locknut, #4-40
  • 4 – Machine Screw, #4-40 x 1 1/2″*
  • 4 – Machine Screw, #4-40 x 1 1/4”*
  • 8 – Nylon Spacer, #4 x 1/8″ Length
  • 4 – Flat Washer, #4
  • 1 – ELEV-8 v3 Prop Guard Kit (#80310) – optional but recommended; included with 80300 starting April 2018 and available separately here.

*When determinig which machine screw to use, use the screws with a length that is equal to or just shorter than the length listed. Industry standard tolerance for machine screws allows them to be up to 1/16″ shorter than their numerical size.

Instructions:

Before you begin, view the ELEV-8 Prop Guard Kit tutorial videos, and decide whether you will add this accessory to your quadcopter. It is highly recommended to help reduce repairs and property damage if you are learning to fly. If yes, then assemble each section according to the video, and attach to each boom as you proceed from Step 3 below, but using the longer screws provided with the Prop Guard kit.

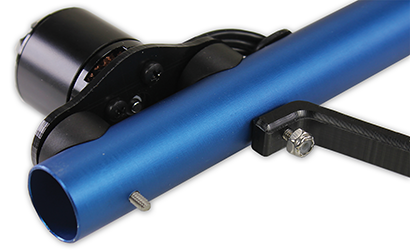
  1. Feed a #4-40 x 1 1/2” screw through the hole on the motor mount next to to where the wires come out of the motor. Feed a #4-40 x 1 1/4” screw through the hole on the opposite end of the motor mount.

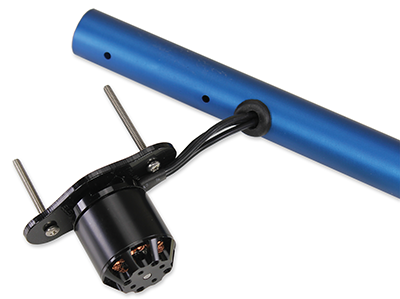
  1. Slide a nylon spacer and saddle washer over the other end of each screw.

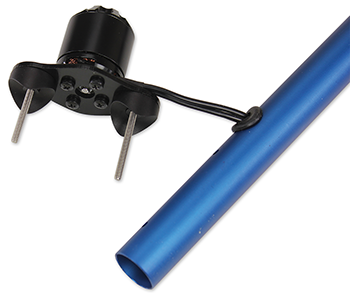
  1. Insert the screws into the holes on the boom, and feed it through to the other side.

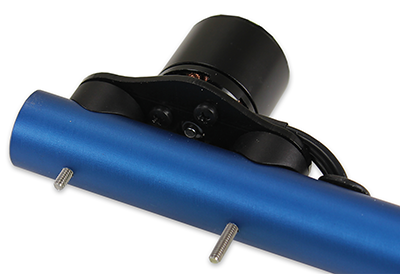
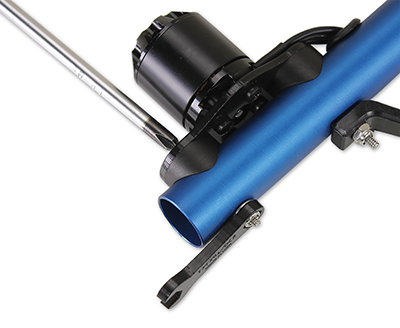
  1. Take the short side of the landing gear (see the last image on this page) and feed it over the screw next to the motor wires, followed by the locknut.     


  1. Place a washer over the other screw, followed by a locknut.      

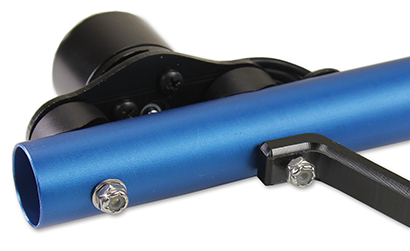
  1. Using the screwdriver and wrench, tighten (clockwise) until there is no longer a gap between any parts (including nut or screw-head). Then turn the locknut one more full rotation and stop. Do not turn more than this or you may begin to crush the boom.      

  1. Repeat for the other three booms.  

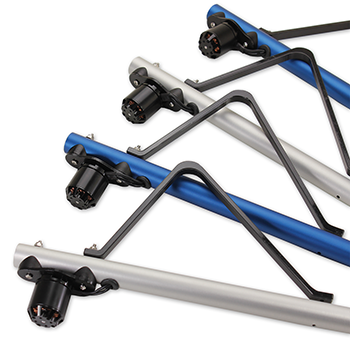
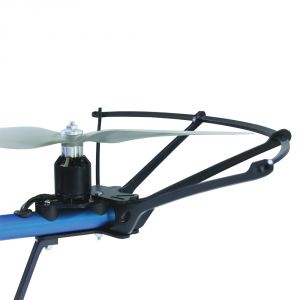
If you elected to use the Prop Guard Kit, each boom will instead look like this:


Printer-friendly version
Step 3: Feed Motor Wires Through Booms
Prev
Step 5: Insert Tube Plugs
Next

DISCUSSION FORUMS | PARALLAX INC. STORE

About | Terms of Use | Feedback: learn@parallax.com | Copyright©Parallax Inc. 2024

© 2025 Parallax Learn • Built with GeneratePress