Skip to content
Parallax Learn

Parallax Learn

  • Welcome
  • Tutorials
        • Tutorial Series head tag

          Tutorial Series
        • Tutorial Series

          The special, classroom-ready series pages are organized collections of tutorials for our most popular hardware and/or languages. The tutorials for each topic are conveniently accessible from a single page, shown in the order it is recommended that they be completed.
        • Robotics Series Head tag

          Robotics Series
        • Robotics Series

          • Artificial Intelligence
          • Cybersecurity: Radio Data tutorialCybersecurity
          • cyber:bot + Python
          • cyber:bot + MakeCode
          • Boe-Bot Tutorial SeriesBoe-Bot
          • Arduino Shield-Bot
          • ActivityBot with C TutorialsActivityBot + C
          • ActivityBot with BlocklyProp Tutorial SeriesActivityBot + BlocklyProp
          • Scribbler 3 Tutorial SeriesScribbler 3
        • Electronics & Programming Series Head tag

          Electronics & Programming Series
          • BS2 Board of Education Tutorial SeriesBS2 Board of Education
          • Propeller C-Language BasicsPropeller C Basics
          • FLiP Try-It Kit C Tutorial SeriesFLiP Try-It Kit + C
          • FLiP Try-It Kit BlocklyProp TutorialsFLiP Try-It Kit + BlocklyProp
          • Badge WX Tutorial SeriesBadge WX
          • Propeller BlocklyProp Basics and ProjectsPropeller BlocklyProp Basics
          • View All Tutorial Series »
        • Browse Tutorials
        • Browse Tutorials

          Individual tutorials sorted by robot or kit, and language.
        • By Robot or Kit
          • ActivityBot
          • SumoBot WX
          • Boe-Bot
          • Shield-Bot
          • cyber:bot
          • Badge WX
          • ELEV-8
          • ARLO
        • By Language
        • By Language

          • Propeller C
          • Arduino
          • BlocklyProp
          • PBASIC
          • Python
          • MakeCode
          • View All Tutorials »
  • Educators
  • Reference
  • Downloads
  • Home
  • All Courses

ELEV-8 v3 Wireless Telemetry via XBee

Curriculum

  • 1 Section
  • 5 Lessons
  • Lifetime
Expand all sectionsCollapse all sections
  • ELEV-8 v3 Wireless Telemetry via XBee
    5
    • 1.0
      Hardware and Software for Telemetry
    • 1.1
      Configuring the XBee 900MHz Modules
    • 1.2
      Installing the XBee Hardware
    • 1.3
      Heat-Shrink the Base Module
    • 1.4
      Verifying the Wireless Link

Heat-Shrink the Base Module

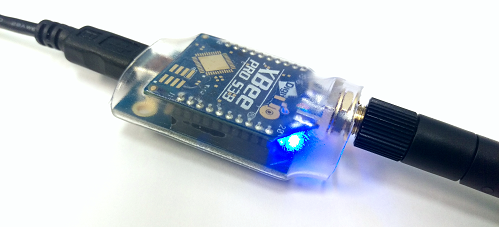
If you wish to make the receiving end of your telemetry link semi-permenant and provide it some protection, you can use a short piece of large diameter (1.25″ or 1.5″) clear heat-shrink tubing to enclose the XBee Module and USB Adapter Board. This is completely optional, but dials up the “cool factor.”

Do not power on an XBee Module with an antenna connector without an antenna attached.  Powering up a radio module without an antenna attached can damage the module.

  • Plug the XBee module into the USB Adapter Board.
  • Slide the heatshrink tubing over the XBee and Adapter Board.
  • Use a heat gun to carefully and evenly shrink the tubing around the module/adapter.
  • Connect the antenna to the XBee module’s RPSMA connector.


Printer-friendly version
Installing the XBee Hardware
Prev
Verifying the Wireless Link
Next

DISCUSSION FORUMS | PARALLAX INC. STORE

About | Terms of Use | Feedback: learn@parallax.com | Copyright©Parallax Inc. 2024

© 2026 Parallax Learn • Built with GeneratePress