Skip to content
Parallax Learn

Parallax Learn

  • Welcome
  • Tutorials
        • Tutorial Series head tag

          Tutorial Series
        • Tutorial Series

          The special, classroom-ready series pages are organized collections of tutorials for our most popular hardware and/or languages. The tutorials for each topic are conveniently accessible from a single page, shown in the order it is recommended that they be completed.
        • Robotics Series Head tag

          Robotics Series
        • Robotics Series

          • Artificial Intelligence
          • Cybersecurity: Radio Data tutorialCybersecurity
          • cyber:bot + Python
          • cyber:bot + MakeCode
          • Boe-Bot Tutorial SeriesBoe-Bot
          • Arduino Shield-Bot
          • ActivityBot with C TutorialsActivityBot + C
          • ActivityBot with BlocklyProp Tutorial SeriesActivityBot + BlocklyProp
          • Scribbler 3 Tutorial SeriesScribbler 3
        • Electronics & Programming Series Head tag

          Electronics & Programming Series
          • BS2 Board of Education Tutorial SeriesBS2 Board of Education
          • Propeller C-Language BasicsPropeller C Basics
          • FLiP Try-It Kit C Tutorial SeriesFLiP Try-It Kit + C
          • FLiP Try-It Kit BlocklyProp TutorialsFLiP Try-It Kit + BlocklyProp
          • Badge WX Tutorial SeriesBadge WX
          • Propeller BlocklyProp Basics and ProjectsPropeller BlocklyProp Basics
          • View All Tutorial Series »
        • Browse Tutorials
        • Browse Tutorials

          Individual tutorials sorted by robot or kit, and language.
        • By Robot or Kit
          • ActivityBot
          • SumoBot WX
          • Boe-Bot
          • Shield-Bot
          • cyber:bot
          • Badge WX
          • ELEV-8
          • ARLO
        • By Language
        • By Language

          • Propeller C
          • Arduino
          • BlocklyProp
          • PBASIC
          • Python
          • MakeCode
          • View All Tutorials »
  • Educators
  • Reference
  • Downloads
  • Home
  • All Courses

ELEV-8 v3 Wireless Telemetry via XBee

Curriculum

  • 1 Section
  • 5 Lessons
  • Lifetime
Expand all sectionsCollapse all sections
  • ELEV-8 v3 Wireless Telemetry via XBee
    5
    • 1.0
      Hardware and Software for Telemetry
    • 1.1
      Configuring the XBee 900MHz Modules
    • 1.2
      Installing the XBee Hardware
    • 1.3
      Heat-Shrink the Base Module
    • 1.4
      Verifying the Wireless Link

Installing the XBee Hardware

Installing the XBee Module on the Flight Controller

Once you have have configured both XBee modules, you are ready to install one of them on your ELEV-8 Flight Controller.

  • Remove the top cover and foam block from your ELEV-8 v3, exposing the Flight Controller board.
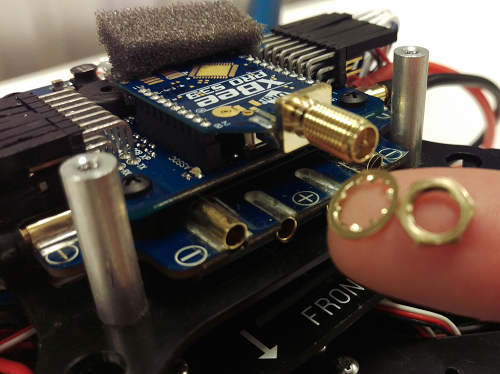
  • Insert an XBee module into the socket on the Flight Controller.
  • Remove the nut and washer from the RPSMA connector.

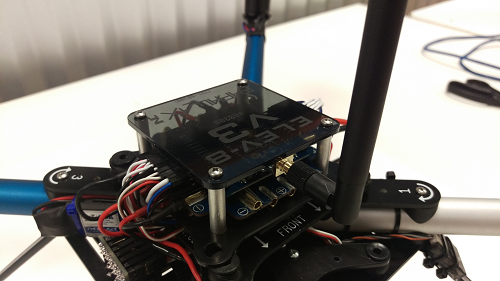
  • Replace the foam block and top cover – make sure the foam block is covering the two small chips in the center of the Flight Controller circuit board

Options for Attaching the Antenna

You have two options for attaching the antenna: 1) attaching the antenna directly to the XBee module (see warning below!) or 2) use an RPSMA extension cable between the XBee module an antenna for strain relief.

Option 1 – Attaching the antenna directly to the XBee module

Caution – a crash (even a minor one) could damage or destroy the XBee if the antenna is installed directly onto the XBee module – follow Option 1 at your own risk

  • Carefully screw the antenna onto the XBee’s RPSMA connector.

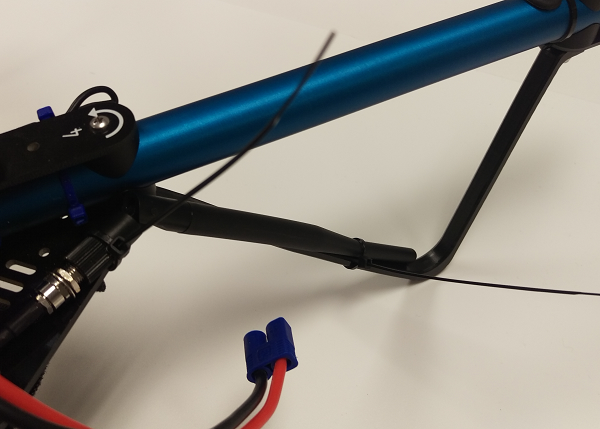
Option 2 – Connect the antenna using an RPSMA extention cable

  • Connect the extension cable to the XBee module’s RPSMA connector.

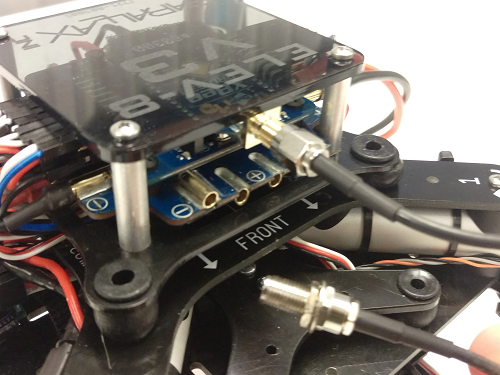
  • Carefully route the cable under the ELEV-8 v3’s isolation stack and out one side of the ELEV-8 v3.

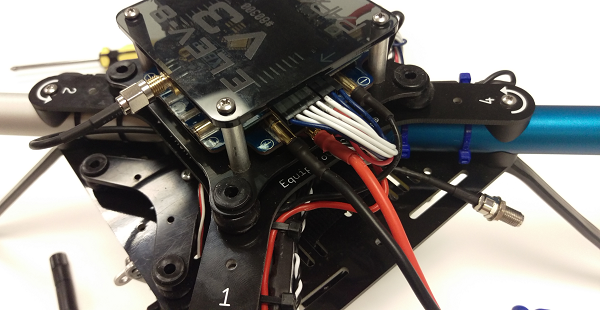
  • Attach the antenna to the RPSMA extention cable.

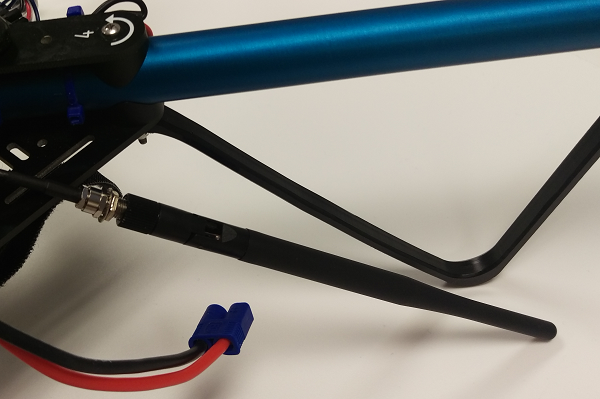
  • Zip-tie the antenna to one of the landing gear legs and/or bottom plate and clip the excess from the zip-ties.

Note: If you have previously gone to the trouble of balancing your quadcopter’s frame, you may want to re-balance it after these hardware additions have been made.


Printer-friendly version
Configuring the XBee 900MHz Modules
Prev
Heat-Shrink the Base Module
Next

DISCUSSION FORUMS | PARALLAX INC. STORE

About | Terms of Use | Feedback: learn@parallax.com | Copyright©Parallax Inc. 2024

© 2026 Parallax Learn • Built with GeneratePress