Displaying Numbers
The ePaper module is a great way to display the data received from a sensor, such as the CM2302 temperature and humidity Sensor, or the BME680 air quality sensor. The ePaper needs up to 2 seconds to refresh the screen. You can use the ePaper print number block to send a number value to the ePaper. This block can hold a number value, or a variable, or any expression that resolves as a number. It can display values as decimal, hexadecimal, or binary numbers.

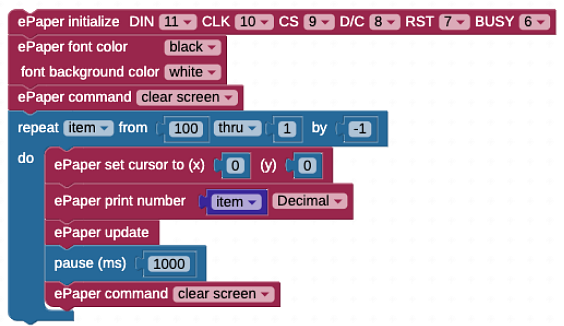
Example Code – Counting Down
The example project uses a repeat item loop to display a value as it counts down from 100 to 1, updating the display once per second.
- In BlocklyProp Solo, make a new project for your board.
- Build the program shown below:
- Save the program, and then click the Run once button.
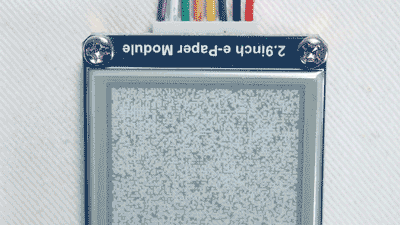
Your display should update and display the values below which shows the first few iterations of the repeat item loop.
How it Works – and Doesn’t!
After initializing the display, set the ePaper font color block to black, and the font background to white. This will let each number overwrite the previous number instead of overlapping them.
Next, the loop repeat item from 100 to 0 by 1 sets up our countdown. It starts off by setting the cursor to position 0,0 each time through the loop so each number will display in the upper left corner. The ePaper print number block prints the current value of item each time through the loop. The pause 1000 block slows down the loop so it updates the display once every second and we are able to see the value before the screen is cleared to allow for the next value.
Did You Know?
Numbers are text too – From the program above, you can see that the ePaper font color block works with the ePaper print number block, just the same way it does with the ePaper print text block. Likewise, the ePaper text size block works with the ePaper print number block.
So, as long as the extra fonts are installed in upper EEPROM, you can display your project’s sensor values in large bubble numbers if that’s what you want!
Try This
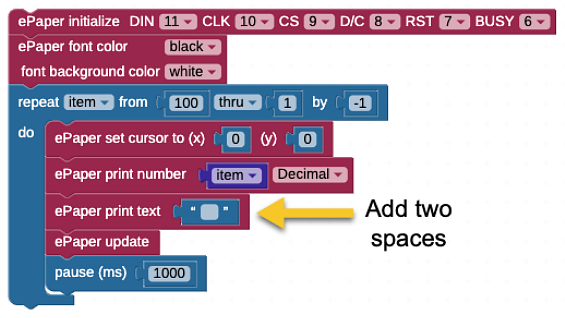
What if you took out the clear screen command in the countdown program above and ran the program again? The program will display a countdown, and it will display 100 the first time around the loop. The second time around the loop it will display 990 and the third time around it will display 980 and so on. The reason for this is because the last value left behind when displaying 100, did not clear. This was not an issue when the screen was being cleared however you may find yourself in situations where you may not want to use the clear screen command.
Thankfully there’s a technique to mitigate this issue.
- Add the ePaper print text block to the countdown program.
- Print a few spaces after the number each time you update it. In fact, a good practice to follow is add enough spaces for your smallest possible number to cover up your largest possible number.
- Take out the ePaper command clear screen block and add an ePaper print text block containing two space characters, just below the ePaper print number block:
- Save the project and re-run it.
- Watch it count down.
The two extra space characters, printed with the black font background, should now overwrite the leftover numbers as the value printed reduces from 3 digits, to 2 digits, to 1 digit.
Your Turn
Here is a challenge that combines what you have learned so far.
- Save a copy of your Try This project.
- Add the label “Decimal” for the value displayed.
- Expand the code to display the value in hexadecimal and binary, labeled.