Add extensions to your micro:bit
In the block language, you can use specialized instructions just for the micro:bit that are grouped into categories. A category must be stored in a special area on your micro:bit, called the file system, before its instructions can be used in a project. For example, the cyber:bot library archive includes several categories that will let you write micro:bit projects for your cyber:bot robot.
You have two options: use a .hex file template that already has the extension included, or add the extension to your micro:bit project manually.
- How to use a .hex file template that already has the extension included: Quick Start Template for cyber:bot Robots using Online Makecode Editor (below)
- How to add the extension to your project manually: Adding an Extension to micro:bit Project (also below)
Quick Start Template for cyber:bot Robots Using Online Makecode editor
Here is a template shortcut if you are using the online makecode.microbit.org editor and just need to get started with the cyber:bot robot quickly. Download the template below, open it with the Makecode online editor, and start coding. It already has the cyber:bot extension added to its project settings, so you can immediately use its instructions in your projects.
- Right-click the hex link below, choose Save link as…, and then save the file to your computer.
Cyberbot-template-with-blink.hex
As written, this project will make the P21 light blink. Let’s try this to make sure the cyber:bot system is ready:
- In a browser, go to the micro:bit Makecode Editor.
- Click the micro:bit Makecode Editor’s import button.
- Choose the Import File… option then click Choose File.
- Browse to and open cyberbot_template_with_blink.hex (it’s usually in the Downloads folder).
- Make sure that:
- The micro:bit is connected to the cyber:bot board.
- The 5AA battery pack is plugged into the cyber:bot board.
- The micro:bit is connected to a computer with the USB cable.
- The cyber:bot board’s PWR switch to 2 to power all features, or to 1 to power everything but the servo ports (this keeps the robot from running away while downloading code). The project won’t run if PWR is set to 0.
- The extension is on the most recent release (to verify just go to the javascript side of the project, press the dropdown that says Explorer, and press the version button on the cyber:bot file to update it).
- Click the Download button, and follow the Connect to micro:bit popups. (For robot navigation apps, you’d be disconnecting the USB cable after this step.)
- Verify that the P21 light blinks.
The cyberbot_template_with_blink.hex file is a good one to open/duplicate every time you start on a new cyber:bot project. Just delete the default project and replace it with whatever cyber:bot project you are working on. Make sure to update the project name before you save your work. (See Save & Edit Projects.) When you reopen the file later with the micro:bit MakeCode Editor, it will still have the extension(s) it needs and be ready for the cyber:bot to run. That way, you won’t have to repeat all the steps in the Adding an Extension to the micro:bit Filesystem section every time.
Adding an Extension to micro:bit Project
Watch the following video and follow along with these instructions for adding an extension to your project. The cyber:bot extension is used as an example. Follow along with your own computer and micro:bit.
- Open a browser and navigate to makecode.microbit.org.
- Open a new project and name it cyberbot_template.
- Press the gray +Extensions button.
- Type cyberbot into the extensions search bar and press enter.
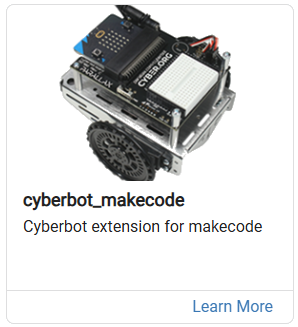
- Click on the extension shown below.

- You should now see the cyberbot category in between the Led and Radio categories.
- You can now duplicate this project and rename it for any project with which you want to use the cyberbot blocks.
