Setting Up BlocklyProp for the S3
What is BlocklyProp?
BlocklyProp is a Parallax’s visual programming tool for the Scribbler 3 robot’s brain, the Propeller Multicore Microcontroller.
In the following tutorials, you will learn to use BlocklyProp’s building blocks to construct programs for the Scribbler 3 robot. The blocks are used to generate code that is then sent to a cloud server over the internet, compiled remotely, and returned as a file to download to your S3. Let’s take a look at how to set up BlocklyProp to program your S3 robot.
Did You Know?
BlocklyProp is based on Blockly, an open source project from Google, loosely based on the MIT Scratch block programming system. More information about develpment of Google’s Blockly can be found on the project page at the https://developers.google.com/blockly/.
Before you Begin
If you have already connected your battery, just skip these two checkmark instructions.
- Remove the battery cover on your S3 by pulling the battery cover latches down toward the tail wheel, and then lift the battery cover up.
- Connect the cable on the S3 battery to the connector inside the battery compartment, sliding the ends together until they click into place. The plug only inserts one way.
For more information or instructions on battery safety and your S3, see the Startup Guide Poster that came with your Scribbler 3 robot. You can also view and print the poster here, https://www.parallax.com/downloads/scribbler-s3-robot-info-poster.
BlocklyProp Launcher and BlocklyProp Solo
BlocklyProp Solo replaces our original BlocklyProp tool. BlocklyProp Solo does not require registration, and your programs are stored on your computer. You will need to install the BlocklyProp Launcher on your computer; it replaces the original BlocklyProp Client.
Best practice: Install the BlocklyProp Launcher Ahead of Time
Dwnload and install the BlocklyProp Launcher for Windows or Mac, or get the extesion for Chromebook, from the Parallax store site, and then run it. Or if it is already on your computer, run it now.
BlocklyProp Launcher Downloads
- Follow the prompts to save the Launcher file to your Windows or Mac computer, or if on a Chromebook, follow the prompts to install.
- If you downloaded an .exe file for Windows, click on the file to start installation.
- If you downloaded a .zip file for Mac or Windows, extract the file first.
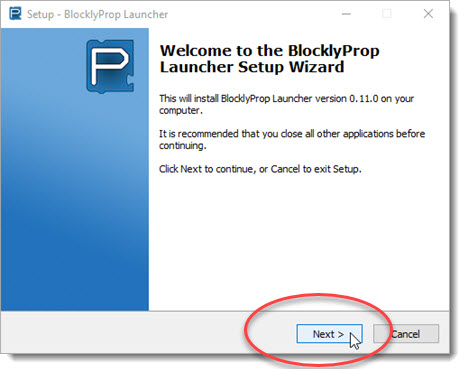
- A Setup Wizard will open. Click the Next buttons to follow the prompts through installation.
- Accept default installation with FTDI drivers. Click Finish when complete.
- If you are on a Mac computer, bookmark this page and also https://solo.parallax.com. Reboot and come back!
- Open the Launcher from the desktop icon or from your Start menu, if it is not already running.
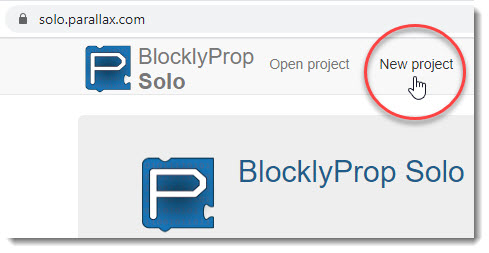
- Under Open Browser, click the BlocklyProp Solo button. This opens up BlocklyProp Solo in its own instance of Chrome without any browser tabs.
- Click on New project.
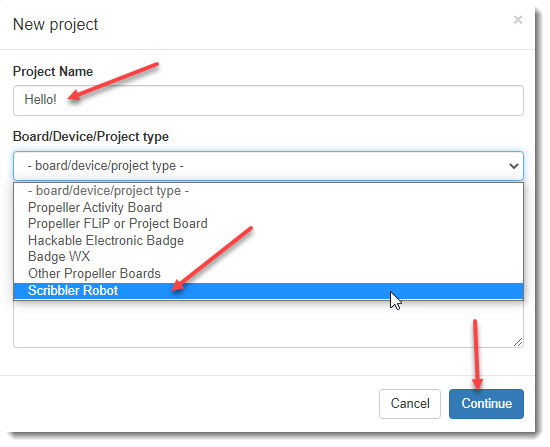
- In the window that opens, type in a Project Name.
- From the dropdown menu, select your Propeller board type.
- Click Continue.
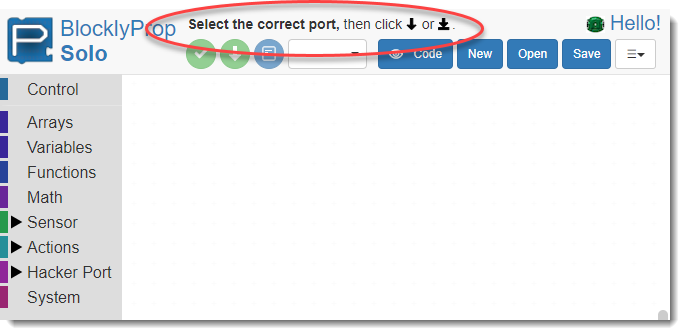
The Edit pane for your project will open.
- If you see the message “Select the correct port…” all is well, and you can now skip to the next page.
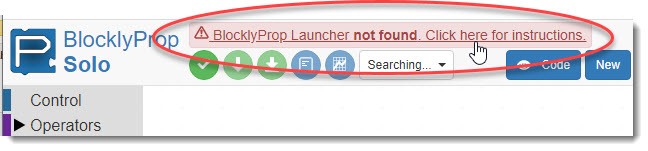
BlocklyProp Launcher not found?
If you have opened BlocklyProp Solo not installed the Launcher ahead of time, you will see a pink alert bar with the message “BlocklyProp Launcher not found. Click here for instructions.”
- If you see the pink alert bar, click on it and continue with the instructions below.
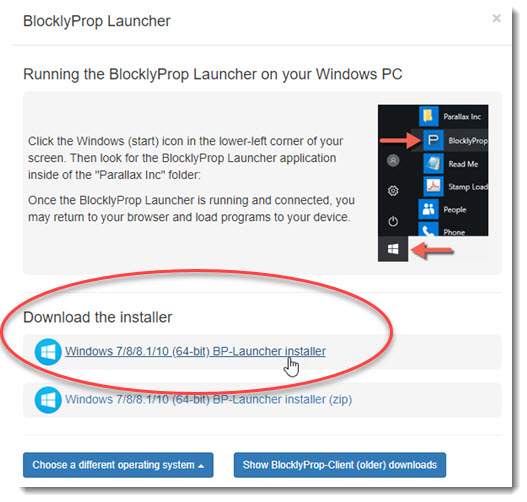
A download instruction window for BlocklyProp Launcher will open. Under Download the Installer, you should see options for your operating system.
- Click the installer link for your operating system. (If it is not shown, click “Choose a different operating system” to find the best option.)
- Follow the prompts to save the Launcher file to your Windows or Mac computer, or if on a Chromebook, follow the prompts to install.
- If you downloaded an .exe file for Windows, click on the file to start installation.
- If you downloaded a .zip file for Mac or Windows, extract the file first.
- A Setup Wizard will open. Click the Next buttons to follow the prompts through installation.
- Accept default installation with FTDI drivers. Click Finish when complete.
- If you are on a Mac computer, bookmark this page and also https://solo.parallax.com. Reboot and come back!
- Open the Launcher from the desktop icon or from your Start menu, if it is not already running.
- The Status button should turn green and say “Connected!” DON’T CLICK ANY BUTTONS HERE THIS ONE TIME!
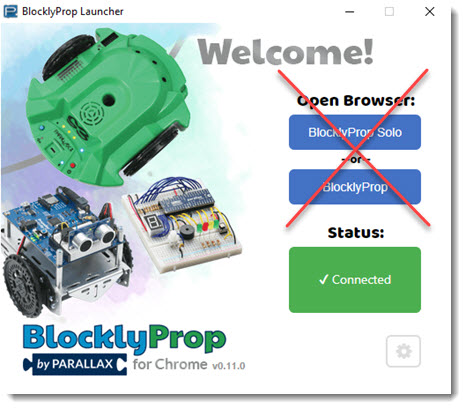
- Now, you can return to BlocklyProp Solo in your Chrome browser. Go to the next page to connect your hardware and run your first project.
Special thanks to Parallax friend Whit Stodghill for his assistance in writing, editing, and testing material for these S3 tutorials.