Skip to content
Parallax Learn

Parallax Learn

  • Welcome
  • Tutorials
        • Tutorial Series head tag

          Tutorial Series
        • Tutorial Series

          The special, classroom-ready series pages are organized collections of tutorials for our most popular hardware and/or languages. The tutorials for each topic are conveniently accessible from a single page, shown in the order it is recommended that they be completed.
        • Robotics Series Head tag

          Robotics Series
        • Robotics Series

          • Artificial Intelligence
          • Cybersecurity: Radio Data tutorialCybersecurity
          • cyber:bot + Python
          • cyber:bot + MakeCode
          • Boe-Bot Tutorial SeriesBoe-Bot
          • Arduino Shield-Bot
          • ActivityBot with C TutorialsActivityBot + C
          • ActivityBot with BlocklyProp Tutorial SeriesActivityBot + BlocklyProp
          • Scribbler 3 Tutorial SeriesScribbler 3
        • Electronics & Programming Series Head tag

          Electronics & Programming Series
          • BS2 Board of Education Tutorial SeriesBS2 Board of Education
          • Propeller C-Language BasicsPropeller C Basics
          • FLiP Try-It Kit C Tutorial SeriesFLiP Try-It Kit + C
          • FLiP Try-It Kit BlocklyProp TutorialsFLiP Try-It Kit + BlocklyProp
          • Badge WX Tutorial SeriesBadge WX
          • Propeller BlocklyProp Basics and ProjectsPropeller BlocklyProp Basics
          • View All Tutorial Series »
        • Browse Tutorials
        • Browse Tutorials

          Individual tutorials sorted by robot or kit, and language.
        • By Robot or Kit
          • ActivityBot
          • SumoBot WX
          • Boe-Bot
          • Shield-Bot
          • cyber:bot
          • Badge WX
          • ELEV-8
          • ARLO
        • By Language
        • By Language

          • Propeller C
          • Arduino
          • BlocklyProp
          • PBASIC
          • Python
          • MakeCode
          • View All Tutorials »
  • Educators
  • Reference
  • Downloads
  • Home
  • All Courses

Servo Spirit Project

Curriculum

  • 1 Section
  • 4 Lessons
  • Lifetime
Expand all sectionsCollapse all sections
  • Servo Spirit Project
    4
    • 1.0
      Servo Spirit Body
    • 1.1
      Wiring it Up
    • 1.2
      Program with Spooky Sounds
    • 1.3
      Program with a Sweet Song

Servo Spirit Body

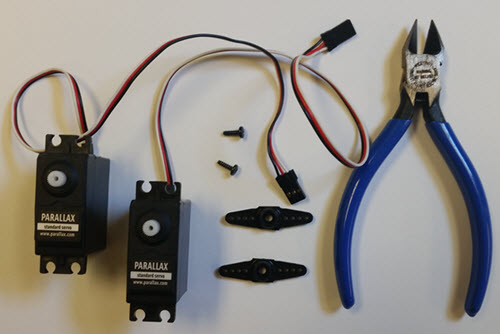
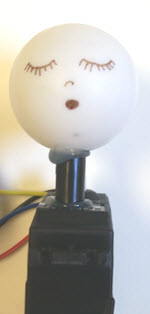
The body of the Servo Spirit is made from the two Parallax Standard Servos in the Animation Kit. The hollow, transluscent plastic eyeball serves as a head, backlit by the Neopixel ring.

  • Plug in your hot glue gun so it warms up while you prepare the servos.
  • Remove the horns from both servos, and save the screws.
  • Cut off opposite arms on each servo horn so you have two straight horns – one will be the shoulders and the other the hips.

  • Put a horn back on each servo’s spline, but don’t screw it in yet.
  • Gently twist a from one end of its range to the other, then move the horn until it is in the middle of its range.
  • Carefully pull off the horn, and then put it back on its spline so it sticks out to both sides of the servo case, then attach with the screw.
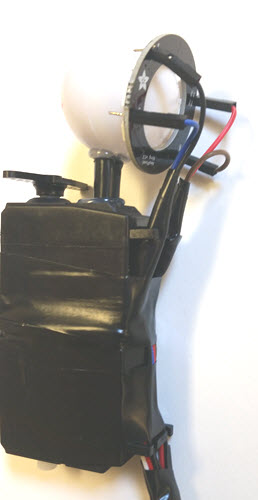
  • Glue the bottoms of the servos together so the cords are facing the same way.
  • Glue the neck on top of the servos, as far from the servo horn shoulders as you can.
  • Glue the eyeball/head onto the neck. You can have it turned toward the servo horn for arms like the spooky Servo Youkai below, or away from the servo horn for wings.

  • Carefully solder a male-male jumper wire into each of the four thru-holes on the neopixel ring.

  • Gently hold the ring against the back of the eyeball, and gather the wires together and press them against the servo case.
  • Adjust the wire lengths so the tension pushes the ring against the eyeball, and secure the wires together and to the case with electrical tape.
  • Run the servo and neopixel ring wires through the mounting holes to keep them tidy, and secure with electrical tape.

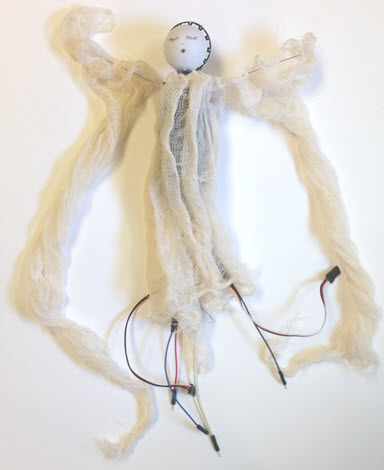
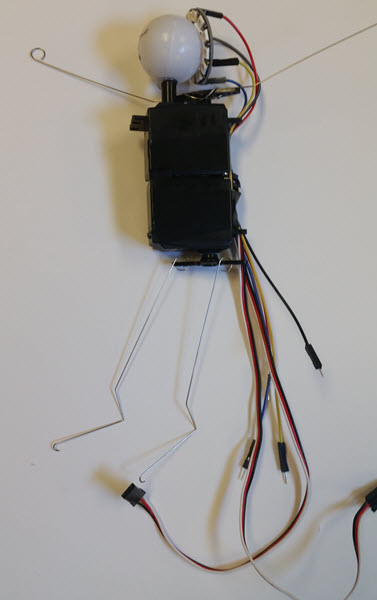
  • Make wire arms that loop firmly through a couple of holes in the shoulders servo horn so they stick out to the sides – these will be the arms.
  • Make wire legs that loop through the outermost holes in the hips servo horn,  letting them dangle freely.

  • Attach streamers, ribbons, or fabric to the top wires. Here I used gauze for wings.


Printer-friendly version
Wiring it Up
Next

DISCUSSION FORUMS | PARALLAX INC. STORE

About | Terms of Use | Feedback: learn@parallax.com | Copyright©Parallax Inc. 2024

© 2026 Parallax Learn • Built with GeneratePress